Getting started
The Unity ML Agents toolkit provides a C# API for use in your project and Python scripts to run outside of Unity. You will need Python itself and a few extra libraries.
You will need the Python tools before the training stage, but to get started quickly just install Unity to begin.
Tools
Install Unity via the Unity Hub. The Unity Hub provides an easy way to manage multiple installations of Unity. It also provides a straightforward way of adding the required support modules. You will need the following:
- Unity Hub
- Unity
- Visual Studio Community Edition (Unity support module)
- Dr Arm Unity project files (the accompanying zip file)
- [only for deploying to an Android device] Android build support (Unity support module)
The installation instructions in the next section go through the steps shown above, starting with the Unity Hub.
Installing Unity Hub, Unity and support modules
Download and install the Unity Hub
Note that Personal licenses are free, and if running on Windows you will need Windows 10 or 11 and a GPU with DirectX 10 capabilities. If running Unity on a Mac or Linux, please follow the instructions for your platform.
In Unity Hub, download and install Unity. The latest LTS (Long Term Support) release should work but this project has been tested on 2022.3.12f1.
In Unity Hub go to Installs and click Install Editor
Go to the Archive page and find version 2022.3.12f1. Select the “Unity Hub” download button rather than downloading the Unity Editor directly
The install will require several gigabytes (including Android deployment options) so check your available disk space first
Add Android Build support
Click the Settings icon and choose Add Modules
 Figure 1. List of Unity versions installed
Under Dev Tools, choose Microsoft Visual Studio Community 2022 if you wish to install it. This integrates well with Unity as a code editor, but any editor will do for editing scripts
Under Platforms, choose Android Build Support. Also make sure to choose OpenJDK and Android SDK & NDK Tools as well
 Figure 2. Tick the modules you want installed
Press Continue, and then agree to the Android SDK and NDK License Terms to install everything
If you prefer to use an alternative script editor, you might want to check your editor is active; see section below Check active script editor in Unity
Download and open the Dr Arm Unity project
Download and extract the accompanying Unity project from the supporting zip file .
Open Unity Hub
From the Unity Hub, under the Projects tab, click the down-arrow next to Open and select “Add project from disk”.
Choose the location of your workshop files (the directory that contains the Assets folder)
The project will appear in the list. Click it to open the project in Unity.
It may take a few minutes for Unity to process the asset files.
Check active script editor in Unity
Depending on your setup, it’s possible that the default script editor is not set to your preferred editor:
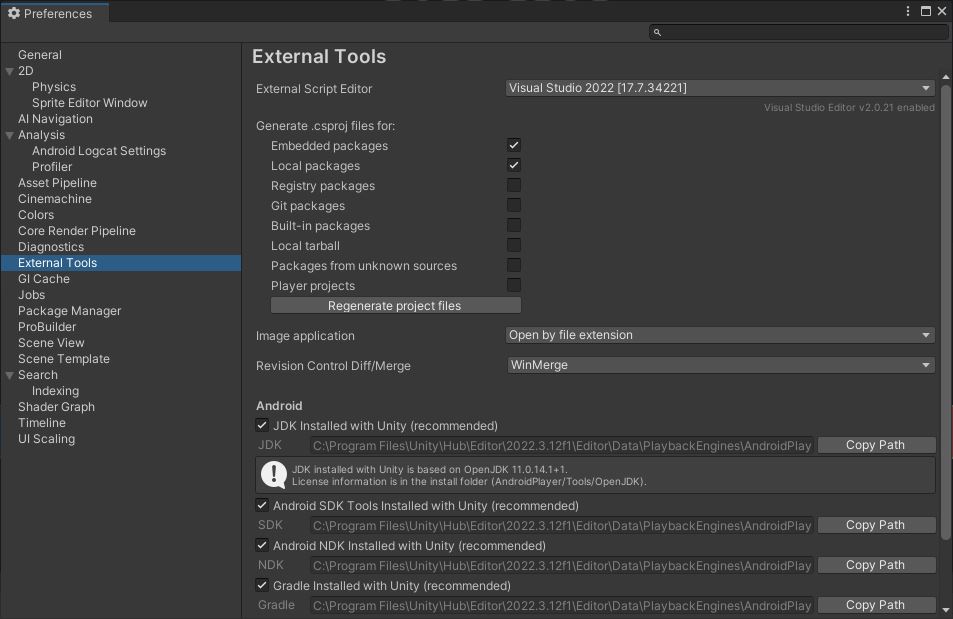
In Unity select Edit menu and then Preferences
In the Preferences window, select External Tools on the left
Select your desired editor from the drop-down menu next to External Script Editor
 Figure 3. External tool options in Unity