Deploy MySQL and WordPress on an always free tier Arm shape
Introduction
Install WordPress and MySQL on an OCI Arm server
Next Steps
Deploy MySQL and WordPress on an always free tier Arm shape
This Learning Path explains how to install MySQL Community Server and WordPress on an Arm virtual machine instance in Oracle Cloud Infrastructure (OCI).
Before you begin
You may want to review the Learning Path Getting Started with Oracle OCI before proceeding.
You will need an Oracle OCI account to complete this Learning Path. Create an account and use Oracle Cloud Free Tier if you don’t already have an account.
Deploy a compute instance
You can deploy an Arm (Ampere) compute instance in OCI via the console or using Terraform.
If you want to deploy a compute instance using Terraform, you can follow the Learning Path Deploy Arm Instances on Oracle Cloud Infrastructure (OCI) using Terraform .
The compute instance should be created with Oracle Linux 9 as the operating system.
Connect to the compute instance using SSH
To install WordPress and MySQL, connect to the compute instance using SSH. For Oracle Linux the username is opc.
Use the SSH key you setup when creating the instance and your public IP address.
Run ssh and substitute your SSH key and your public IP address:
ssh -i <your-ssh-key> opc@<your public IP>
You are now connected to your OCI instance and ready to start installing WordPress.
Install MySQL
Start by installing MySQL 8.1, the latest Innovation Release, using the Community repository.
You need to install the Yum repository for the correct OS version, in this case Oracle Linux 9:
cat /etc/oracle-release
The output should be similar to:
Oracle Linux Server release 9.2
Visit https://dev.mysql.com/downloads/repo/yum/ to see the contents of the latest YUM repository.
Run rpm to install the repository setup package:
sudo rpm -ivh https://dev.mysql.com/get/mysql80-community-release-el9-4.noarch.rpm
Next, install MySQL and MySQL Shell:
sudo dnf install -y mysql-community-server mysql-shell \
                 --enablerepo mysql-innovation-community --enablerepo mysql-tools-innovation-community
Prepare the database
Start MySQL using systemctl:
sudo systemctl start mysqld
By default, MySQL generates a password for the root user. Use the grep command to find the generated password:
sudo grep password /var/log/mysqld.log
The password is shown in the output (your password will be different).
2023-09-06T08:47:37.029047Z 6 [Note] [MY-010454] [Server] A temporary password is generated for root@localhost: cMP,ycA01Yoq
Make a note of the root password.
Connect to the MySQL instance using MySQL Shell:
mysqlsh --sql mysql://root@localhost
Proceed through the questions. Enter your saved root password and answer No that you don’t want to save it.
You will end up at a MySQL prompt that includes SQL >
        Please provide the password for 'root@localhost': ************
Save password for 'root@localhost'? [Y]es/[N]o/Ne[v]er (default No): no
Error during auto-completion cache update: You must reset your password using ALTER USER statement before executing this statement.
MySQL Shell 8.1.1

Copyright (c) 2016, 2023, Oracle and/or its affiliates.
Oracle is a registered trademark of Oracle Corporation and/or its affiliates.
Other names may be trademarks of their respective owners.

Type '\help' or '\?' for help; '\quit' to exit.
Creating a Classic session to 'root@localhost'
Your MySQL connection id is 8
No default schema selected; type \use <schema> to set one.
 MySQL  localhost  SQL >
At the SQL prompt change the password:
set password='MyPassw0rd!';
The output will be similar to:
Query OK, 0 rows affected (0.0247 sec)
Next, create a database for WordPress and a dedicated user. Make sure you are entering these commands at the SQL > prompt:
create database wordpress;
create user wordpress identified by 'WPpassw0rd!';
grant all privileges on wordpress.* to wordpress;
The database name wordpress, the user name wordpress, and the new password will be used later during WordPress installation.
Install the Apache server
WordPress can use Apache as a web server. Install httpd, PHP, and several PHP modules:
sudo yum install -y httpd php php-mysqlnd php-zip php-gd php-mbstring php-xml php-json
Start Apache
You can now start Apache and configure the system to restart it after reboot:
sudo systemctl enable httpd --now
Configure Security
To reach the web server from your local machine, you need to modify the firewall to allow http and https connections to reach the web server.
Open the firewall using the commands:
sudo firewall-cmd --permanent --add-port=80/tcp
sudo firewall-cmd --permanent --add-port=443/tcp
sudo firewall-cmd --reload
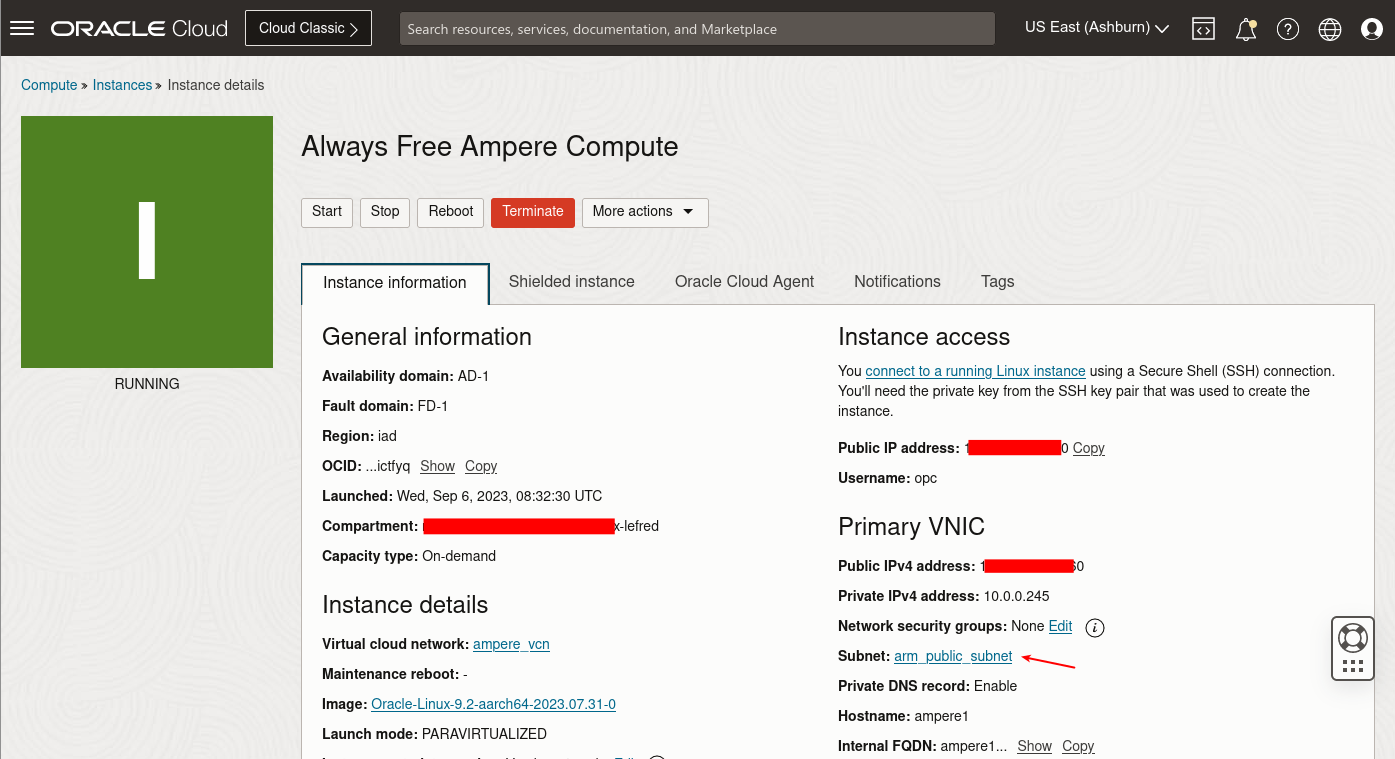
You also need to modify the security list in the OCI console.
Select the compute instance’s subnet:
Click on the default security list.
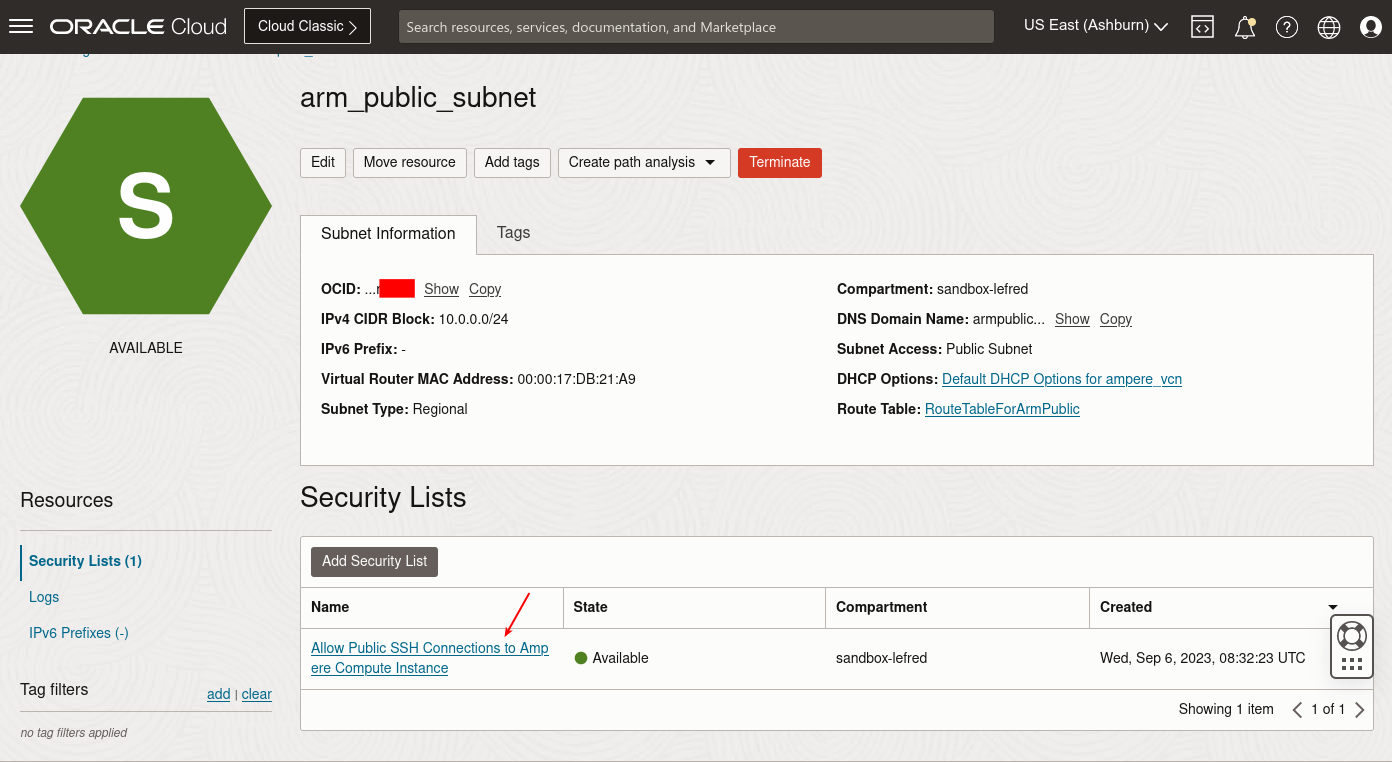
Add a new rule to allow http and https connections (TCP ports 80 and 443) for the world (0.0.0.0/0):

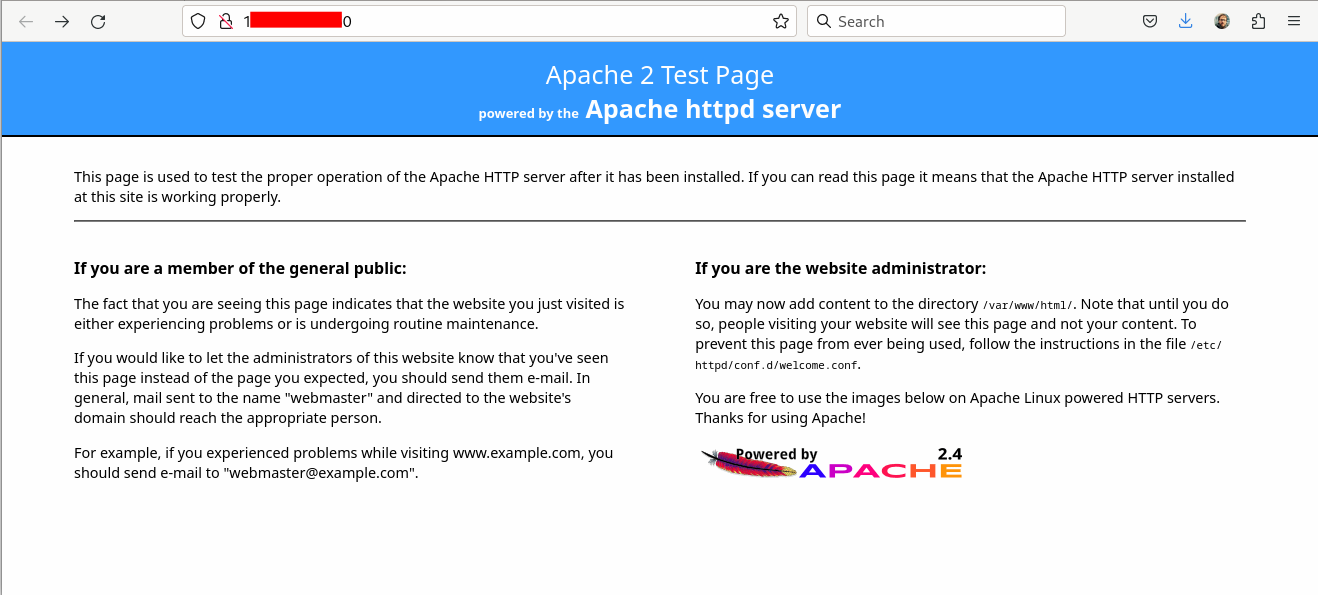
When you are done, enter the compute instance’s public IP address in your browser and you should see the following page:
Configure SE Linux
You also need to make modifications to SE Linux to allow Apache to connect and write data to MySQL:
Run the commands:
sudo chcon -t httpd_sys_rw_content_t /var/www/html -R
sudo setsebool -P httpd_can_network_connect_db 1
Install WordPress
You can download the latest WordPress release using the commands below.
Download the latest release:
curl -O https://wordpress.org/latest.tar.gz
Extract the downloaded file in the web server root directory:
sudo tar zxf latest.tar.gz -C /var/www/html/ --strip 1
Adjust the ownership of the newly installed files:
sudo chown apache. -R /var/www/html/
Create a new folder for future content uploads and set the ownership:
sudo mkdir /var/www/html/wp-content/uploads
sudo chown apache:apache /var/www/html/wp-content/uploads
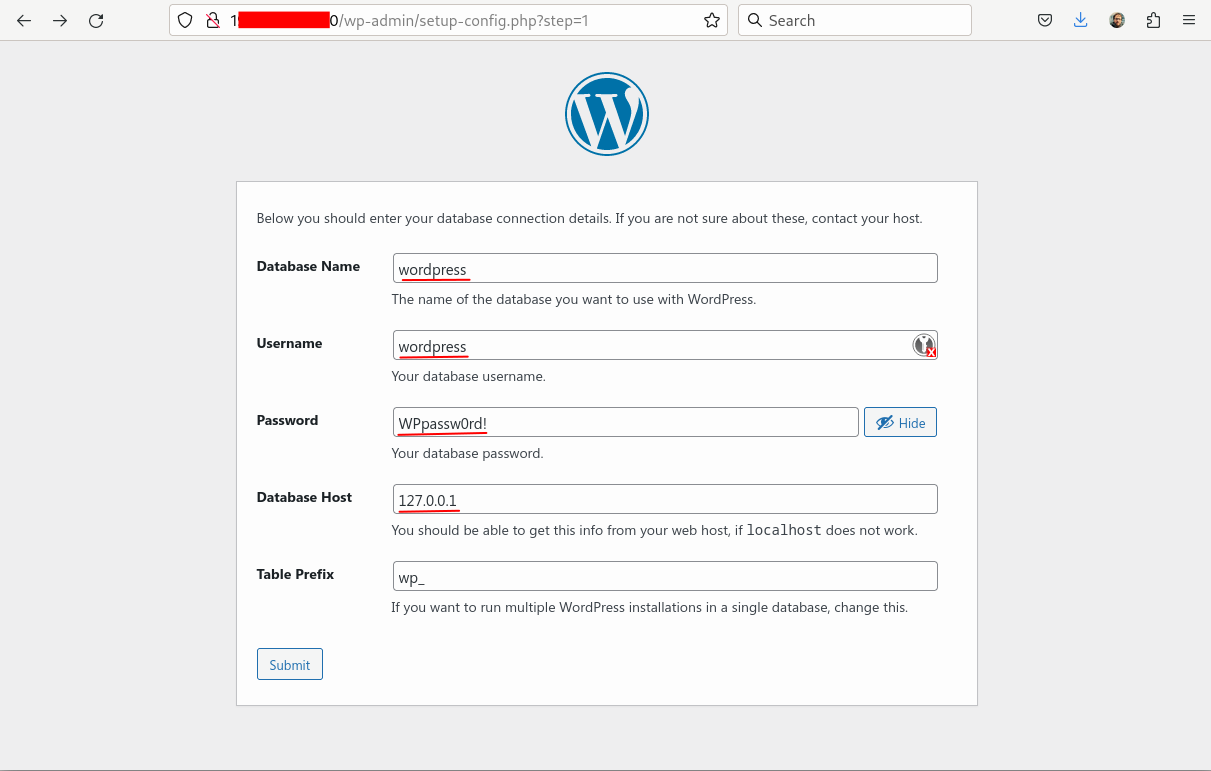
In the browser where you entered the public IP, refresh the page and you should now see the WordPress installation wizard:

Next, use the database name, user name, and password you created in MySQL and use 127.0.0.1 as database host:
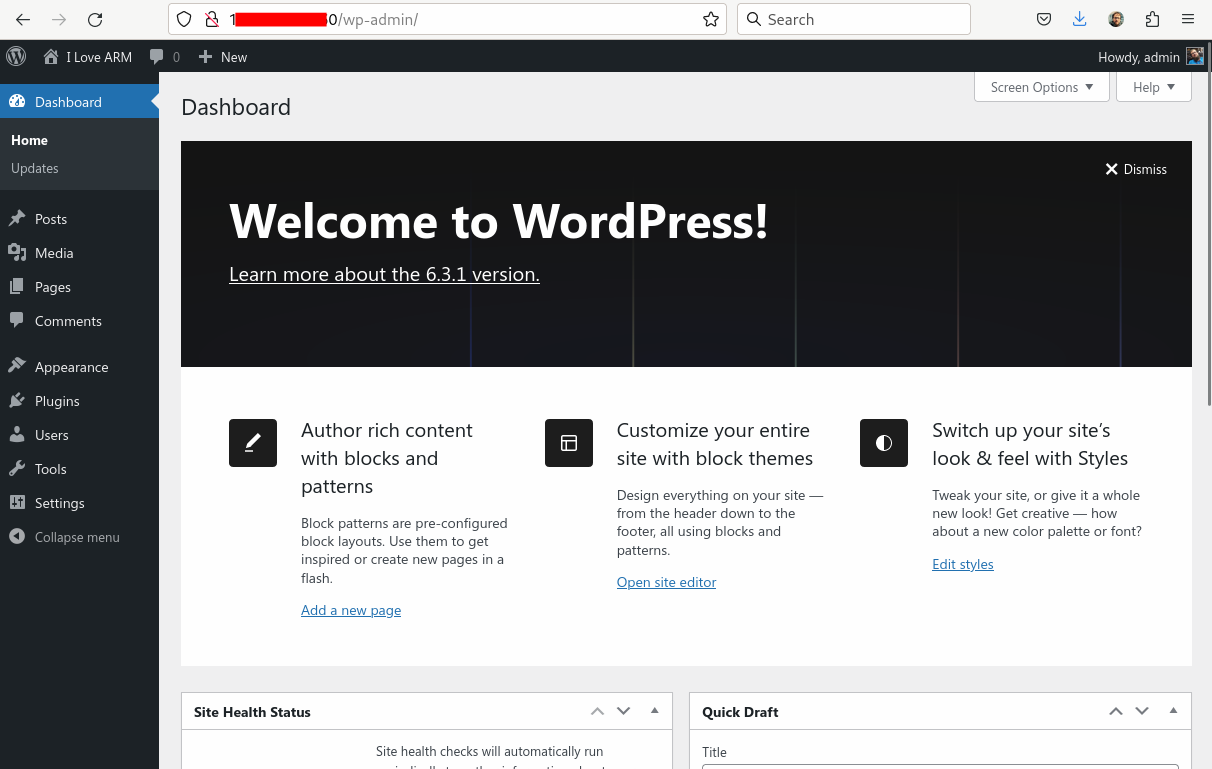
Follow the next steps in the Wizard and at the end you should see your WordPress instance using MySQL running on an Arm Shape (Ampere always free) on OCI: