Access running containers using Supervisor, SSH, and Remote.It
Introduction
Introduction to remote container access
Install Supervisor, SSH, and Remote.It
Access the container running in AWS
Next Steps
Access running containers using Supervisor, SSH, and Remote.It
You can update the container to install Supervisor and create a container with multiple services.
The Dockerfile below includes some extra software for debug and test.
Here are the changes:
- Install SSH and enable password login
- Install and configure Remote.It
- Add a Supervisor configuration file
Use a text editor to replace your Dockerfile with the new file below:
FROM ubuntu:24.04

RUN apt-get update && apt-get install -y curl iproute2 sudo openssh-server sudo vim apache2 supervisor procps uuid-runtime

# Configure SSH for password login
RUN mkdir -p /var/run/sshd
RUN sed -i '/PasswordAuthentication no/c\PasswordAuthentication yes' /etc/ssh/sshd_config
RUN sed 's@session\s*required\s*pam_loginuid.so@session optional pam_loginuid.so@g' -i /etc/pam.d/sshd

# Configure Remote.It
RUN mkdir -p /etc/remoteit
RUN touch /etc/remoteit/registration
RUN sh -c "$(curl -L https://downloads.remote.it/remoteit/install_agent.sh)"

# Configure Supervisor
COPY supervisord.conf /etc/supervisor/conf.d/supervisord.conf

# Setup default user
RUN useradd --create-home -s /bin/bash -m ubuntu && echo "ubuntu:ubuntu" | chpasswd && adduser ubuntu sudo
RUN echo '%sudo ALL=(ALL) NOPASSWD:ALL' >> /etc/sudoers

EXPOSE 80
CMD ["/usr/bin/supervisord"]
You will also need a configuration file for Supervisor.
Use a text editor to create a file named supervisord.conf with the following contents:
[supervisord]
user=root
nodaemon=true
logfile = /var/log/supervisord.log
pidfile=/var/run/supervisord.pid

[program:sshd]
command=/usr/sbin/sshd -D

[program:remoteit-agent]
command=/usr/share/remoteit/refresh.sh

[program:apache2]
command=/usr/sbin/apache2ctl -DFOREGROUND
Build the container using:
docker build -t supervisord-dev .
Before running the container, you need a registration code from Remote.It.
Log in to your account at https://app.remote.it .
From the dashboard click the + icon and select the Linux icon to add a new device.
Copy the generated registration code by clicking the bar code symbol under COPY as shown below:

With this code you can launch the container. Substitute your registration code instead of the one shown below:
docker run -d -e R3_REGISTRATION_CODE=416ED829-D9D8-532C-B1FE-13548929B2A1 -p 80:80 supervisord-dev
Once the container starts on your local machine, you can open your browser to https://localhost and see the Apache welcome screen.
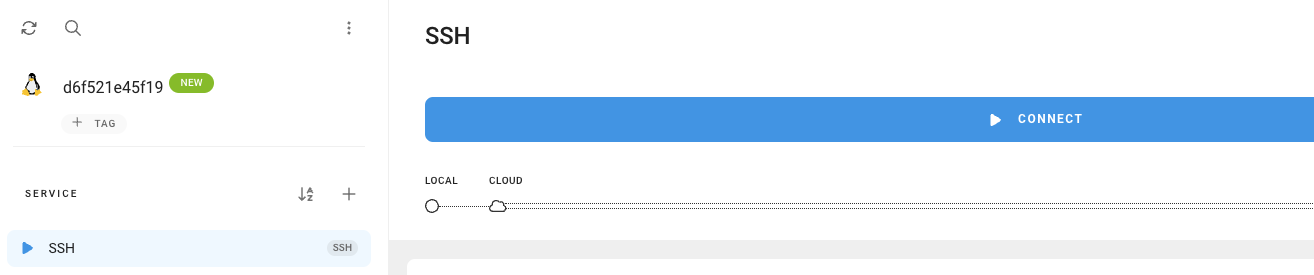
You will also see the device in your Remote.It dashboard.
In the dashboard, start the SSH connection by clicking the CONNECT bar as shown below:
Once connected, get the values for the PUBLIC ENDPOINT:
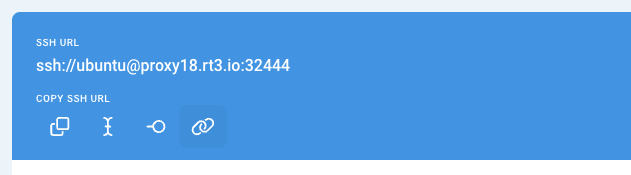
You can now SSH directly into the container. The username for the container is ubuntu and the password is also ubuntu. If desired, you can change this in the Dockerfile.
Change to your endpoint values in the command below to SSH:
ssh ssh://ubuntu@proxy18.rt3.io:32443
You are now inside the container as the ubuntu user.
Notice that the SSH port was not shared by the container.