Deploy Ruby on Rails on Arm-based Google Cloud C4A virtual machines
Introduction
Get started with Ruby on Rails on Google Axion C4A
Create a Google Axion C4A Arm virtual machine on GCP
Install Ruby on Rails on SUSE Linux
Set up Ruby on Rails baseline testing
Benchmark Ruby on Rails
Next Steps
Deploy Ruby on Rails on Arm-based Google Cloud C4A virtual machines
Overview
Follow these steps to install PostgreSQL, connect it to a Ruby on Rails app, and verify everything works on a SUSE Arm64 Google Cloud C4A VM.
Install PostgreSQL and development headers
Install PostgreSQL and its development headers on your SUSE system:
sudo zypper install postgresql-devel postgresql-server
This installs two packages:
postgresql-server- the PostgreSQL database servicepostgresql-devel- development headers needed to compile thepggem that connects Rails to PostgreSQL
The development headers are essential because Rails uses the pg gem to communicate with PostgreSQL, and this gem needs to be compiled during installation.
Start PostgreSQL and enable it to run at boot:
sudo systemctl start postgresql
sudo systemctl enable postgresql
systemctl status postgresql
The output is similar to:
        ● postgresql.service - PostgreSQL database server
  Loaded: loaded (/usr/lib/systemd/system/postgresql.service; enabled; vendor preset: disabled)
  Active: active (running) since Tue 2025-11-04 21:25:59 UTC; 18s ago
   Main PID: 26997 (postgres)
   Tasks: 7
     CPU: 372ms
  CGroup: /system.slice/postgresql.service
       ├─ 26997 /usr/lib/postgresql15/bin/postgres -D /var/lib/pgsql/data
       └─ ... (other postgres processes)
If the Active state is running, PostgreSQL is ready.
Create a PostgreSQL user for Rails
Create a dedicated PostgreSQL user for your Rails app:
sudo -u postgres psql -c "CREATE USER gcpuser WITH SUPERUSER PASSWORD 'your_password';"
This command creates a user named gcpuser with superuser privileges. You’ll use this user in your Rails configuration.
Set environment variables
Set environment variables for Rails to connect to PostgreSQL:
export PGUSER=gcpuser
export PGPASSWORD=your_password
export PGHOST=localhost
These variables tell Rails how to connect to your PostgreSQL database:
PGUSER- the PostgreSQL username you createdPGPASSWORD- the password for that userPGHOST- tells Rails to connect to the local database server
Create a new Rails app with PostgreSQL
Now you’ll create a Rails application configured to use PostgreSQL as its database.
Generate a new Rails app:
rails new db_test_rubyapp -d postgresql
This command creates a new Rails application named db_test_rubyapp with PostgreSQL as the default database adapter.
Navigate to your new app directory:
cd db_test_rubyapp
Install the required gems:
bundle install
The bundle install command downloads and installs all the gem dependencies listed in your Gemfile, including the pg gem that allows Rails to communicate with PostgreSQL.
You now have a Rails application ready to connect to your PostgreSQL database.
Check config/database.yml and make sure username and password match your PostgreSQL user (gcpuser).
Update Rails database configuration
Open config/database.yml and confirm the credentials:
sudo vi config/database.yml
Set these fields:
        default: &default
  adapter: postgresql
  encoding: unicode
  username: gcpuser
  password: your_password
  host: localhost
  pool: 5

development:
  <<: *default
Change the Authentication Method
By default, PostgreSQL on many Linux distributions (including SUSE) uses the ident authentication method for local connections. This method maps Linux system usernames directly to PostgreSQL roles. While convenient for local access, it prevents password-based authentication, which is necessary for Rails and most application connections.
To allow Rails to connect using a username and password, change the authentication method in PostgreSQL’s configuration file pg_hba.conf from ident to md5:
sudo vi /var/lib/pgsql/data/pg_hba.conf
The file location /var/lib/pgsql/data/pg_hba.conf is the default data directory path for PostgreSQL on SUSE Linux.
Find lines like the following in the file:
        # IPv4 local connections:
host    all             all             127.0.0.1/32            ident
# IPv6 local connections:
host    all             all             ::1/128                 ident
Change ident to md5:
        # IPv4 local connections:
host    all             all             127.0.0.1/32            md5
# IPv6 local connections:
host    all             all             ::1/128                 md5
Restart PostgreSQL:
sudo systemctl restart postgresql
Verify the change:
sudo systemctl status postgresql
The service should show as active (running).
Create and Initialize the Database
Once PostgreSQL is configured and Rails can authenticate, you can create your application’s development and test databases. This step verifies that Rails is correctly connected to PostgreSQL and that the pg gem is working on your Arm64 environment.
Run the following command from inside your Rails app directory:
rails db:create
The expected output is:
        Created database 'db_test_rubyapp_development'
Created database 'db_test_rubyapp_test'
This output confirms that Rails successfully. It connected to the PostgreSQL service using the credentials from config/database.yml and created two new databases — one for development and one for testing.
Generate a Scaffold for Testing
To verify your Ruby on Rails and PostgreSQL integration, you’ll create a small scaffold application. A scaffold is a Rails generator that automatically builds a model, controller, views, and database migration, allowing you to test CRUD (Create, Read, Update, Delete) operations quickly.
For this example, you’ll create a simple Task Tracker app that manages tasks with titles and due dates.
Run the following command inside your Rails project directory:
rails generate scaffold task title:string due_date:date
This command generates a model, controller, views, and migration for tasks.
Apply the migration:
rails db:migrate
You’ll see output similar to:
        == 20251006101717 CreateTasks: migrating ======================================
-- create_table(:tasks)
   -> 0.0127s
== 20251006101717 CreateTasks: migrated (0.0128s) =============================
Verify the tasks table in PostgreSQL
Check that the tasks table exists:
sudo -u postgres psql
In the PostgreSQL shell, run:
\c db_test_rubyapp_development
\d tasks
\q
Connect to PostgreSQL as the database superuser and inspect the table structure:
sudo -u postgres psql
In the PostgreSQL shell, connect to your Rails development database and examine the tasks table:
\c db_test_rubyapp_development
\d tasks
\q
This sequence of commands does the following:
sudo -u postgres psql→ Launches the PostgreSQL shell as the superuserpostgres.\c db_test_rubyapp_development→ Connects to the Rails app’s development database.\d tasks→ Displays the schema (columns and types) of thetaskstable.\q→ Exit from the PostgreSQL shell.
You should see output similar to:
        psql (15.10)
Type "help" for help.

postgres=# \c db_test_rubyapp_development
You are now connected to database "db_test_rubyapp_development" as user "postgres".
db_test_rubyapp_development=# \d tasks
                                          Table "public.tasks"
   Column   |              Type              | Collation | Nullable |              Default
------------+--------------------------------+-----------+----------+-----------------------------------
 id         | bigint                         |           | not null | nextval('tasks_id_seq'::regclass)
 title      | character varying              |           |          |
 due_date   | date                           |           |          |
 created_at | timestamp(6) without time zone |           | not null |
 updated_at | timestamp(6) without time zone |           | not null |
Indexes:
    "tasks_pkey" PRIMARY KEY, btree (id)
Configure Google Cloud firewall to allow port 3000
Your Rails app runs on port 3000 by default. To access it from your browser, you need to configure Google Cloud’s firewall to allow incoming connections on this port.
Navigate to the firewall settings in your Google Cloud Console:
- Open the Navigation menu (hamburger icon in the top left)
- Go to VPC network → Firewall
- Click Create Firewall Rule
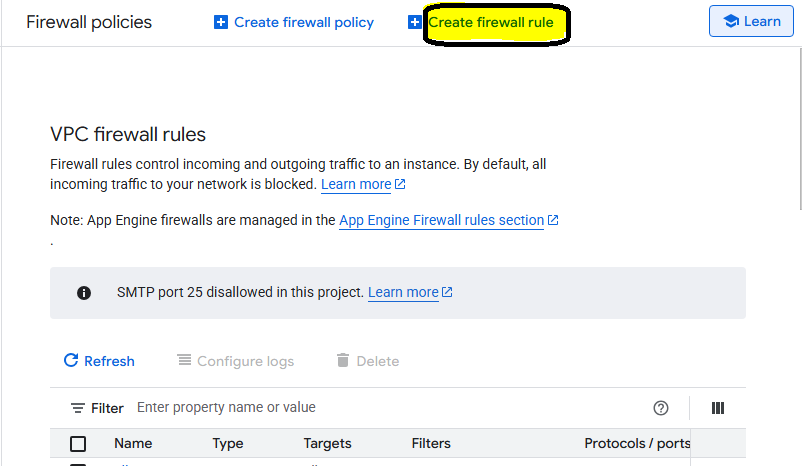 Create firewall rule
Fill in the details as below:
- Provide a name for your desired port (for example,
allow-3000-ingress).
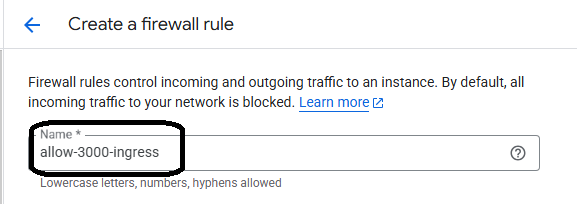 Allow-3000-ingress
Set Direction of Traffic to Ingress.
Set Target to All Instances in the network. You can also select Specific Tags.
Set the Source IPv4 range to
0.0.0.0/0, for global access.
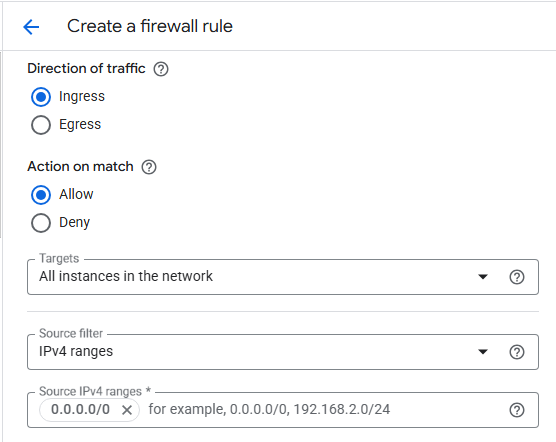 Setting the target
In the Protocols and ports section, select TCP and enter
 3000 in the port field:
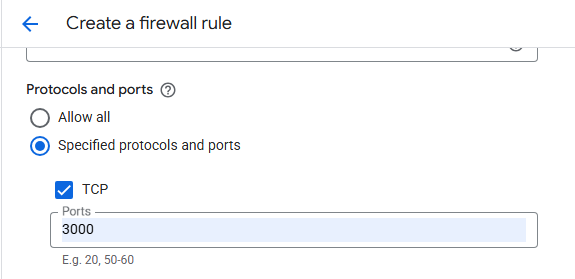 Protocols and ports
- Select Create. Your firewall rule is created and appears in the Firewall policies page:
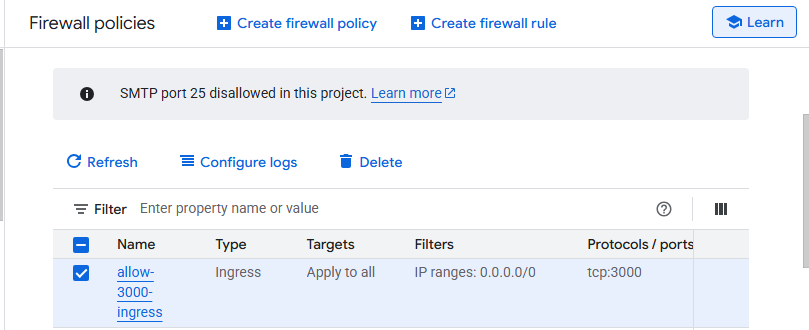 Create Firewall rule
OS firewall (firewalld) on SUSE
Once done, go back to your VM, install FirewallD:
sudo zypper install firewalld
Now start FirewallD and run the commands to allow port 3000:
sudo systemctl start firewalld
sudo systemctl enable firewalld
sudo firewall-cmd --permanent --add-port=3000/tcp
sudo firewall-cmd --reload
Start Rails
Now that port 3000 is allowed in your VM’s ingress firewall rules, you can start the Rails server using the following command:
rails server -b 0.0.0.0
This command lets you access Rails from your browser using the VM’s external IP.
Access the Rails application:
Open a web browser on your local machine and enter the following URL in the address bar:
http://[YOUR_VM_EXTERNAL_IP]:3000
- Replace
<YOUR_VM_PUBLIC_IP>with the public IP of your GCP VM.
You will see a Rails welcome page in your browser if everything is set up correctly, as shown below:
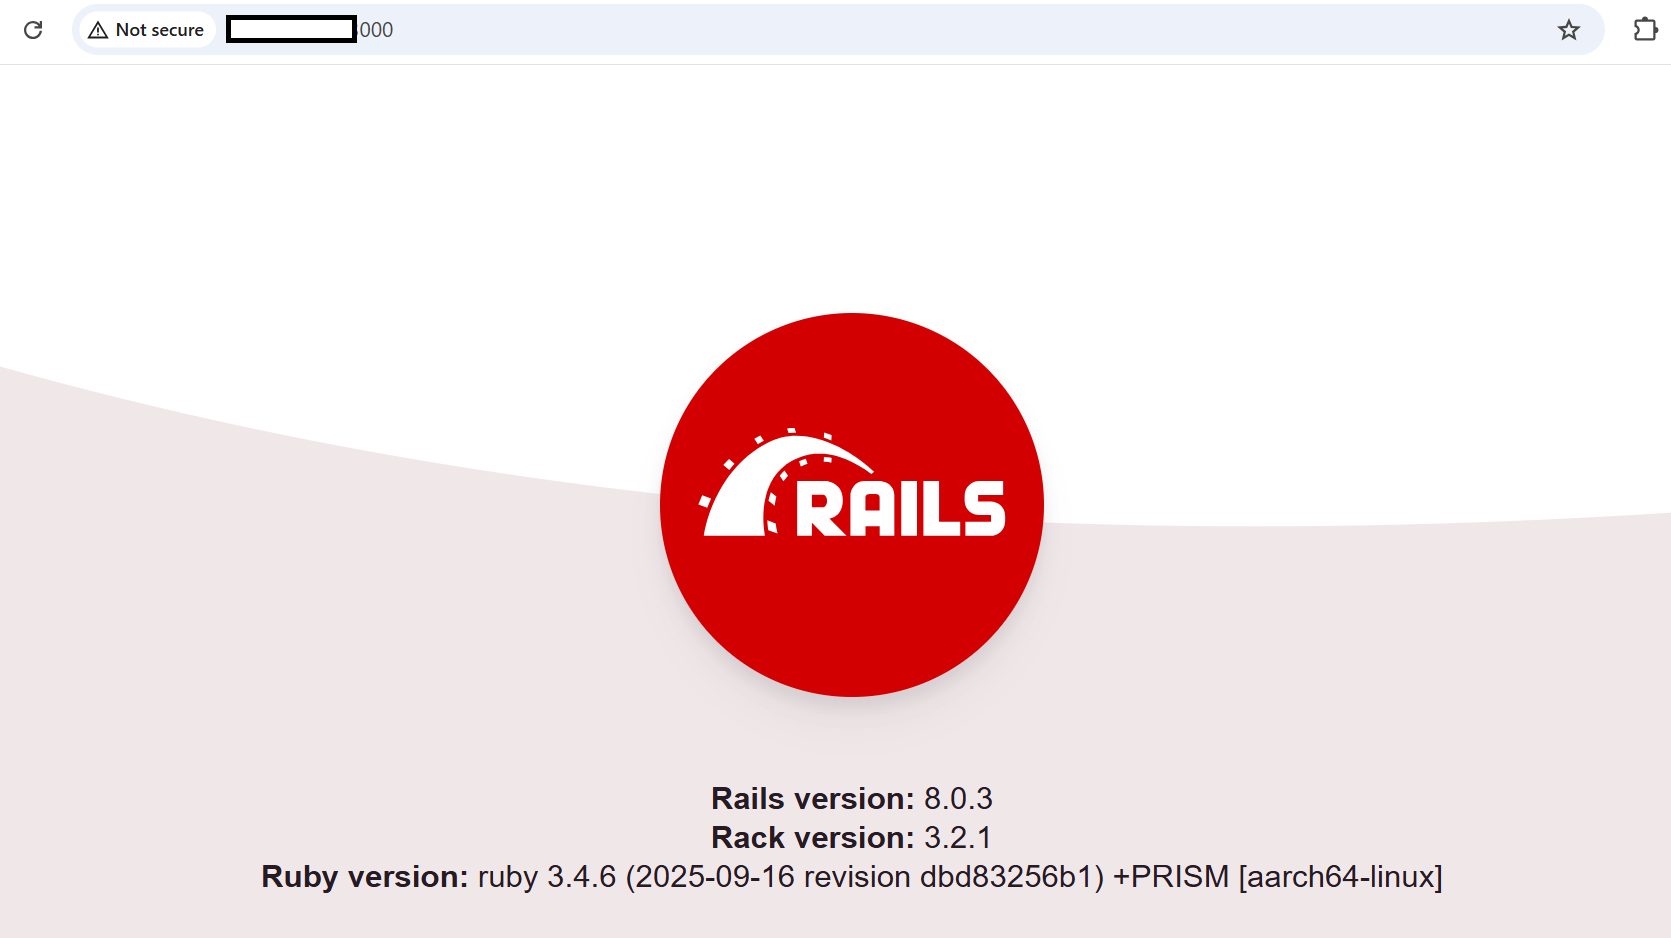 Ruby/Rails welcome page
With port 3000 reachable and the welcome page loading, your Rails stack on SUSE Arm64 (C4A Axion) is verified end-to-end and you can proceed to benchmarking.
What you’ve accomplished
You set up a Ruby on Rails app with PostgreSQL on a Google Cloud C4A Arm-based VM running SUSE Linux. You installed and configured PostgreSQL, created a database user, connected Rails, verified connectivity, generated a scaffold, and made your app accessible over the network. Your Rails stack is now ready for benchmarking and performance testing on Arm.