Learn how to create a virtual machine in a Realm using Arm Confidential Compute Architecture (CCA)
Introduction
Build and run the Arm CCA stack on an Arm FVP
Next Steps
Learn how to create a virtual machine in a Realm using Arm Confidential Compute Architecture (CCA)
Before you begin
You will need at least 30 GB of free disk space on your machine to build the Arm CCA reference software stack.
Install the necessary packages:
sudo apt update && sudo apt install git gcc telnet xterm net-tools build-essential
Overview
The Arm Confidential Compute Architecture (CCA) enables the construction of protected execution environments called Realms. Realms allow lower-privileged software, such as an application or a virtual machine to protect its content and execution from attacks by higher-privileged software, such as an OS or a hypervisor. Realms provide an environment for confidential computing, without requiring the Realm owner to trust the software components that manage the resources used by the Realm.
The Arm Realm Management Extension (RME) is an Arm v9-A architecture extension and defines the set of hardware features and properties that are required to comply with the Arm CCA architecture. RME introduces a new security state “Realm world”, in addition to the traditional Secure and Non-Secure states.
In this learning path, you will learn how to build and run the reference integration software stack for Arm CCA which demonstrates support for Arm’s RME architecture feature. You will also learn how to create a Realm that runs a guest Linux kernel.
Build the docker container
You can build the Arm CCA reference software stack in a docker container which contains all the build dependencies. Install docker engine on your machine.
Clone the repository that contains the docker container file and utility scripts:
git clone --branch AEMFVP-A-RME-2023.09.29 https://git.gitlab.arm.com/arm-reference-solutions/docker.git
Build the docker container:
cd docker
./container.sh build
The script container.sh defines the docker file and image name used to create the container.
Confirm that the docker container image was built successfully:
docker image list
The expected output is:
        REPOSITORY        TAG       IMAGE ID       CREATED       SIZE
aemfvp-builder    latest    2fa7ce18f57a   7 mins ago    1.83GB
Create a directory on your host machine to store the software source files. Then run the container and mount this directory inside the container:
mkdir ~/cca-stack
./container.sh -v ~/cca-stack run
You should see the following output:
        Running docker image: aemfvp-builder ...
ubuntu@ip-172-16-0-235:/$
You are now inside the root directory of the aemfvp-builder container and ready to build the software stack.
Build the reference Arm CCA software stack
You can build the Arm CCA software stack in your running container using a manifest file. Inspect the manifest file to view all the component repositories needed to build this reference stack.
Inside the running container, change directory into the mounted directory. Use the repo tool and the manifest file to download the software stack:
cd ~/cca-stack
repo init -u https://git.gitlab.arm.com/arm-reference-solutions/arm-reference-solutions-manifest.git -m pinned-aemfvp-a-rme.xml -b refs/tags/AEMFVP-A-RME-2023.09.29
repo sync -c -j $(nproc) --fetch-submodules --force-sync --no-clone-bundle
Patch the Linux kernel Kconfig file for arm64 targets. This patch enables extending the bootloader provided command line arguments. It is required to speed up execution of the software stack.
cd linux
wget https://raw.githubusercontent.com/ArmDeveloperEcosystem/arm-learning-paths/main/content/learning-paths/servers-and-cloud-computing/rme-cca-basics/kconfig.patch
git apply --ignore-space-change --whitespace=warn --inaccurate-eof -v kconfig.patch
The output should be similar to:
        Checking patch arch/arm64/Kconfig...
Hunk #1 succeeded at 2260 (offset 60 lines).
Applied patch arch/arm64/Kconfig cleanly.
Build the stack:
cd ..
./build-scripts/aemfvp-a-rme/build-test-buildroot.sh -p aemfvp-a-rme all
The build process can take a while to complete as it’s building the entire collection of software components for the Arm CCA stack.
The binary executables are built in the ~/cca-stack/output/aemfvp-a-rme directory.
You can now exit the docker container.
exit
Run the software stack
The binary executables built in the previous step can run on an Armv-A Base Architecture Envelop Model (AEM) FVP with support for RME extensions. AEM FVPs are fixed configuration virtual platforms of Armv8-A and Armv9-A architectures with comprehensive system IP. You can download and run the FVP on either x86_64 or aarch64 host machines.
Depending on the architecture of your host machine, run the steps below to download and extract this FVP, create an environment variable MODEL and set it to point to the FVP executable:
host machine architecture: aarch64
cd ~/cca-stack
wget https://developer.arm.com/-/media/Files/downloads/ecosystem-models/FVP_Base_RevC-2xAEMvA_11.23_9_Linux64_armv8l.tgz
tar -xvzf FVP_Base_RevC-2xAEMvA_11.23_9_Linux64_armv8l.tgz
export MODEL=~/cca-stack/Base_RevC_AEMvA_pkg/models/Linux64_armv8l_GCC-9.3/FVP_Base_RevC-2xAEMvA
host machine architecture: x86_64
cd ~/cca-stack
wget https://developer.arm.com/-/media/Files/downloads/ecosystem-models/FVP_Base_RevC-2xAEMvA_11.23_9_Linux64.tgz
tar -xvzf FVP_Base_RevC-2xAEMvA_11.23_9_Linux64.tgz
export MODEL=~/cca-stack/Base_RevC_AEMvA_pkg/models/Linux64_GCC-9.3/FVP_Base_RevC-2xAEMvA
Launch the boot.sh script to run the binaries on the FVP:
./model-scripts/aemfvp-a-rme/boot.sh -p aemfvp-a-rme shell
A number of Info and Warning messages will be emitted by the FVP. These can safely be ignored.
If you see an error of the form xterm: Xt error: Can't open display:, ensure that your terminal application (e.g. PuTTY) has X11 forwarding enabled.
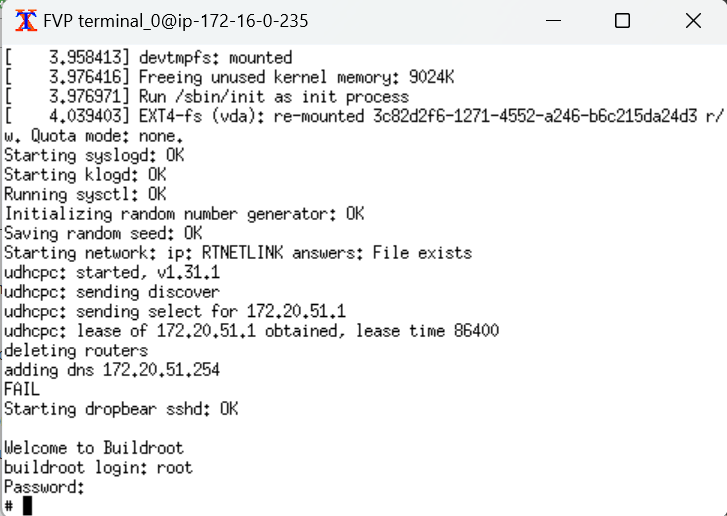
The FVP boots up with four terminal windows.
You should see the host Linux kernel boot on terminal_0. You will be prompted to login to buildroot. Enter root as both the username and password.

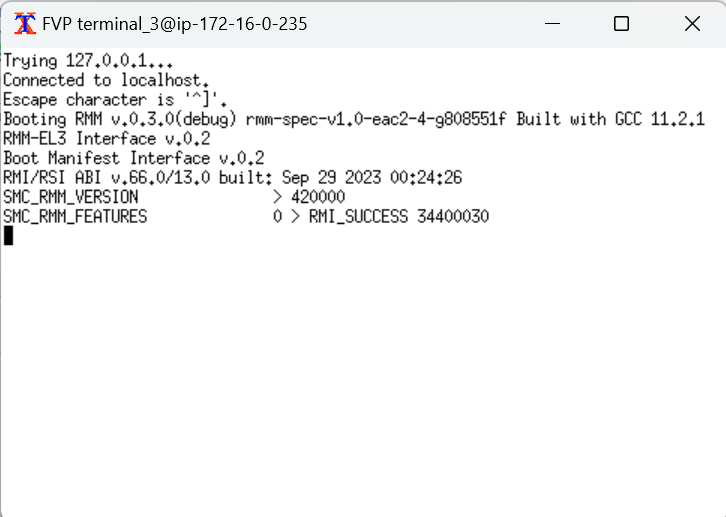
terminal_3 of the FVP is connected to the Realm Management Monitor (RMM). The RMM is the software component of Arm CCA that is responsible for the management of Realms.
The output from the RMM should look like:

You have successfully booted four worlds (Root, Secure, Non-secure and Realm) on the FVP at this point. Trusted Firmware-A is running in root, RMM in Realm, host Linux in non-secure and Hafnium in secure.
Create a virtual guest in a Realm
Guest VMs can be launched in a Realm using kvmtool from your host Linux prompt. The kernel Image and filesystem realm-fs.ext4 for the Realm are packaged into the buildroot host file system.
lkvm run --realm -c 2 -m 256 -k /realm/Image -d /realm/realm-fs.ext4 -p earlycon
You should see the guest Linux kernel starting to boot in a Realm. This step can take several minutes.
During this time, you should see output messages on the RMM console terminal_3 that indicate that the Realm is being created and activated.
SMC_RMM_REC_CREATE            88232d000 8817b2000 88231a000 > RMI_SUCCESS
SMC_RMM_REALM_ACTIVATE        8817b2000 > RMI_SUCCESS
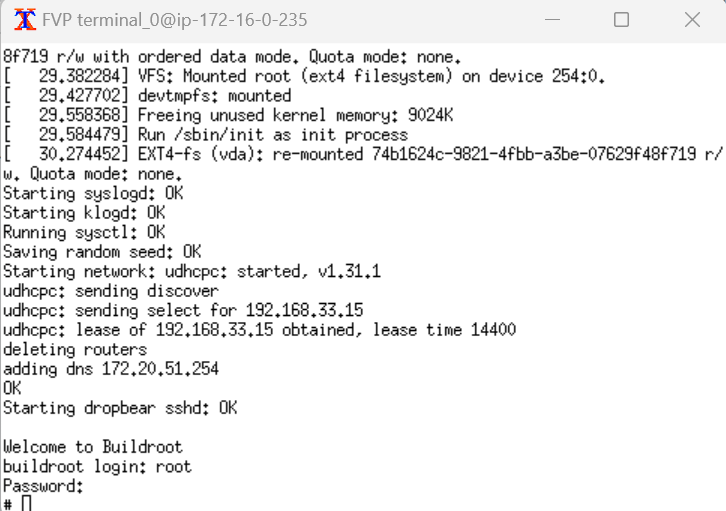
After boot up, you will be prompted to login at the guest Linux buildroot prompt. Use root again as both the username and password.

You have successfully created a virtual guest in a Realm using the Arm CCA reference software stack.