Debug Neoverse N2 Reference Design with Arm Development Studio
Introduction
Set up environment
Debugging SCP
Debugging BL1
Debugging BL31
Debugging BL33 / UEFI
Next Steps
Debug Neoverse N2 Reference Design with Arm Development Studio
Debugging SCP
SCP firmware debug uses the -Og argument. This optimizes some variables that make debugging difficult. To replace -Og with -O0, do the following:
- Navigate to
rd-infra/scp/cmake/Toolchain. - Modify the appropriate
<compiler>-Baremetal.cmakefile for your toolchain.
For example, change GNU-Baremetal.cmake:
string(APPEND CMAKE_${language}_FLAGS_DEBUG_INIT "-Og")
to
string(APPEND CMAKE_${language}_FLAGS_DEBUG_INIT "-O0")
After starting the model, click New Debug Connection… from the Debug Control panel.
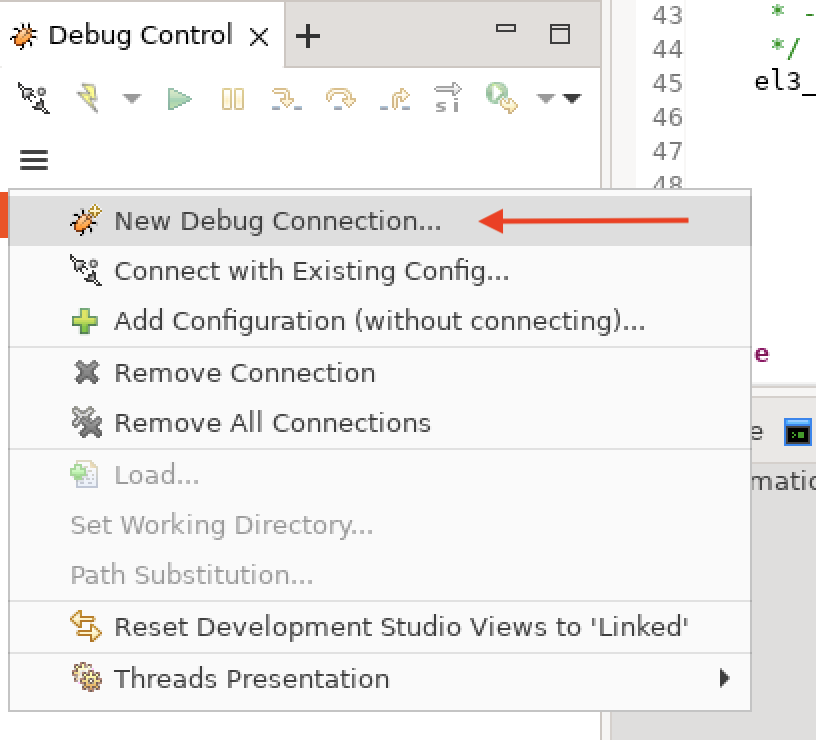 Figure 1. New debug connection
Create a connection name. This can be whatever you prefer.
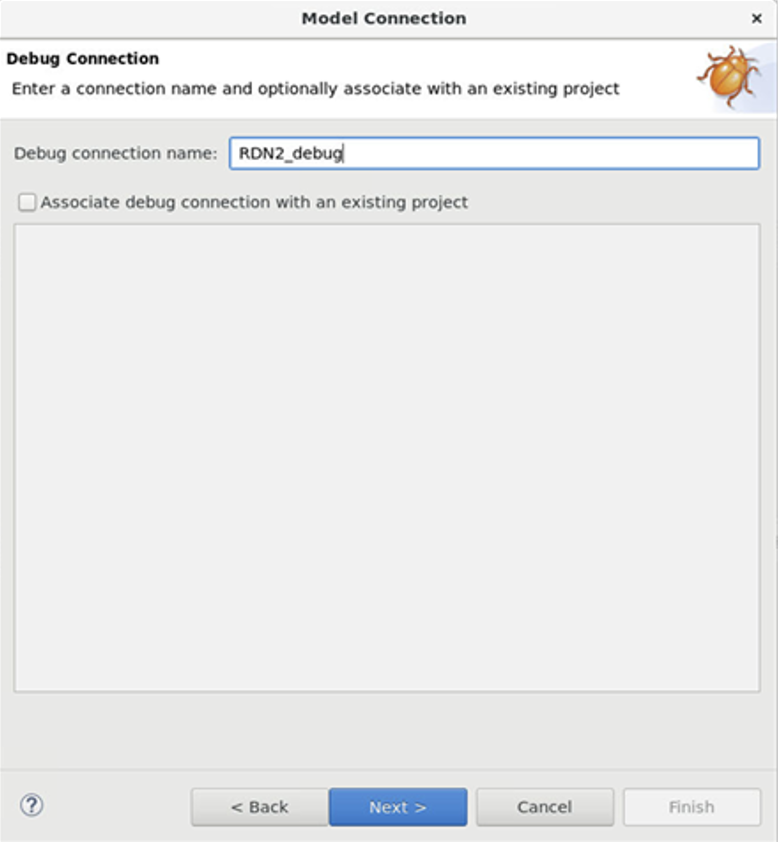 Figure 2. Debug connection name
Next, click on Add a new model….
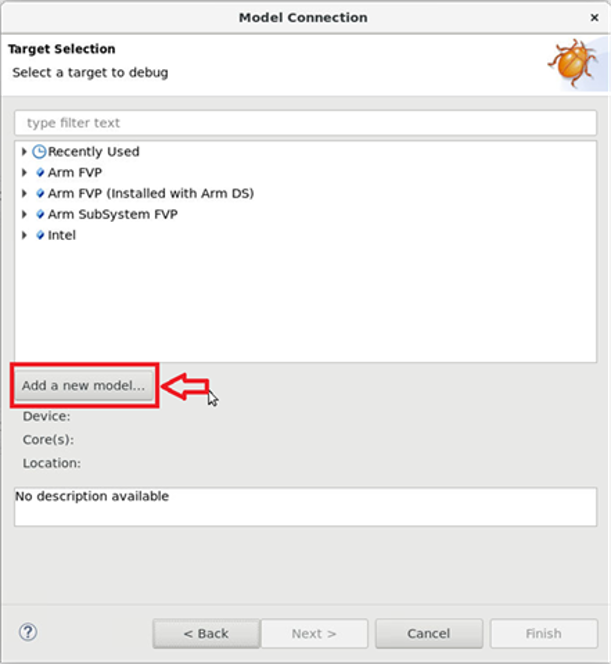 Figure 3. Add new model
Select the appropriate Model Interface, for example CADI.
Click Browse for model running on local host.
Select the correct model, and click Finish.
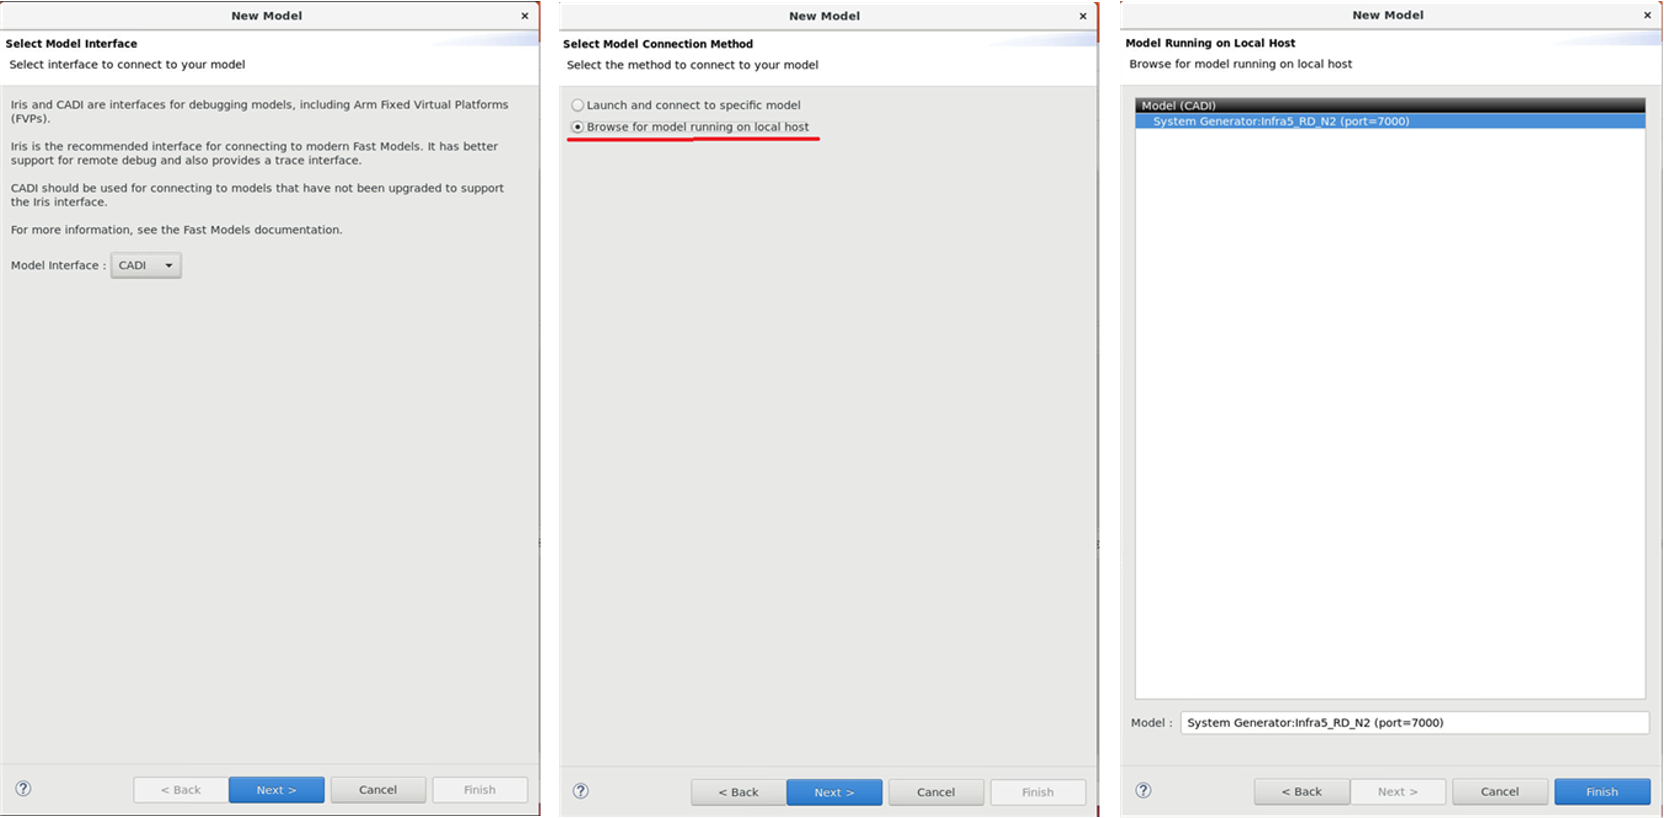 Figure 4. Connect model
In the Edit configuration and launch panel, in the Connection tab, select the correct target.
For the SCP code, select ARM_Cortex-M7_1.
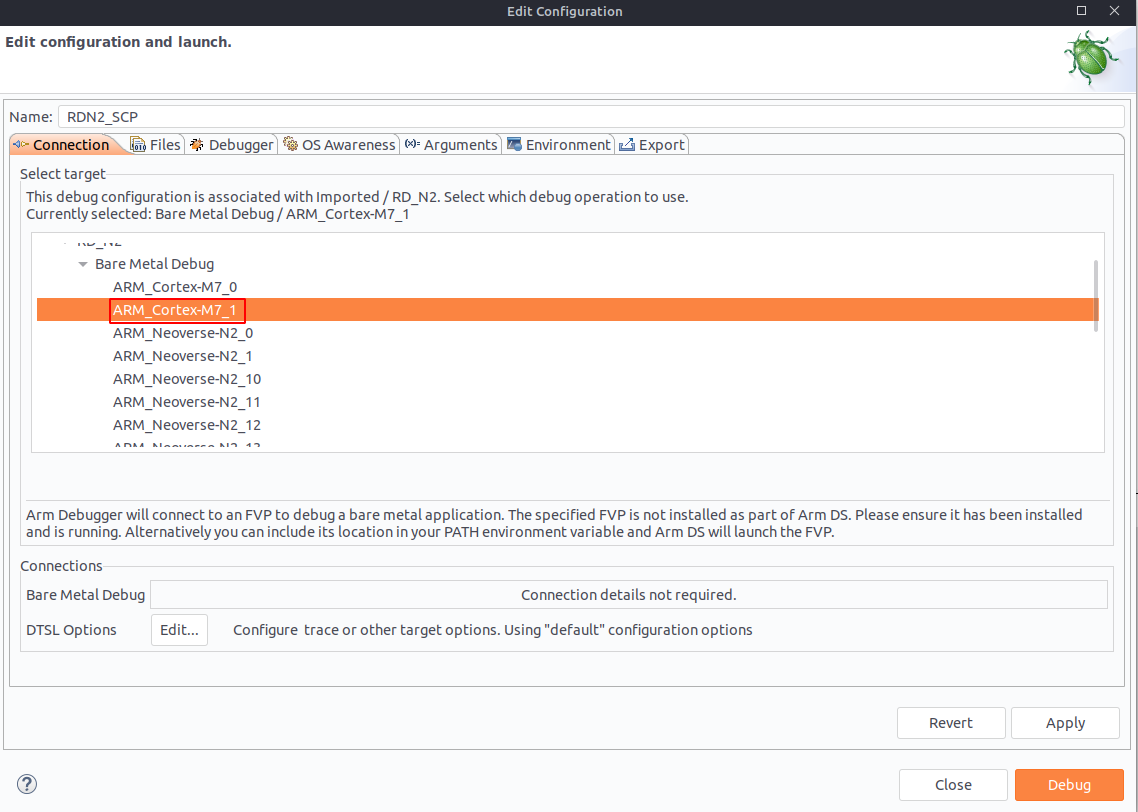 Figure 5. Select target
In the Files panel, select Load Symbols from file, File System, and select the SCP RAMFW ELF file, located at:
rd-infra/scp/output/rdn2/0/scp_ramfw/bin/rdn2-bl2.elf.
 Figure 6. Load SCP symbols
Select Apply then Debug. The debugger now connects to the model.
Once connected, you can set breakpoints in the source code. This can be done by searching for the function in the Functions tab, double-clicking next to the line number, or in the Command view.
Set a breakpoint at cmn700_discovery(). Continue execution and the code stops at the breakpoint you specify.
            break cmn700_discovery
continue
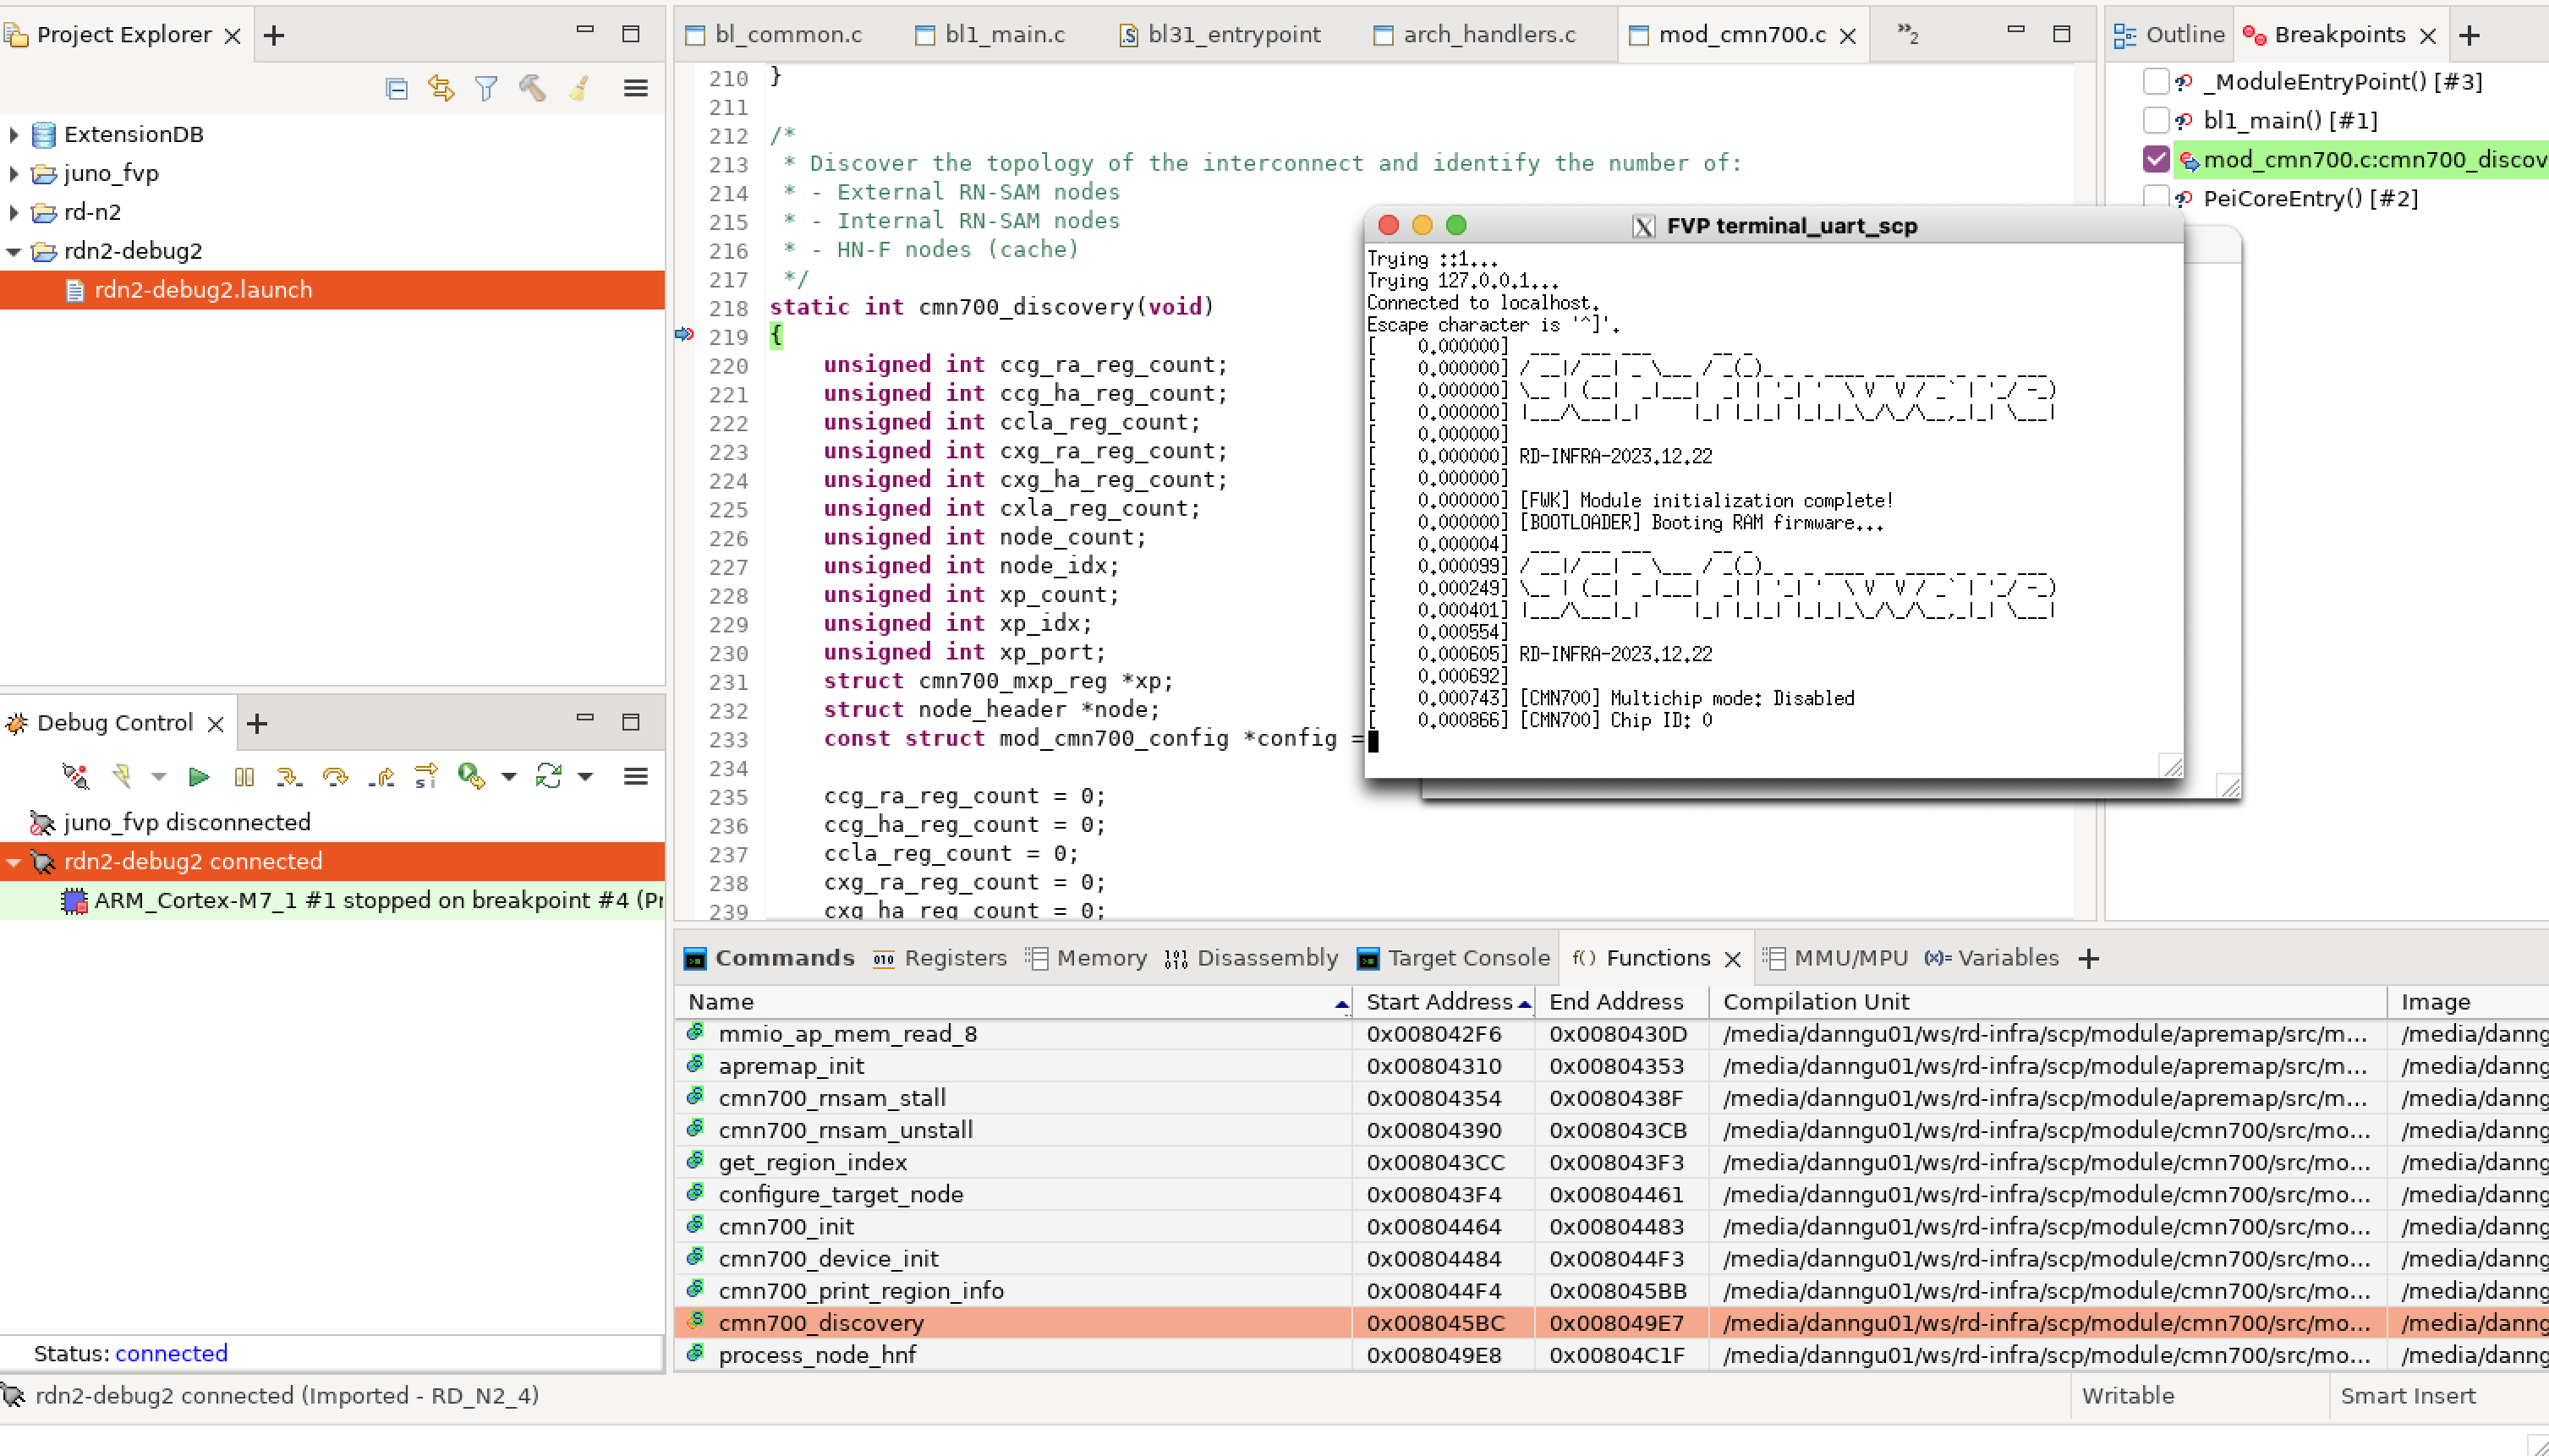 Figure 7. cmn700_discovery() breakpoint
Set another breakpoint at a debug print statement.
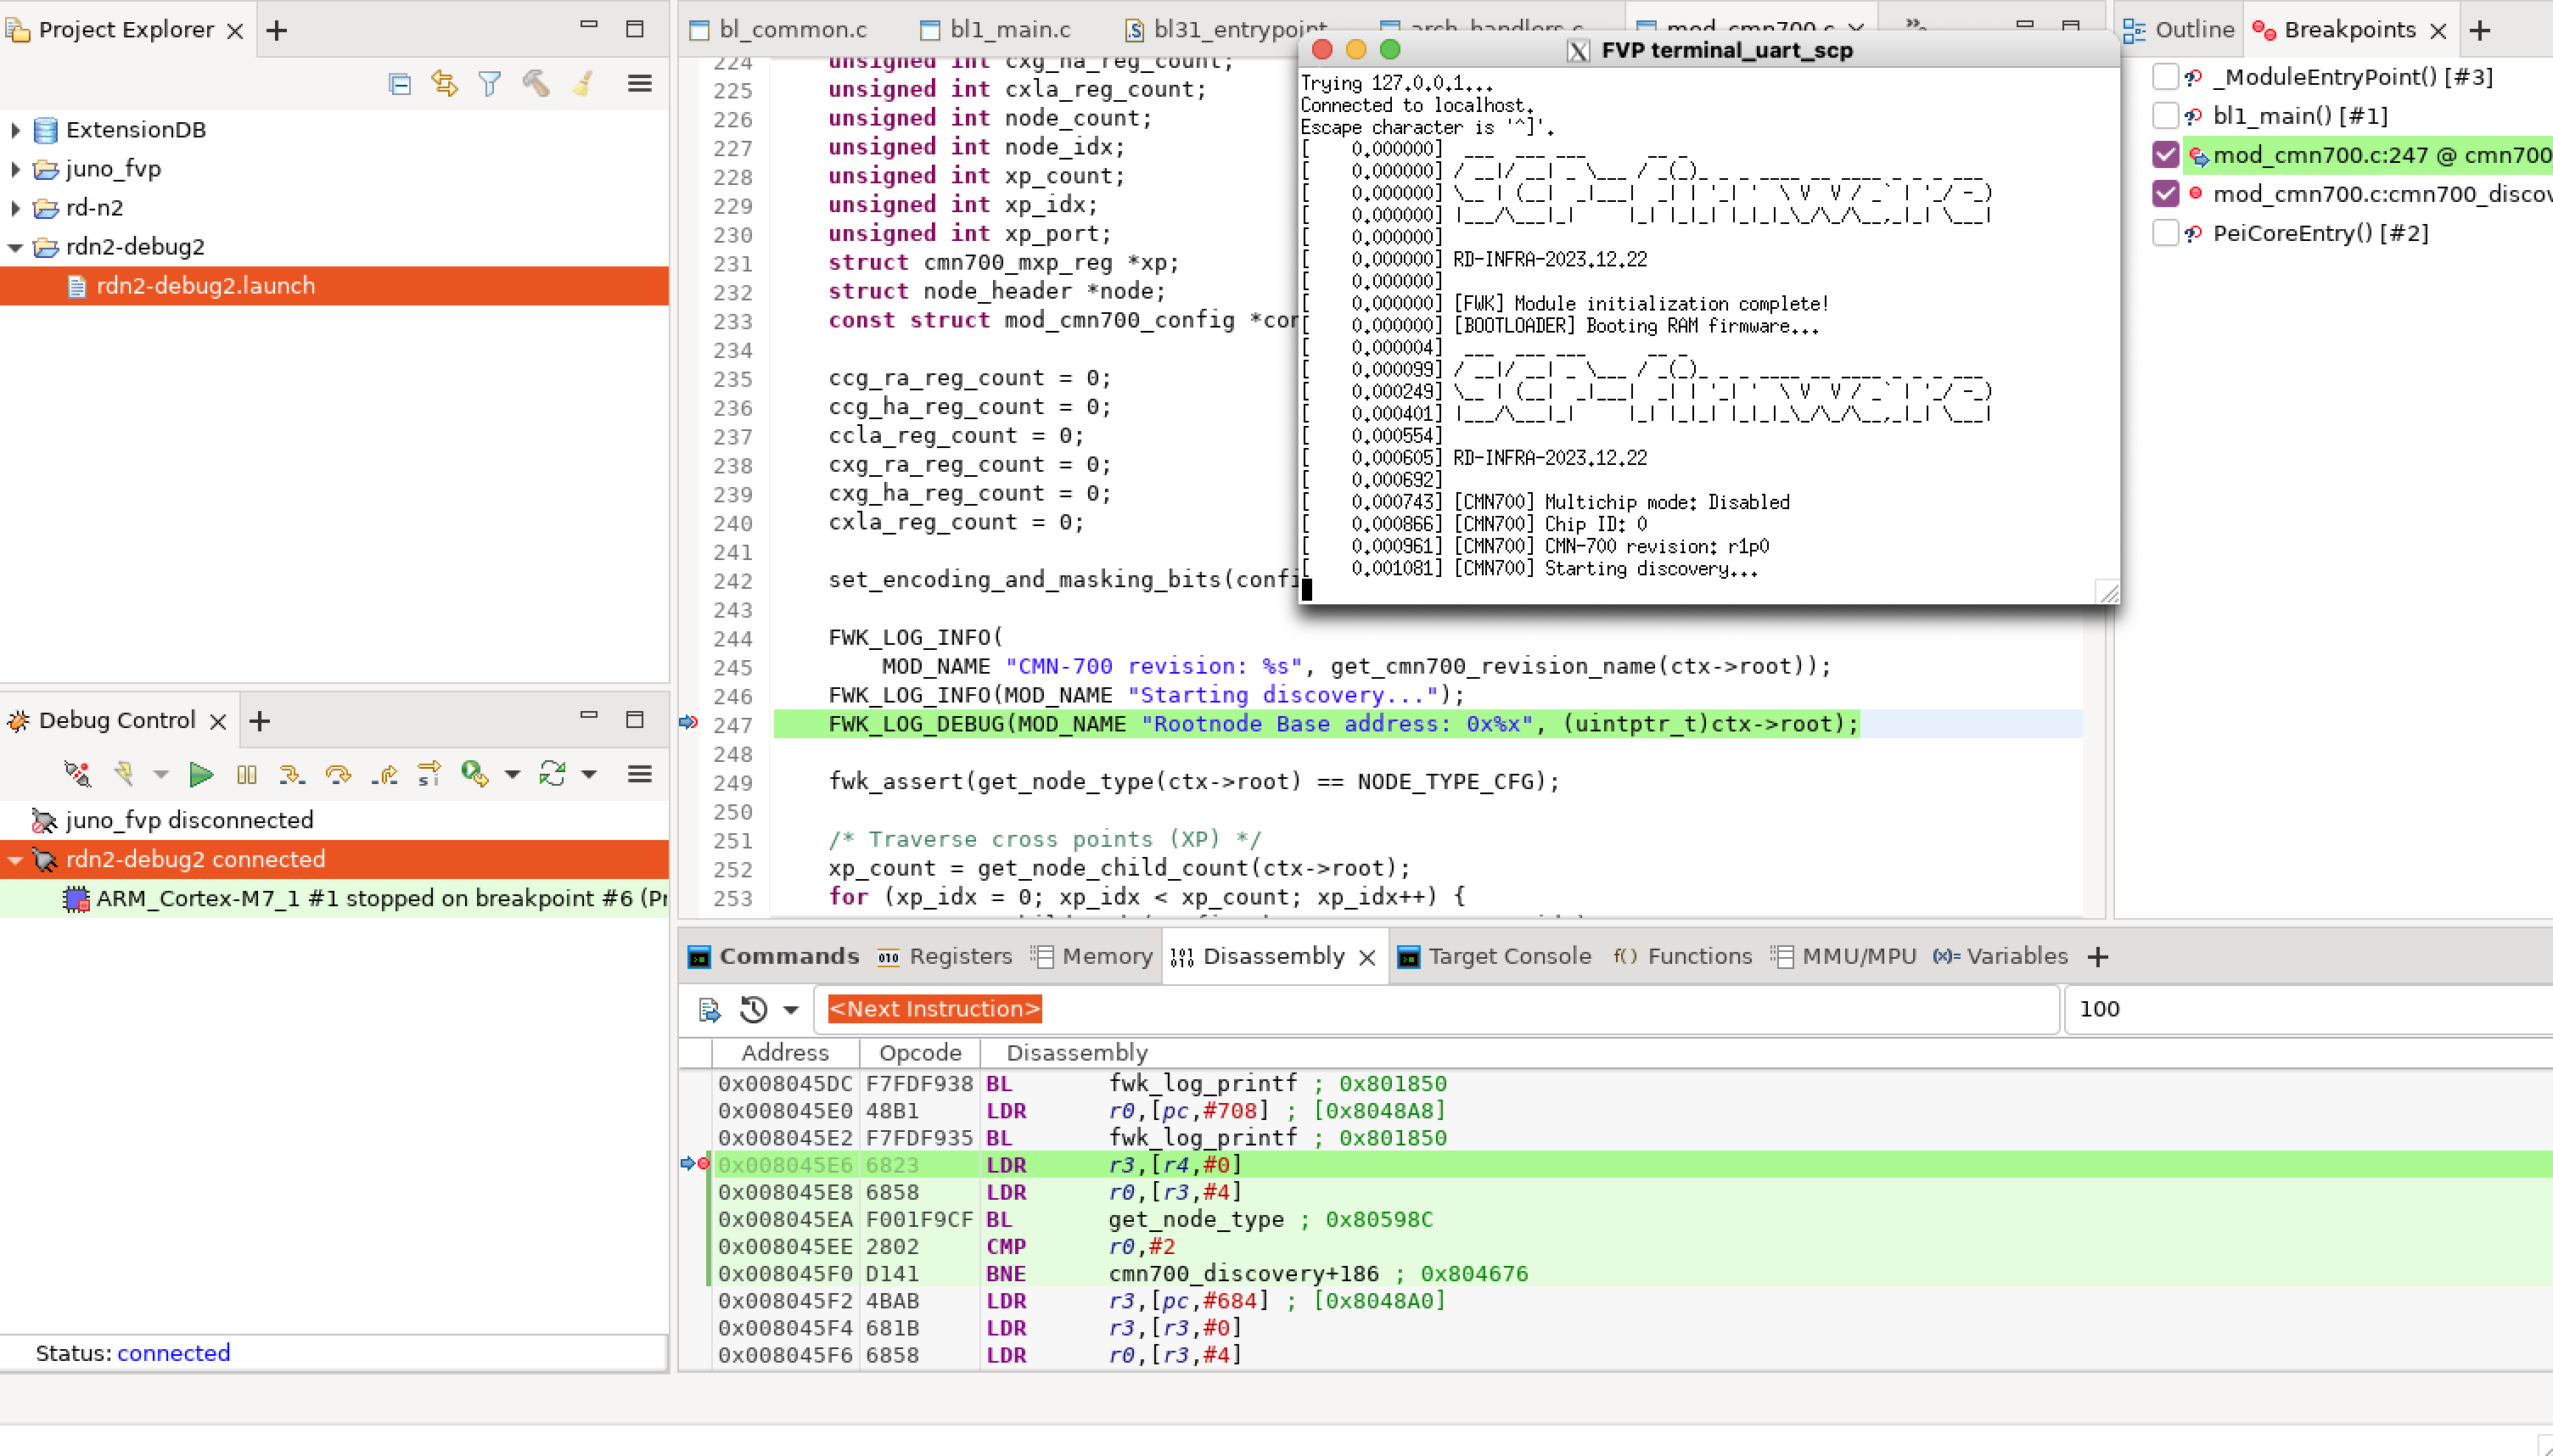 Figure 8. SCP breakpoint 2
Observe the output in the SCP UART window.
Disconnect from the FVP.