Optimize a sample C++ application on an Arm-based server with Arm Performix
Introduction
Set up Arm Performix
Build a sample C++ dot-product application
Find code hotspots in the scalar dot-product application
Identify CPU pipeline bottlenecks in the scalar dot-product application
Examine instruction patterns in the scalar dot-product application
Optimize the dot-product application with Arm Neon intrinsics
Validate the optimized dot-product application
Next Steps
Optimize a sample C++ application on an Arm-based server with Arm Performix
Introduction
Set up Arm Performix
Build a sample C++ dot-product application
Find code hotspots in the scalar dot-product application
Identify CPU pipeline bottlenecks in the scalar dot-product application
Examine instruction patterns in the scalar dot-product application
Optimize the dot-product application with Arm Neon intrinsics
Validate the optimized dot-product application
Next Steps
What Arm Performix is
Arm Performix is a performance analysis toolkit that uses guided recipes to turn hardware performance counter data into actionable insights on Arm-based systems. Unlike command-line tools such as Perf, Performix attributes metrics directly to functions. It applies Arm’s standardized performance methodologies, and presents results with context and suggested next steps.
Performix runs on your local machine (Windows, macOS, or Linux). The tool connects over SSH to a remote Arm Linux server, referred to as the target, where it collects performance data.
For a walkthrough of the Performix GUI and setup process, see this video on getting started with Arm Performix .
In addition to the GUI, you can use Arm Performix through the command line. Arm Performix also includes a local Model Context Protocol (MCP) server for AI-assisted workflows. For a setup example, see Generate Arm Performix AI insights in Visual Studio Code with Codex .
Configure SSH key-based authentication
Arm Performix connects to your target over SSH. After installing Performix by following the install guide , set it up for profiling by configuring SSH key-based authentication.
If you don’t already have an SSH key pair, generate one on your local machine:
ssh-keygen -t ed25519
Press the Enter key to accept the defaults.
Then, copy the public key to your target:
ssh-copy-id username@your-server
Replace username with your user on the server and your-server with the hostname or IP address of the server.
On your local machine, verify that you can connect to the server without a password prompt:
ssh username@your-server
For more information, see the SSH install guide .
Enable passwordless sudo on the server
Performix installs profiling tools on the target and requires root privileges.
If your target prompts for a password to perform root-level operations, configure passwordless sudo for your user. By configuring passwordless sudo, you’ll avoid interactive prompts during analysis.
On the target, create a sudoers drop-in file for your user, replacing username with your username:
echo "username ALL=(ALL) NOPASSWD:ALL" | sudo tee /etc/sudoers.d/username
sudo chmod 440 /etc/sudoers.d/username
Verify passwordless sudo works by running:
sudo whoami
The expected output is:
root
Add a new target in Arm Performix
When you launch Arm Performix, the Welcome screen appears. From this screen, you can connect to a target as follows:
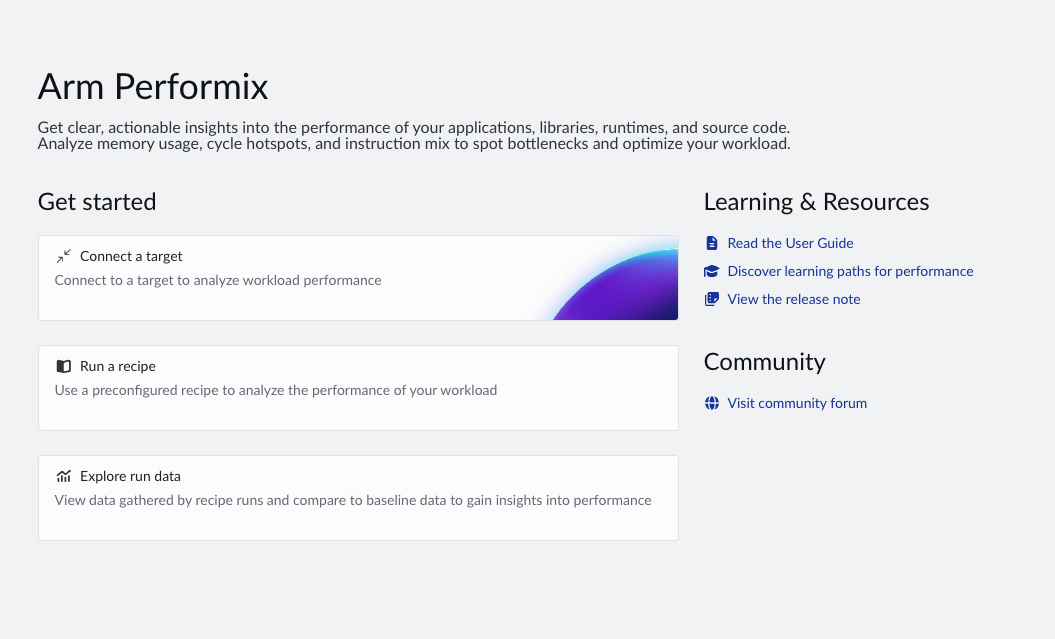 Performix welcome screen
Select Connect a Target to open the Targets view.
Select Add Target.
Fill in the Configure Target form with the following details:
Host: the hostname or IP address of the Arm Linux server
Name: a descriptive name for the target
Port: the SSH port number (the default port is 22)
User: the username for SSH connection, which must be a valid user on the target machine
Authentication method: select one of the following:
- Automatically Detect Key: let Performix find your private SSH key, stored locally (usually at
~/.ssh/id_rsaor~/.ssh/id_ed25519) - Select Key Manually: provide the path to a specific private key
- Username and password: be prompted for a password on connection
- Automatically Detect Key: let Performix find your private SSH key, stored locally (usually at
If you need to route your connection through intermediate hosts, select Add Jump Node to add one or more jump nodes. Specify them in the order your connection should use them.
Select Test Connection to verify your target is reachable. If any required tools are missing, Performix installs them for you.
After validating the connection, select Add Target. The target appears in the list and is ready for profiling.
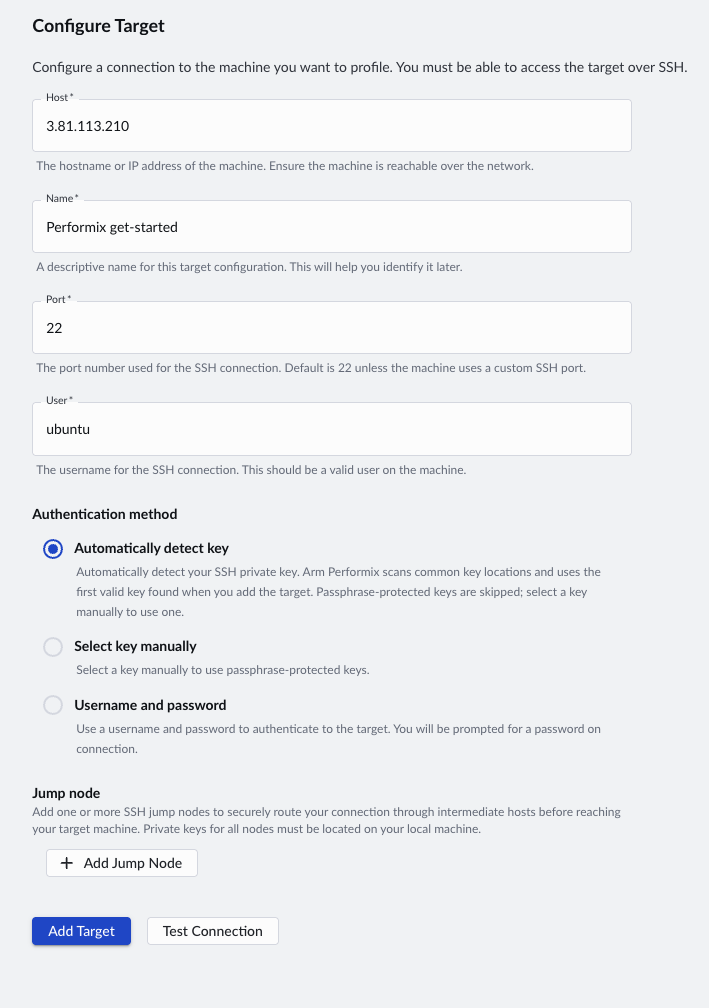 Adding a target in Performix
You should see your target listed in the Targets view with a connected status, confirming Performix can reach your server.
What you’ve accomplished and what’s next
You’ve set up Arm Performix and prepared your local machine and target for profiling a sample application.
Next, you’ll build an example application to profile.