Develop and Validate Firmware Pre-Silicon on Arm Neoverse CSS V3
Introduction
Learn about the Arm RD-V3 Platform
Understand the CSS-V3 boot flow and firmware stack
Build the RD-V3 Reference Platform Software Stack
Simulate RD-V3 Boot Flow on Arm FVP
Simulate Dual Chip RD-V3-R1 Platform
Next Steps
Develop and Validate Firmware Pre-Silicon on Arm Neoverse CSS V3
The RD-V3-R1 dual-chip platform
The RD-V3-R1 platform is a dual-chip simulation environment built to model multi-die Arm server SoCs. It expands on the single-die RD-V3 design by introducing a second application processor and a Management Control Processor (MCP).
Key use cases of RD-V3-R1 are:
- Simulating a chiplet-style boot flow with two APs
- Observing coordination between SCP and MCP across dies
- Testing secure boot in a distributed firmware environment
Key differences from RD-V3 are:
- Dual AP boot flow instead of a single AP
- MCP (Cortex-M7) to support cross-die management
- More complex power/reset coordination
Step 1: Clone the RD-V3-R1 firmware stack
Initialize and sync the codebase for RD-V3-R1:
cd ~
mkdir rdv3r1
cd rdv3r1
repo init -u https://git.gitlab.arm.com/infra-solutions/reference-design/infra-refdesign-manifests.git -m pinned-rdv3r1.xml -b refs/tags/RD-INFRA-2025.07.03 --depth=1
repo sync -c -j "$(nproc)" --fetch-submodules --force-sync --no-clone-bundle
Step 2: Install the RD-V3-R1 FVP
Refer to the RD-V3-R1 Release Tags to pick the FVP version that matches your tag, then download and install it:
mkdir -p ~/fvp
cd ~/fvp
wget https://developer.arm.com/-/cdn-downloads/permalink/FVPs-Neoverse-Infrastructure/RD-V3-r1/FVP_RD_V3_R1_11.29_35_Linux64_armv8l.tgz
tar -xvf FVP_RD_V3_R1_11.29_35_Linux64_armv8l.tgz
./FVP_RD_V3_R1.sh
Step 3: Build the firmware
If you built the Docker image earlier, you can reuse it for RD-V3-R1.
Run the full build and package flow:
cd ~/rdv3r1
docker run --rm \
  -v "$PWD:$PWD" \
  -w "$PWD" \
  --mount type=volume,dst="$HOME" \
  --env ARCADE_USER="$(id -un)" \
  --env ARCADE_UID="$(id -u)" \
  --env ARCADE_GID="$(id -g)" \
  -t -i rdinfra-builder \
  bash -c "./build-scripts/rdinfra/build-test-buildroot.sh -p rdv3r1 build && \
           ./build-scripts/rdinfra/build-test-buildroot.sh -p rdv3r1 package"
Step 4: Launch the simulation
From a desktop session on the build host, start the RD-V3-R1 FVP:
cd ~/rdv3r1/model-scripts/rdinfra
export MODEL="$HOME/FVP_RD_V3_R1/models/Linux64_armv8l_GCC-9.3/FVP_RD_V3_R1"  # adjust if your path/toolchain differs
./boot-buildroot.sh -p rdv3r1 &
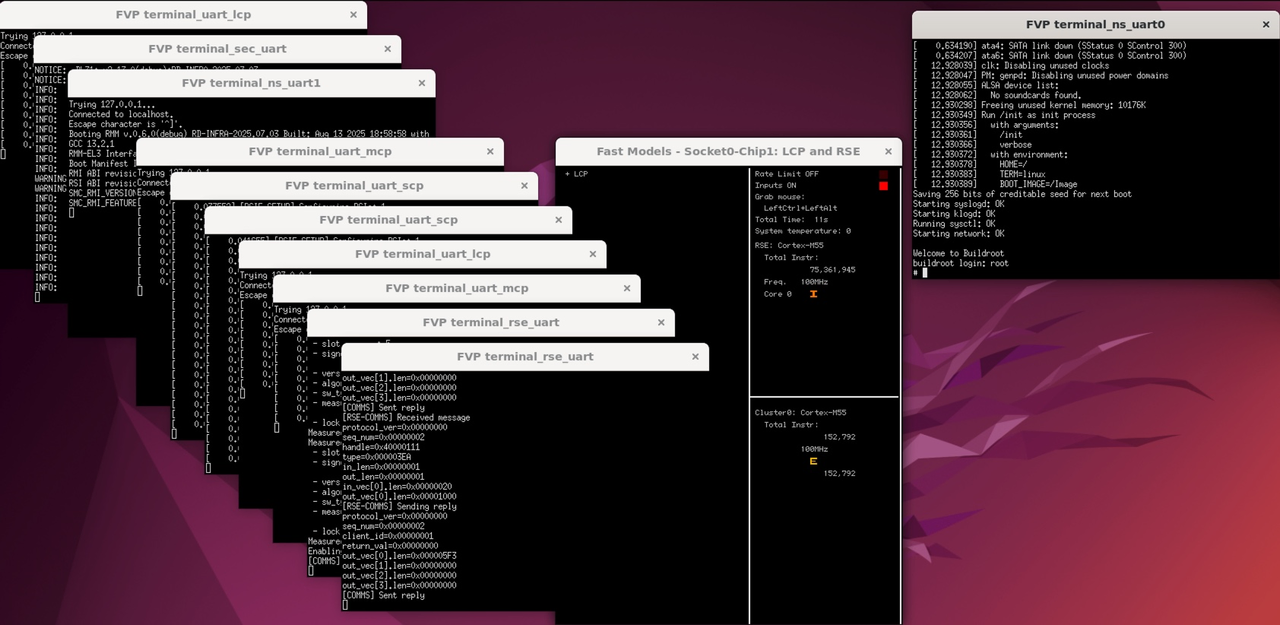
This starts the dual-chip simulation. You’ll see additional UART consoles (for example, MCP) and can verify both application processors (AP0 and AP1) boot in a coordinated manner.
 RD-V3-R1 Buildroot login
As before, the terminal logs are stored under ~/rdv3r1/model-scripts/rdinfra/platforms/rdv3r1/rdv3r1.
Step 5: Customize firmware and confirm MCP execution
To validate a firmware change in the RD-V3-R1 environment, edit the MCP source file ~/rdv3r1/host/scp/framework/src/fwk_module.c
Locate the function fwk_module_start() and add the following logging line just before return FWK_SUCCESS;:
int fwk_module_start(void)
{
    ...
    FWK_LOG_CRIT("[FWK] Module initialization complete!");

    // Custom log message for validation
    FWK_LOG_CRIT("[FWK] Customer code here");
    return FWK_SUCCESS;
}
Rebuild and repackage the firmware:
cd ~/rdv3r1
docker run --rm \
  -v "$PWD:$PWD" \
  -w "$PWD" \
  --mount type=volume,dst="$HOME" \
  --env ARCADE_USER="$(id -un)" \
  --env ARCADE_UID="$(id -u)" \
  --env ARCADE_GID="$(id -g)" \
  -t -i rdinfra-builder \
  bash -c "./build-scripts/rdinfra/build-test-buildroot.sh -p rdv3r1 build && \
           ./build-scripts/rdinfra/build-test-buildroot.sh -p rdv3r1 package"
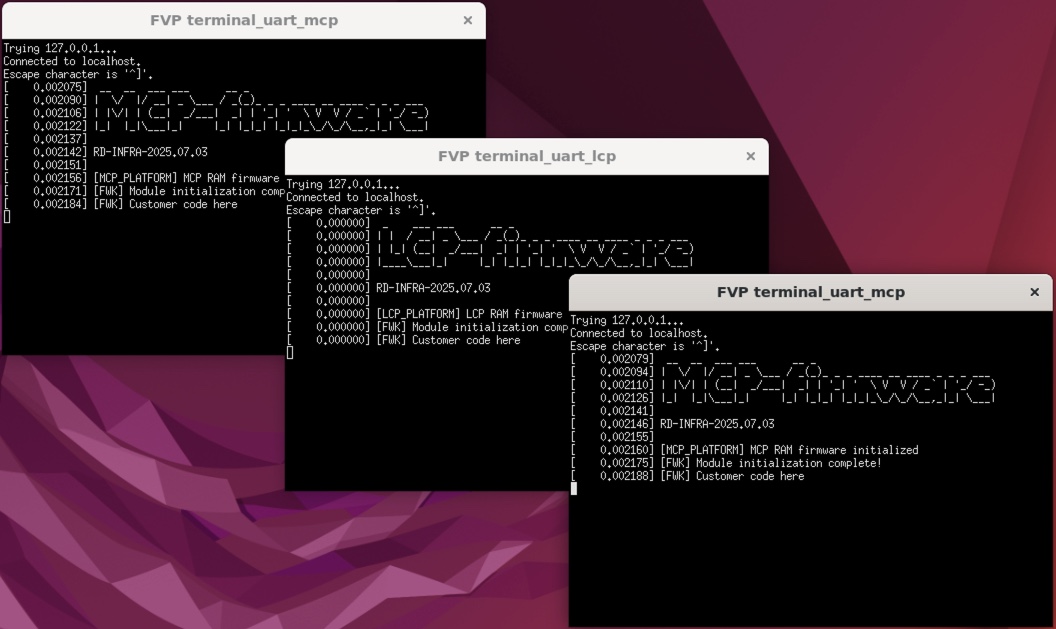
Launch the FVP simulation again and check the MCP UART output for MCP.
 RDV3 R1 modify firmware
If the change was successful, your custom log line will appear in the MCP console - confirming that your code was integrated and executed as part of the firmware boot process. You’ve now successfully simulated a dual-chip Arm server platform using RD‑V3‑R1 on FVP and validated a firmware change end-to-end—setting you up for deeper customization (for example, BMC integration) in future development cycles.