Add Arm nodes to your GKE cluster using a multi-architecture Ollama container image
Introduction
Create the GKE Cluster
Deploy Ollama amd64 to the cluster
Deploy Ollama arm64 to the cluster
Test functionality and performance
Next Steps
Add Arm nodes to your GKE cluster using a multi-architecture Ollama container image
Project Overview
Arm CPUs are widely used in AI/ML workloads on Kubernetes. In this Learning Path, you’ll learn how to deploy Ollama on Arm-based CPUs within a hybrid architecture (amd64 and arm64) K8s cluster.
First, you’ll bring up an initial Kubernetes cluster with an amd64 node running an Ollama Deployment and Service (see 1: Initial Cluster (amd64) in the image below).
Next, you’ll expand the cluster by adding an arm64 deployment and service to it, forming a hybrid cluster (2: Hybrid Cluster (amd64/arm64)). This allows you to test both architectures together, and separately, to investigate performance.
Once satisfied with arm64 performance, you can remove the amd64-specific node, deployment, and service, which then completes your migration to an arm64-only cluster (3: Migration to arm64 complete).
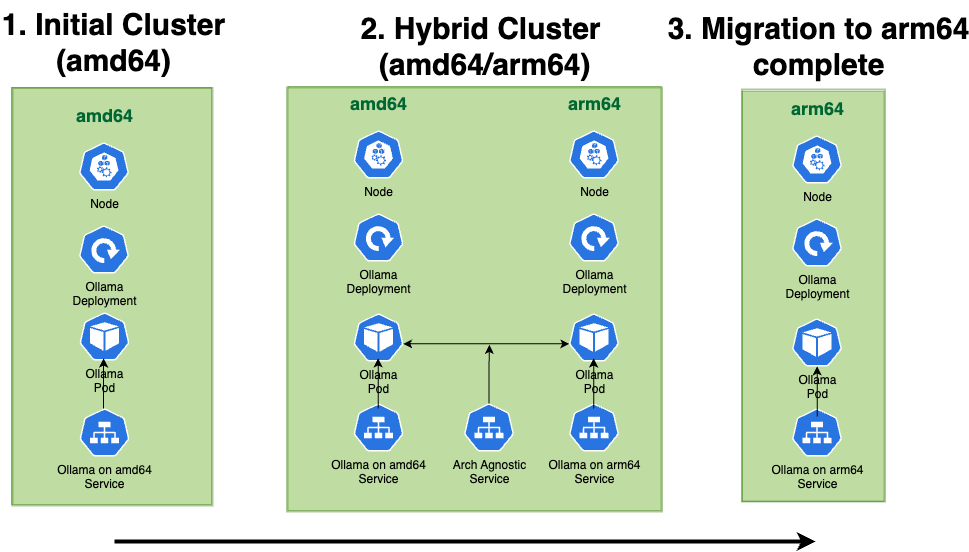
Once you’ve seen how easy it is to add arm64 nodes to an existing cluster, you will be ready to explore arm64 nodes for other workloads in your environment.
Create the cluster
In the GCP Console, navigate to Google Kubernetes Engine , then select Create.
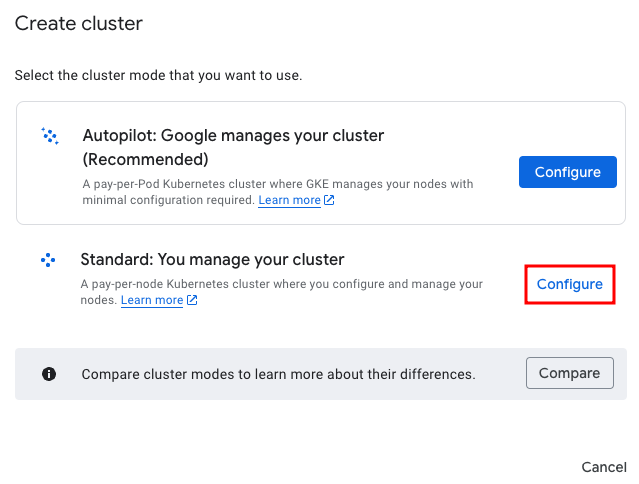
Select Standard: You manage your cluster, then select Configure.
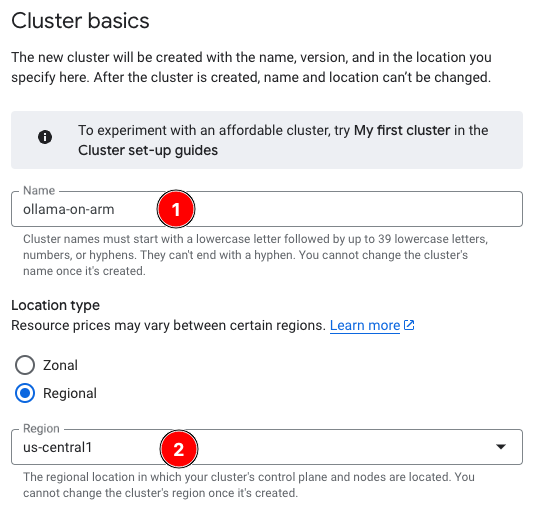
On the Cluster basics tab:
- For Name, enter
ollama-on-arm(see 1). - For Region, enter
us-central1(see 2).
Whilst this procedure works in all regions and zones supporting C4 and C4a instance types, this example uses us-central1 and us-central1-1a regions and zones. For simplicity and cost savings, only one node per architecture is used.
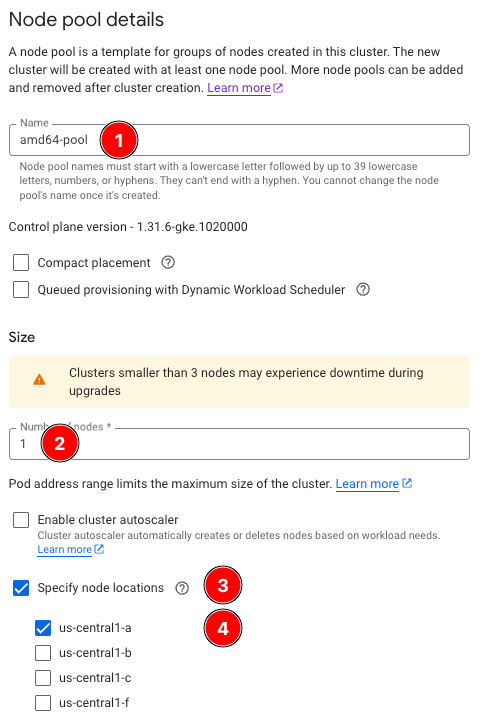
- Under NODE POOLS, select default-pool.
- For Name, enter
amd64-pool(see 1 below). - For Size, enter 1 (see 2 below).
- Select Specify node locations (3), and select us-central1-a (4).
- Click on NODE POOLS->Nodes
- For Series, select C4 (see 1 below).
- For Machine Type, select c4-standard-8 (see 2).
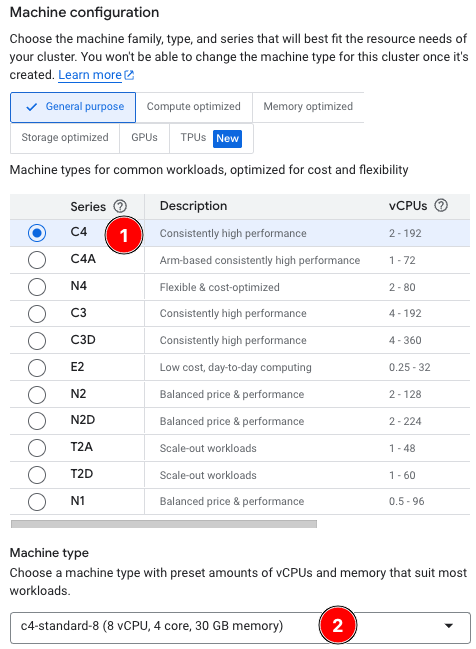
- Click the Create button at the bottom of the screen.
Wait until the cluster shows a green checkmark next to the ollama-on-multiarch cluster, then you’re ready to continue to test your connection to the cluster.
Connect to the cluster
Ensure you have kubectl and gcloud installed.
You can verify each command by printing the version.
Verify gcloud by running:
gcloud -v
If gcloud is installed the version information is printed.
Verify kubectl by running:
kubectl version -o json --client
If kubectl is installed the version information is printed.
If you don’t see the version information printed refer to the gcloud and kubectl install guides.
Now you can set up your newly-created K8s cluster credentials using the gcloud utility.
Enter the following in your command prompt (or cloud shell), and make sure to replace YOUR_PROJECT_ID with the ID of your GCP project:
export ZONE=us-central1
export CLUSTER_NAME=ollama-on-arm
export PROJECT_ID=YOUR_PROJECT_ID
gcloud container clusters get-credentials $CLUSTER_NAME --zone $ZONE --project $PROJECT_ID
If you get the message:
CRITICAL: ACTION REQUIRED: gke-gcloud-auth-plugin, which is needed for continued use of kubectl, was not found or is not executable. Install gke-gcloud-auth-plugin for use with kubectl by following https://cloud.google.com/kubernetes-engine/docs/how-to/cluster-access-for-kubectl#install_plugin
You can resolve the issue by running:
gcloud components install gke-gcloud-auth-plugin
Finally, test the connection to the cluster with this command:
kubectl cluster-info
If you receive a non-error response, you’re successfully connected to the K8s cluster.