Deploy Java applications on Azure Cobalt 100 processors
Introduction
Overview
Create an Arm-based cloud virtual machine using Microsoft Cobalt 100 CPU
Install Java
Java Baseline Testing
Benchmark using Java Microbenchmark Harness
Next Steps
Deploy Java applications on Azure Cobalt 100 processors
Create an Azure Cobalt 100 Arm64 VM using the Azure portal
You can create an Azure Cobalt 100 Arm64 virtual machine in several ways, including the Azure portal, the Azure CLI, or an Infrastructure as Code (IaC) tool.
In this Learning Path, you’ll use the Azure portal to create a VM with the Cobalt 100 processor, following a process similar to creating any other virtual machine in Azure.
Create the virtual machine
To create an Azure virtual machine, open the Azure portal and go to Virtual machines.
Now follow these steps:
Select Create > Virtual machine from the toolbar.
In Basics, complete Instance details including Virtual machine name and Region.
In Image, choose Ubuntu Pro 24.04 LTS, then set Architecture to Arm64.
In Size, select See all sizes, choose the Dpsv6 (D‑series v6) family, then select D4ps_v6.
 Select the D-Series v6 family of virtual machines
Under Administrator account, set Authentication type to SSH public key.
Enter the
Usernamefor the VM.Select Generate new key pair, select SSH key type (ED25519 or RSA), and provide a Key pair name.
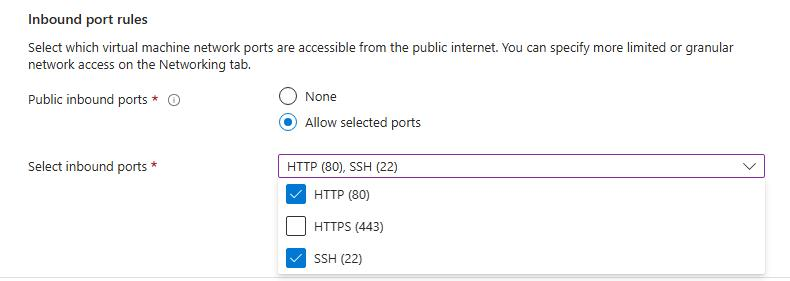
In Inbound port rules, set Public inbound ports to Allow selected ports, then select HTTP (80) and SSH (22).
 Allow inbound port rules
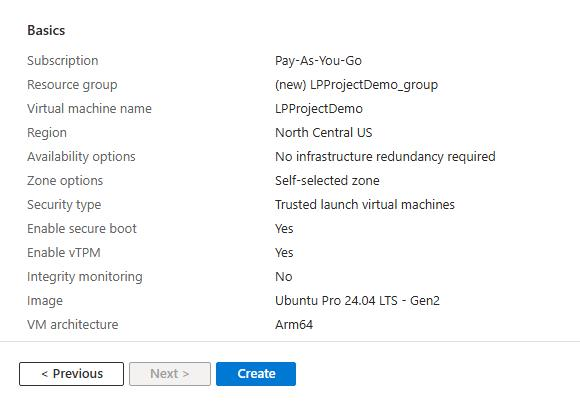
Select Review + create and verify your configuration.
 Review and create an Azure Cobalt 100 Arm64 VM
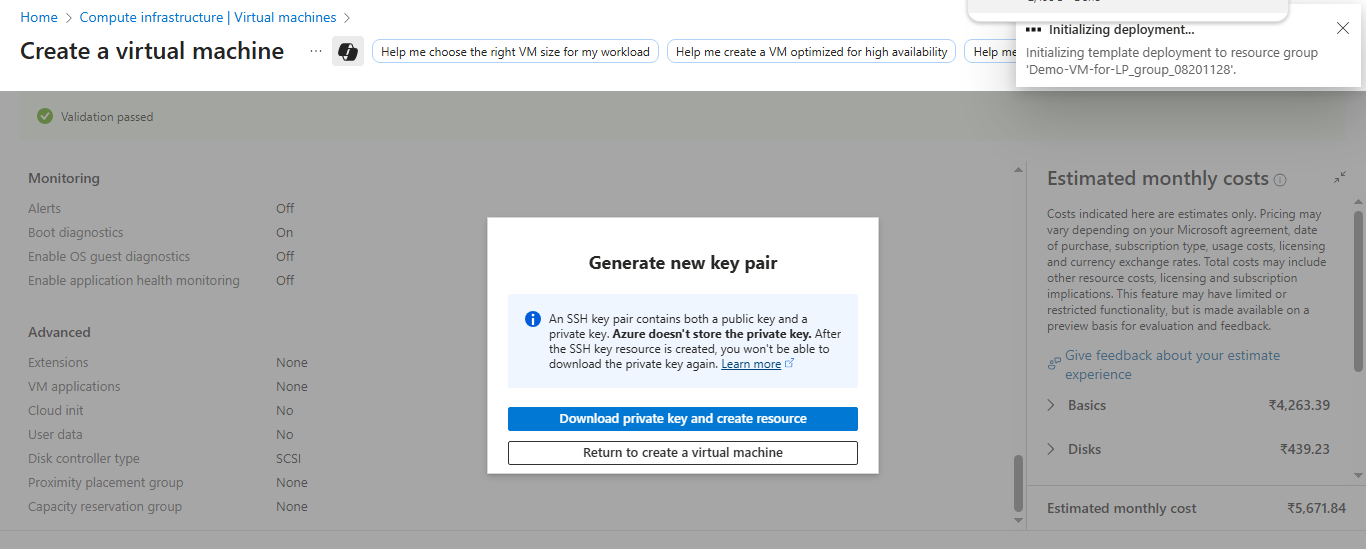
Select Create, then Download private key and create resource.
 Download private key and create resource
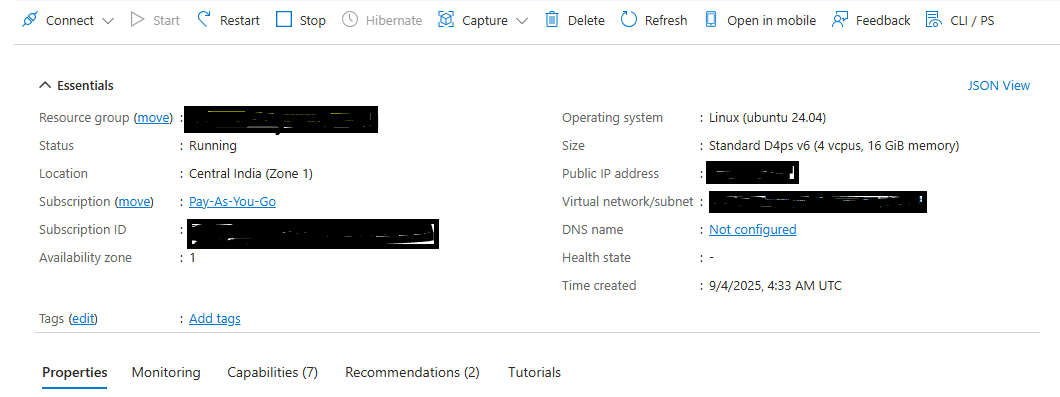
After deployment completes, select Go to resource. From Overview, copy the Public IP address and connect through SSH using your key.
 VM deployment confirmation in Azure portal
Connect to your VM (example)
Use the command below, replacing placeholders with your values:
ssh -i <path-to-private-key> <username>@<public-ip-address>
To learn more about Arm-based virtual machines in Azure, see “Getting started with Microsoft Azure” in Get started with Arm-based cloud instances .