Deploy a containerized application using Azure Container Instances
Introduction
Azure Container Instances
Access the application
Deploying a Docker container from the Azure Container Registry
Next Steps
Deploy a containerized application using Azure Container Instances
Recap
In the previous part of this learning path series, you pushed a container image to the Azure Container Registry. This container image can be now used to launch the application in the cloud using various services. Here, I will show you how you can use Azure Container Instances for this purpose.
At the time of writing, the Azure Container Instances service was not yet compatible with arm64 Docker containers. Therefore, I will use a sample ASP.NET application from the Microsoft Container Registry: mcr.microsoft.com/dotnet/samples:aspnetapp.
Then, we will see what happens if we try to deploy our Arm64 Docker container image to the Azure Container Instances.
Create an Azure Container Instance
In this section, you will create an Azure Container Instance using Azure Portal and deploy the sample ASP.NET application from the Microsoft Container Registry.
To begin, we log into the Azure Portal. Then, in the search box, we type Container instances, and select the first item on the list:
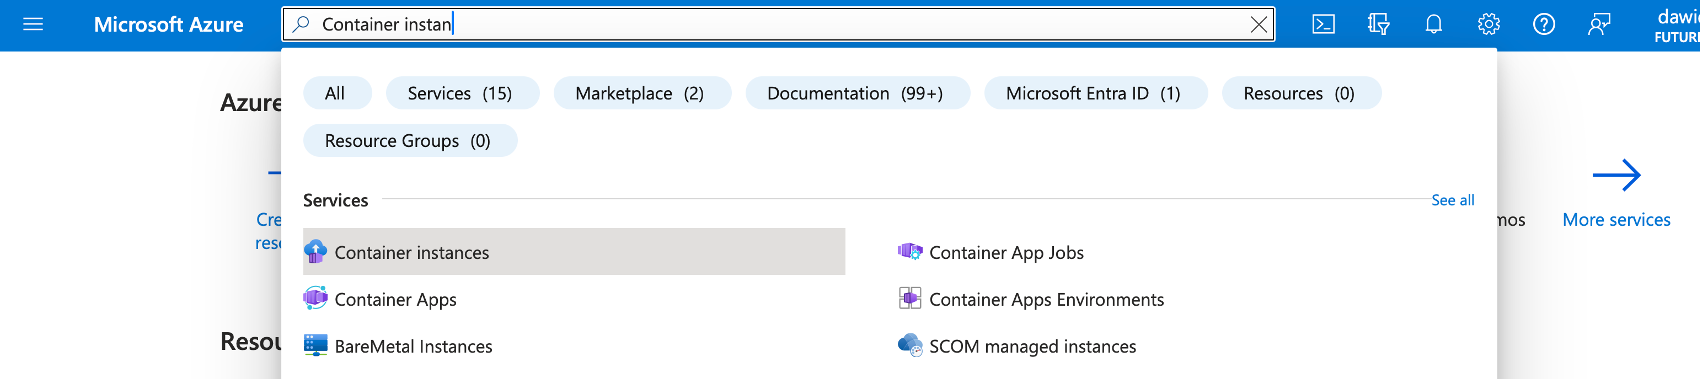
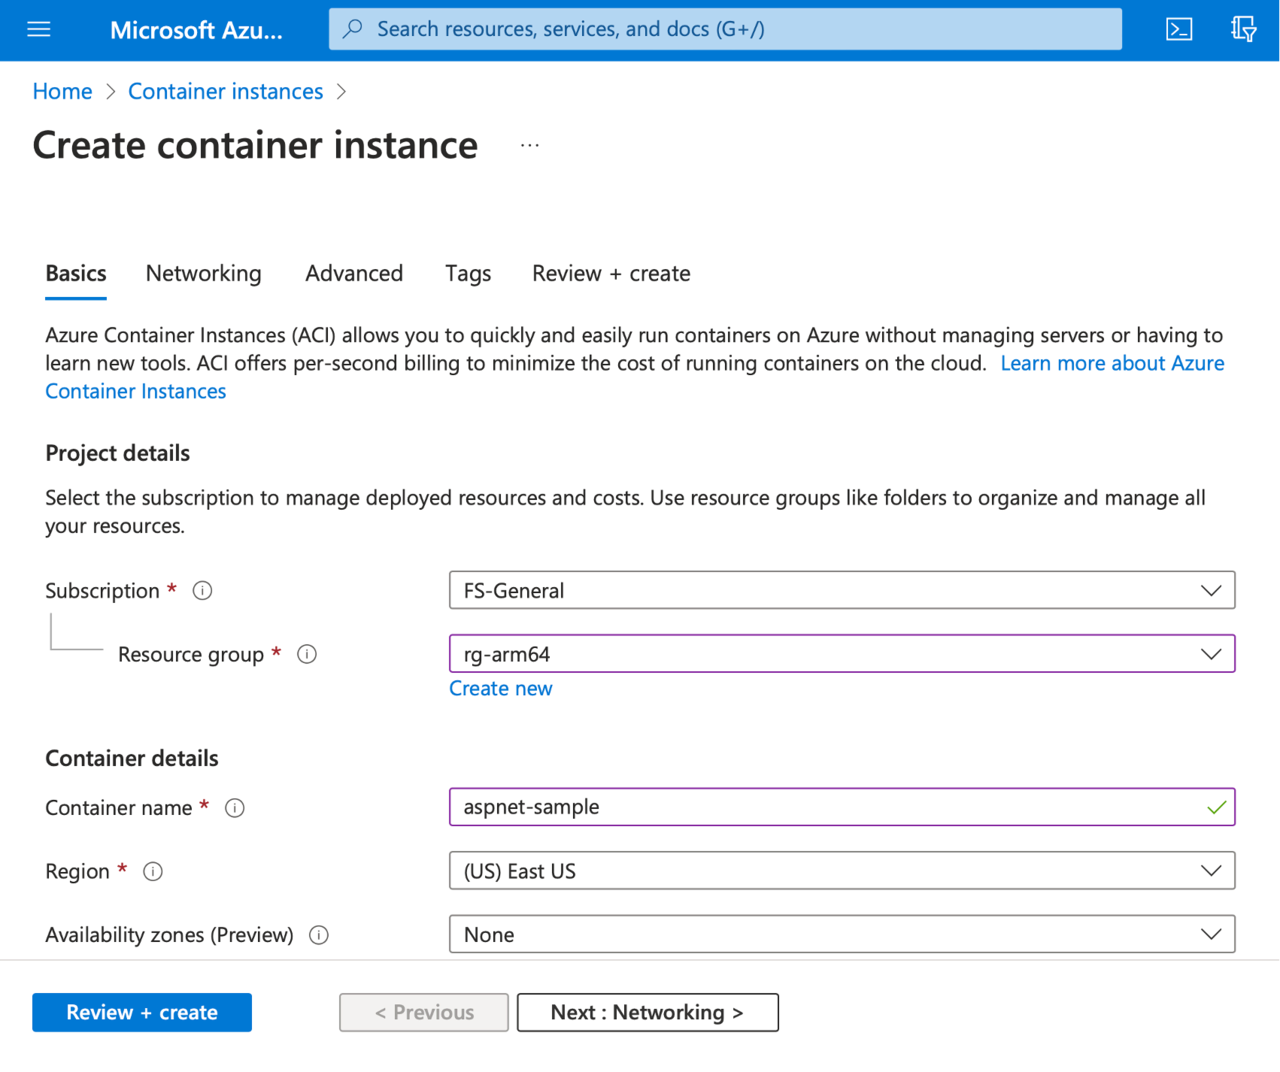
The above procedure will open the Container instances, in which you click the +Create button. This will activate the wizard, which you use to configure your Azure Container Instance:
- Subscription: Select your subscription
- Resource group: rg-arm64 (create a new group, if needed)
- Container name: aspnet-sample
- Region: East US (or select the region closest to your location)
- Availability zones: None or default
At this point, the Create container instance wizard will look as shown below:
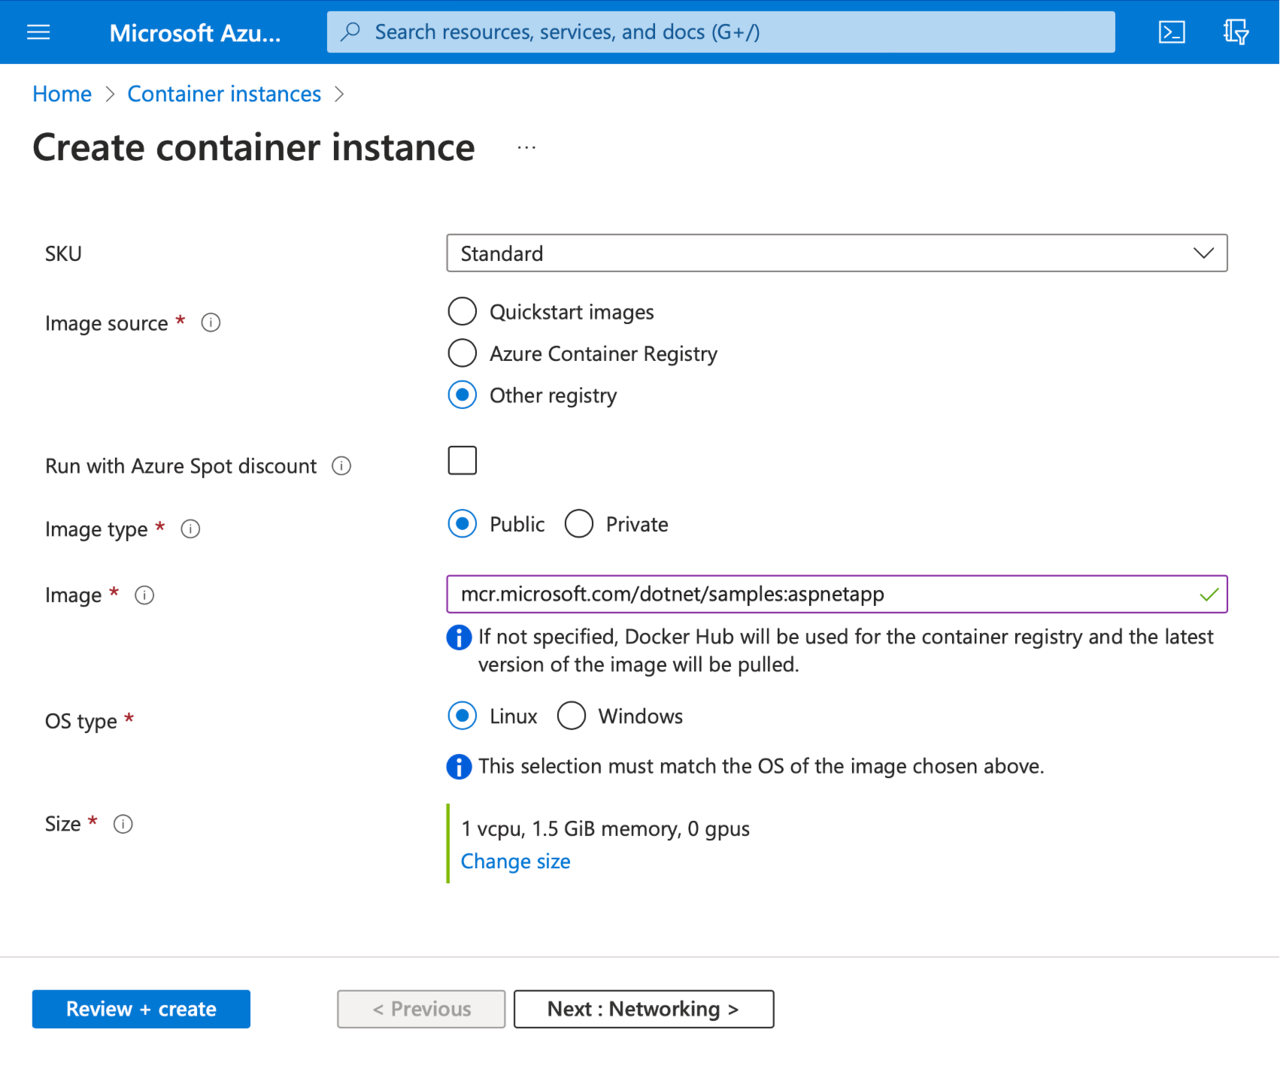
Then, continue with the other settings:
- SKU: Standard
- Image source: Other registry
- Run with Azure Spot Discount: Unchecked
- Image type: Public
- Image: mcr.microsoft.com/dotnet/samples:aspnetapp
- OS type: Linux
- Size: 1 vcpu, 1.5 GiB memory, 0 gpus (or choose any other size if this specific size is unavailable in the Azure region you used)
You should end up with the following configuration:
Now you will need to configure the port mapping. Let’s click the Next: Networking > button, and under the Networking tab scroll down to Ports. Then, add an 8080 port for the TCP protocol:
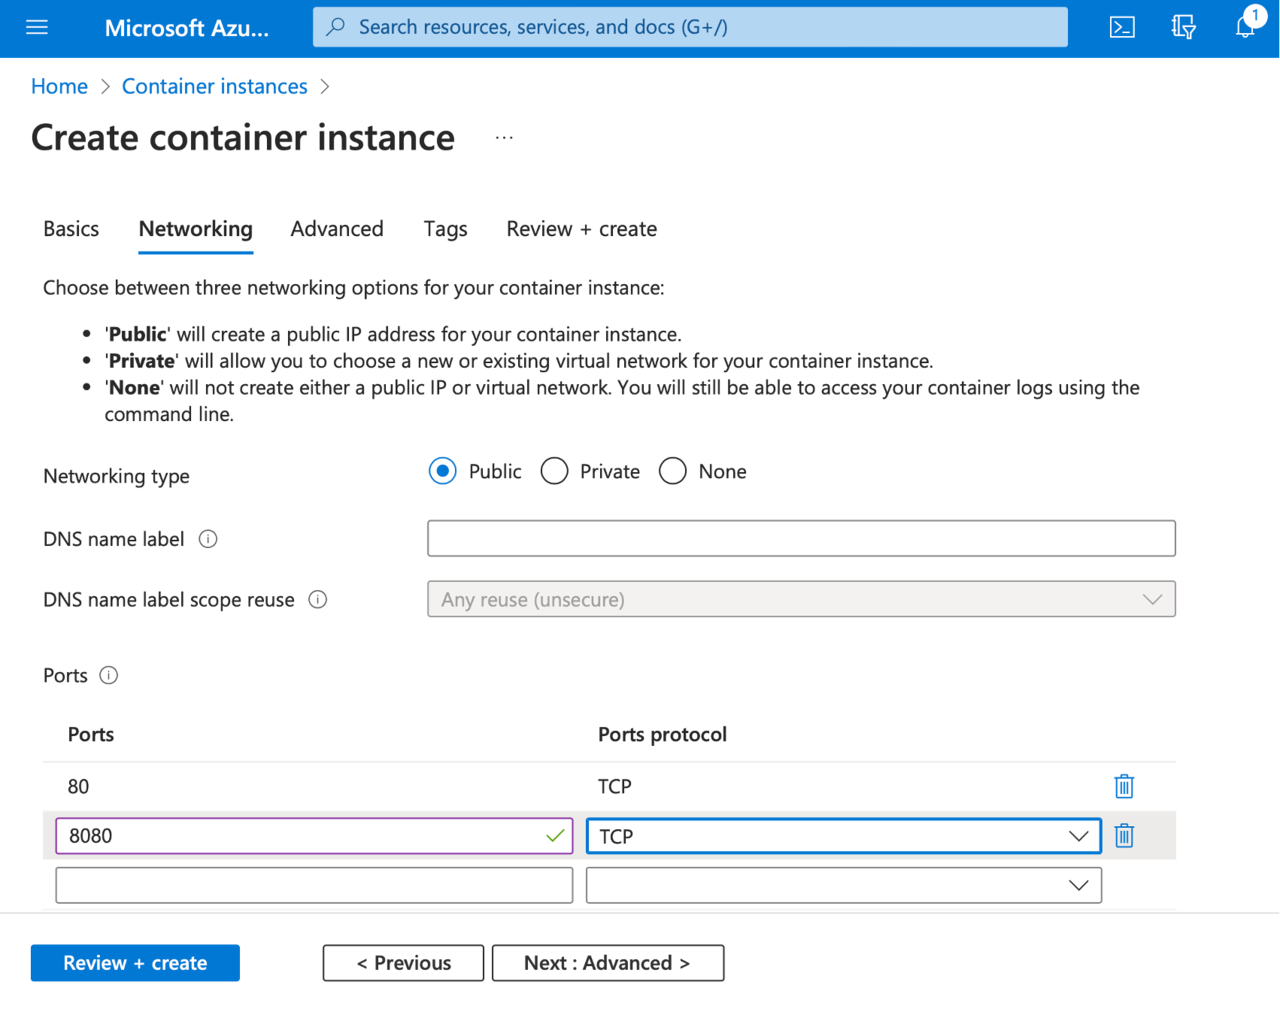
This setting enables us to create the port mapping, which will map port 8080 of the container instance to the corresponding point inside the running container.
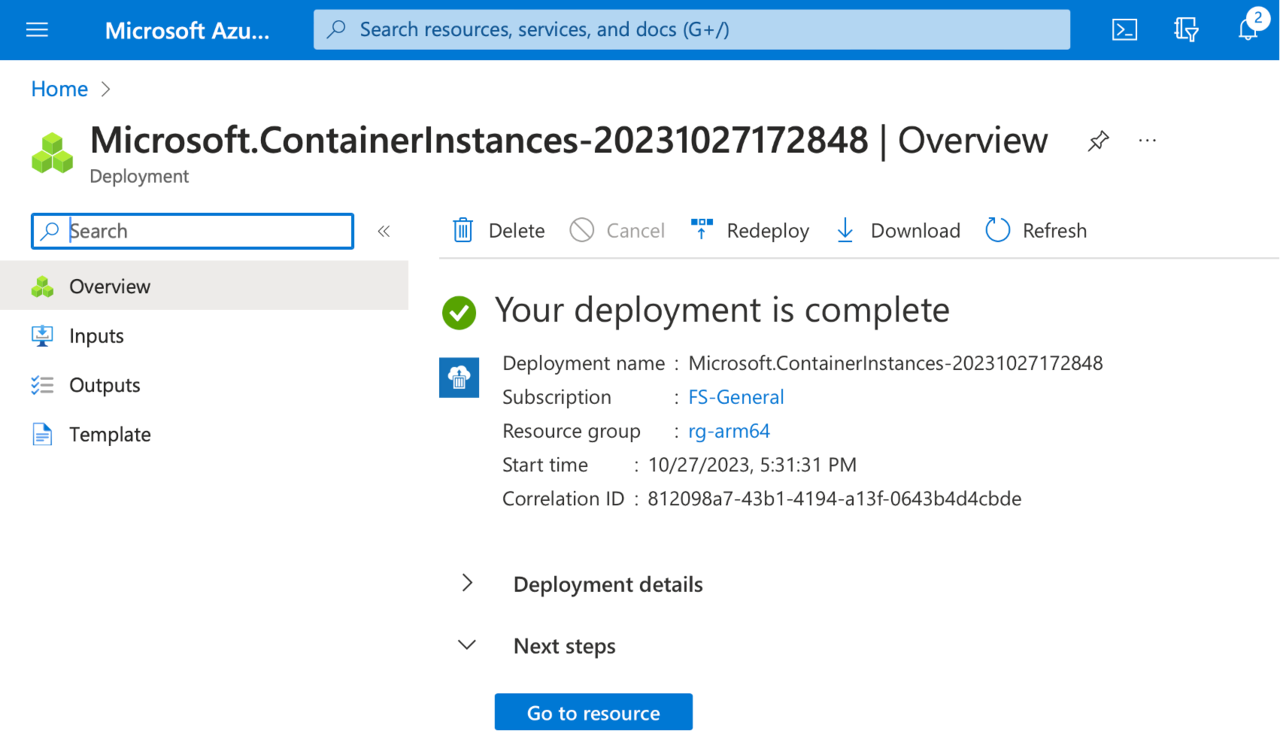
Finally, click the Review + create button. This will run the final validation of your configuration, and you will see the following screen:

Click the Create button, and wait a few moments for the resource to be created. You will then see the confirmation screen, where you click the Go to resource button.