Deploy containers on Amazon ECS with AWS Graviton processors
Introduction
Deploy containers using ECS on AWS Graviton processors
Deploy ECS containers on AWS Graviton processor using Terraform
Next Steps
Deploy containers on Amazon ECS with AWS Graviton processors
Deploy ECS containers on AWS Graviton processor
Amazon Elastic Container Service (ECS) is a fully managed container orchestration service that makes it easy to deploy, manage, and scale containerized applications. You will learn how to deploy a simple application to ECS and run it on a Fargate cluster. Fargate is a serverless service so you don’t need to worry about provisioning or maintaining EC2 instances (virtual machines). Fargate supports AWS Graviton processors so you can run containers for the Arm architecture. You will also learn how to create and configure the necessary Identity and Access Management (IAM) user and role permissions.
Before you begin
You should have the prerequisite tools installed before starting the Learning Path.
Any computer which has the required tools installed can be used for this section. The computer can be your desktop or laptop computer or a virtual machine.
Use the Docker install guide , the AWS CLI install guide , and the Terraform install guide if you need to setup any of these tools on your machine.
You will need an AWS account to complete this Learning Path. Create an account if you don’t have one.
Create an IAM user and assign permissions
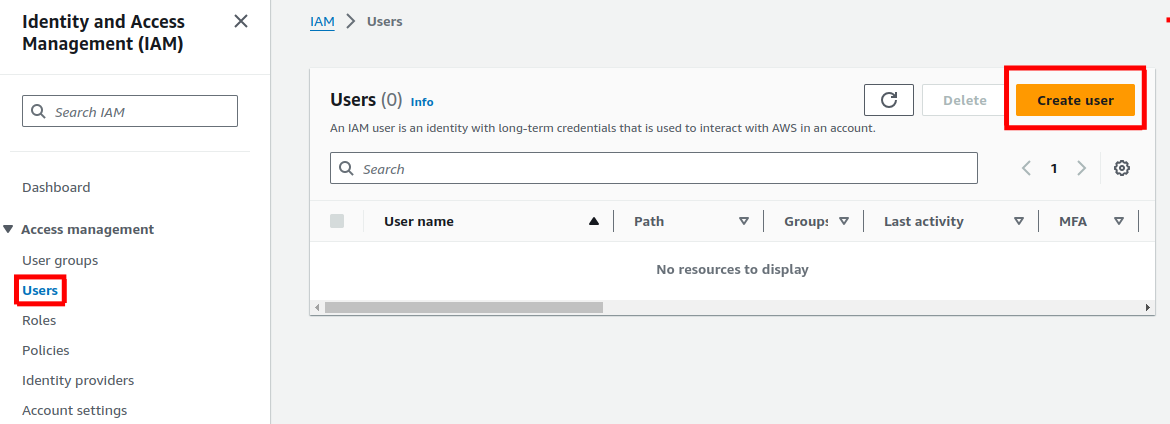
Login to your AWS account as the root user and search for IAM.

From the IAM dashboard select Users from the left menu and click on Create user from the top of the page.
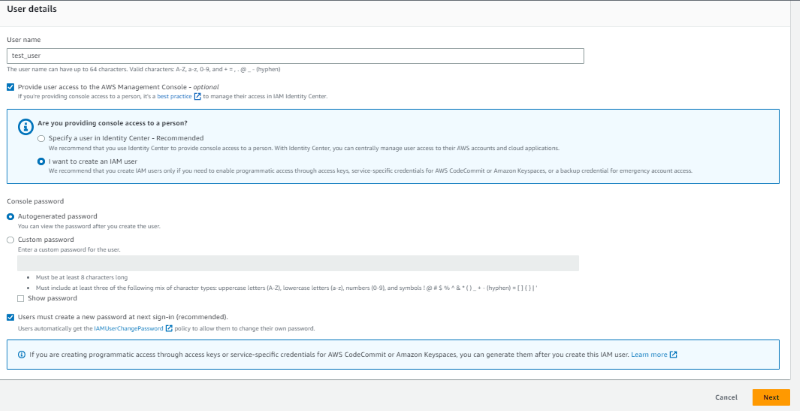
On the Create user screen enter a username and select the check box before Provide user access to the AWS Management Console and click Next
Create an ECR policy
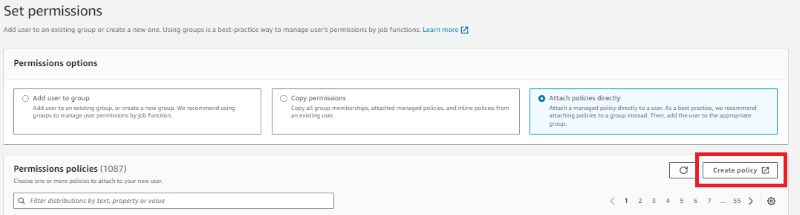
You will need access to the Amazon Elastic Container Registry (ECR) to store container images. You can create a new policy to attach to the IAM user.
To do so, select Create policy.
Under Service, select Elastic Container Registry.
Select All Elastic Container Registry actions (ecr:*) under Actions allowed.
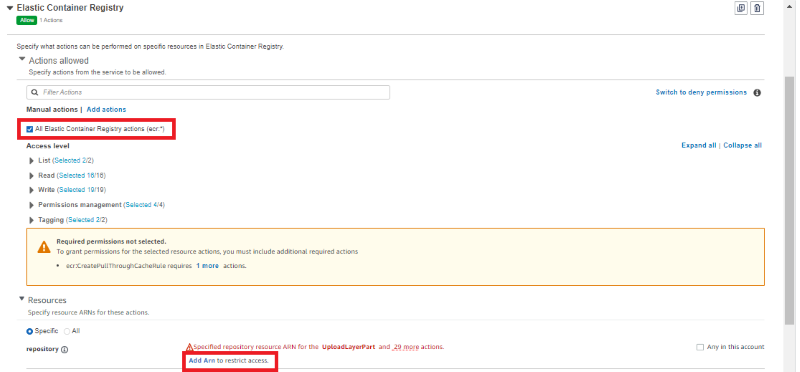
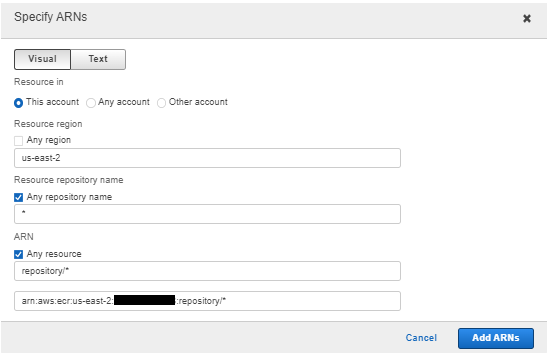
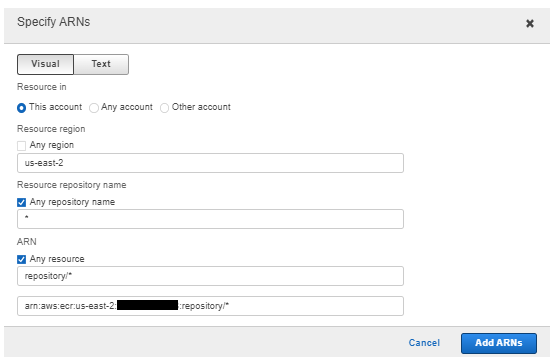
Under Resources, select specific and Add ARN. Here you can select the region and select Any for Repository name under This account and click on Add ARNs.
Skip the tags by clicking Next.
Fill in an appropriate policy name. You can use ECR_FullAccess and select Create policy.
Attaching the access policy
ECS requires permissions for services such as creating ECS clusters and launching containers.
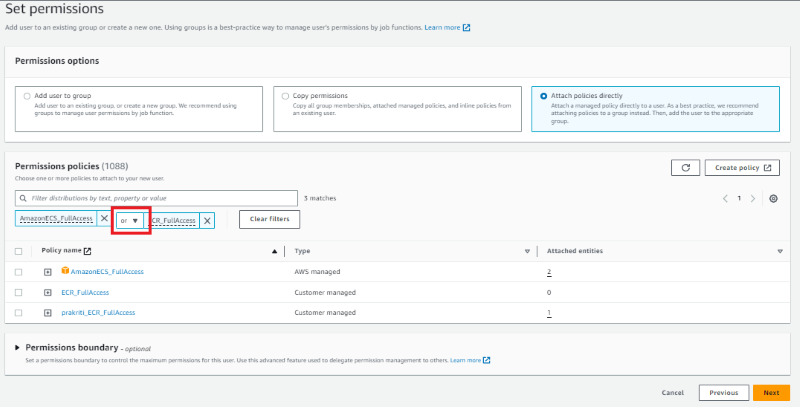
The best way to add permissions to the new IAM user is to use an Amazon managed policy to grant access.
Select Attach existing policies directly under Set permissions and search for AmazonECS_FullAccess & ECR_FullAccess.
Select the checkbox next to the policies.
Select Next to review and then Create user.

When you create the user you will see a confirmation screen.
Save the information in safe place. You will need it to deploy containers.
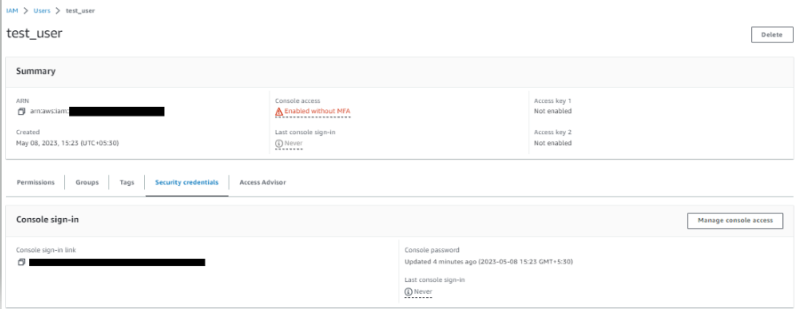
A new user is now visible on the IAM > Users page. Click on the user and go to the Security credentials section.
Click on Create access key

Select Command Line Interface (CLI) and click on Next
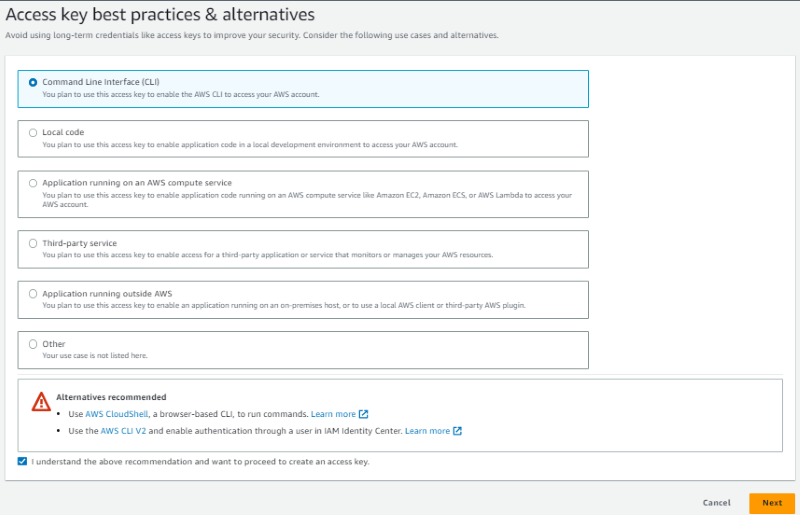
Add a description and click Create access key
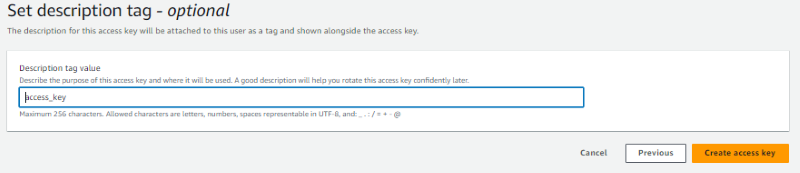
Save Access key and Secret access key, you will need them to configure the AWS CLI.
Create an Elastic Container Registry (ECR)
You can create a repository in ECR to store container images.
You will need the Amazon Resource Name (ARN), a unique identifier for all AWS resources, of the repository to properly tag and upload a container image.
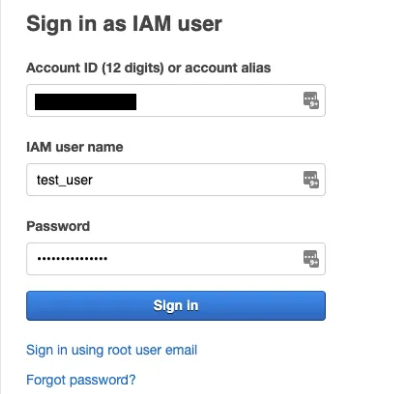
Log in to the AWS console with the test_user credentials you created earlier.
AWS will ask for your account id, username, and password.
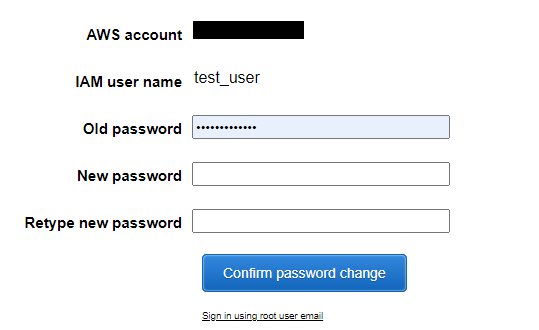
Change your password when prompted.
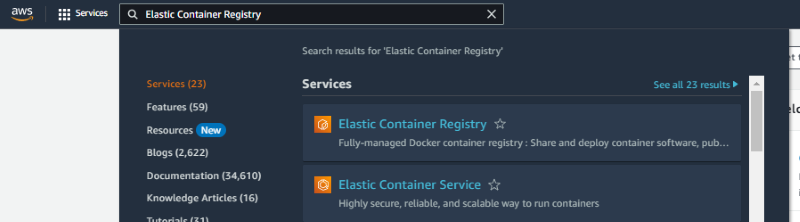
Once you log in, search for Elastic Container Registry.
From there fill in the name of the repository as myapp and leave the defaults for everything else.
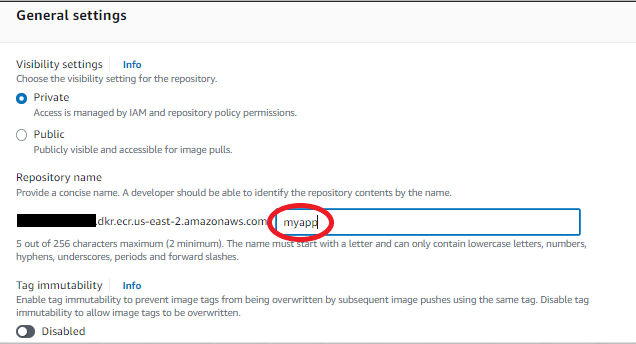
Select Create Repository in the lower right of the page and your repository will be created.
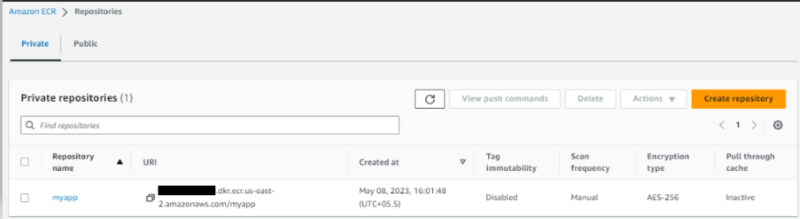
You will see your repository in the list, and the ARN (here it is called a URI for universal resource identifier) which you will need to push your container image to ECR.
Copy the URI for the next step.
Create the Docker image
You can use the Nginx web server as a test application.
You can either pull the image from Docker Hub or build it from source files. The instructions below use the container image from Docker Hub.
Download the Nginx image for Arm64 platform using the below command.
docker pull arm64v8/nginx
Tag the image with the ECR URI so it can be saved to the newly created ECR repository.
docker tag arm64v8/nginx [uri]
Replace [uri] with your respective URI
Log in to ECR
Configure CLI access to your AWS account using the access key and secret access key you saved.
Run the command below to configure the AWS CLI:
aws configure
The configure command will ask for the access key and secret access key you saved while creating the IAM user.
Next, generate an ECR log in token for Docker.
The ECR log in token is piped to docker login so you can push the container image to ECR using the Docker CLI.
Make sure to replace [your account number] with your account number.
aws ecr get-login-password --region us-east-2 | docker login --username AWS --password-stdin [your account number].dkr.ecr.us-east-2.amazonaws.com
If the command succeeds, you will see a Login Succeeded message.
Upload your Docker image to ECR
Use below command to push the image to the ECR repository.
docker push [your account number].dkr.ecr.us-east-2.amazonaws.com/myapp
Replace [your account number] with your AWS account number.
Create a Fargate cluster
Search for Elastic Container Service and select Elastic Container Service
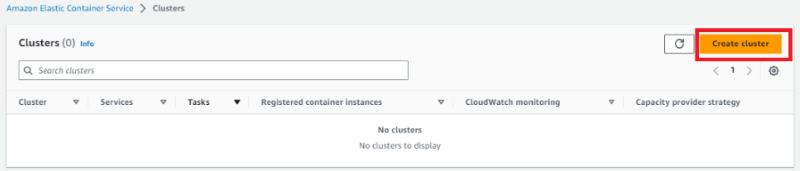
From the left menu select Clusters and then select Create cluster
Name the cluster and the leave the other options with the default values.
Select Create
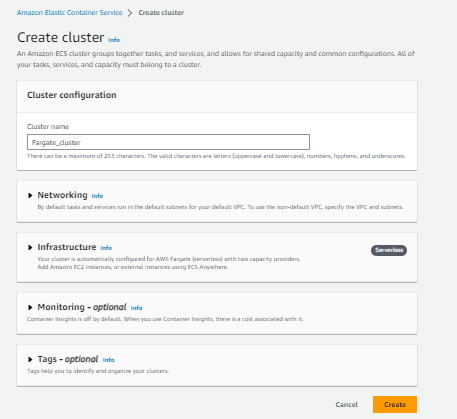
A cluster will be created as shown below:

Create an ECS task
An ECS Task is the action that takes your container image and deploys it as a running container.
To create an ECS Task do the following:
Select Task Definitions from the left menu. Then select Create new Task Definition

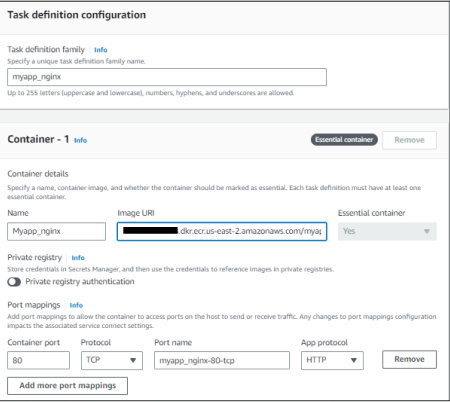
Enter the name of the Task definition family in Task definition configuration
Enter the name of your container and ARN of our image in the Image box.
You can copy this from the ECR dashboard if you haven’t already. Leave everything else with default values.
Click Next
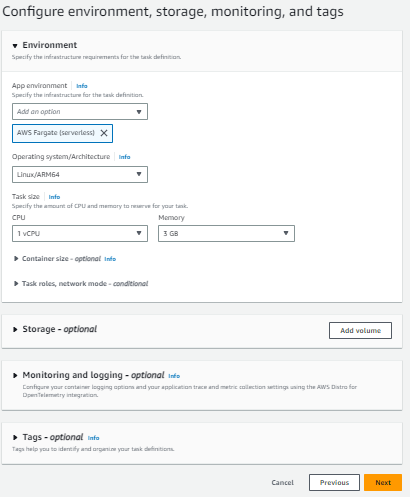
Under Environment Section, select Operating system/Architecture as Linux/ARM64 and leave everything else as default values.
Click Next in the lower right corner of the dialog.
Review everything and click on create
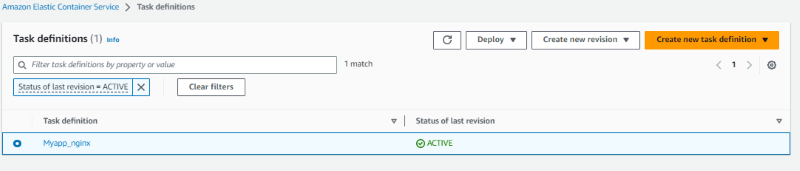
Go to the ECS page, select Task Definitions and you should see the new task with a status of ACTIVE.
Select the task in the task definition list.
Click Deploy and select Run Task

Select your cluster from drop down menu of Existing cluster.
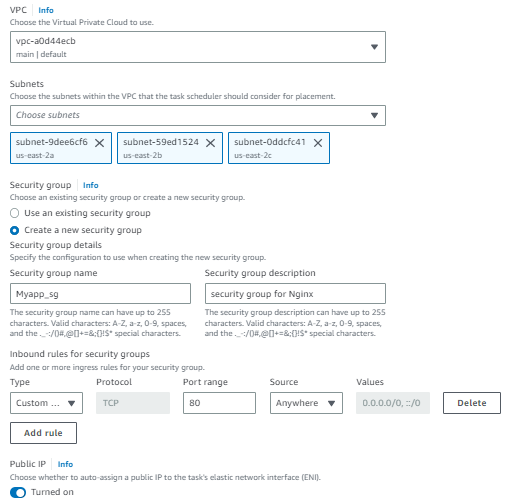
In Networking section, select a virtual private cloud (VPC) from the list. If you are building a custom app this should be the VPC assigned to any other AWS services you will need to access from your application. For Nginx, any VPC works. Add at least one subnet.
Edit the security group. Because Nginx runs on port 80 by default, and port 80 is open for the container, you also need to open port 80 in the security group.
Select Create a new security group and enter a Security group name and security group description and add a Custom TCP inbound rule that opens port 80.
Auto-assign public IP should be set to ENABLED.
Click on Create
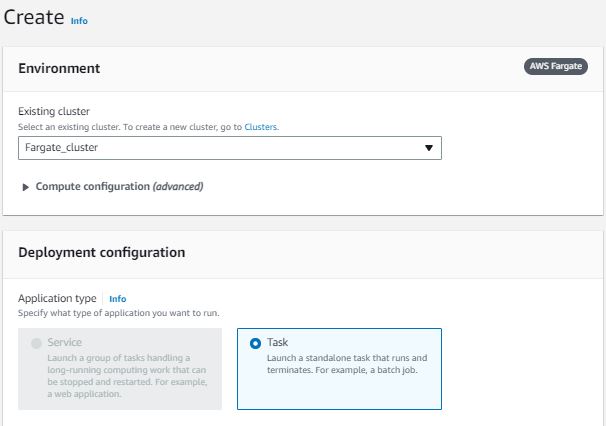
With everything set up, run the task by clicking Create in the lower right corner.
Check that Nginx is running
After you run the task, you will be forwarded to the Fargate-cluster page.
When the Last status of your cluster changes to RUNNING, your app is up and running.
You may have to refresh the table a couple of times before the status is RUNNING
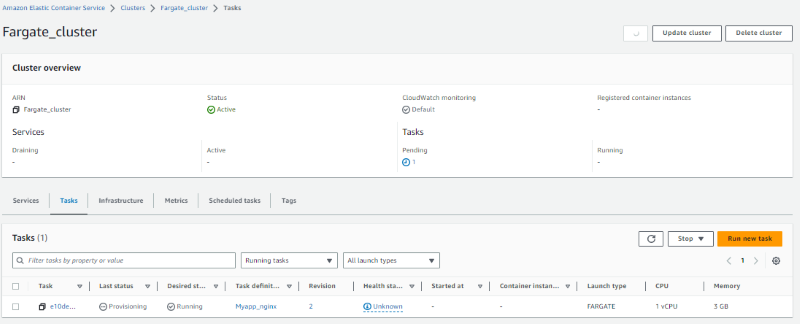
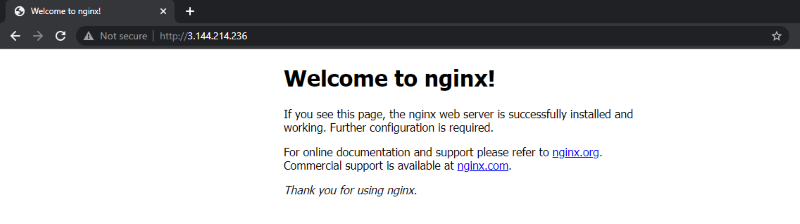
Click on the link in the Task column and find the Public IP address in the Configuration section of the Task page.
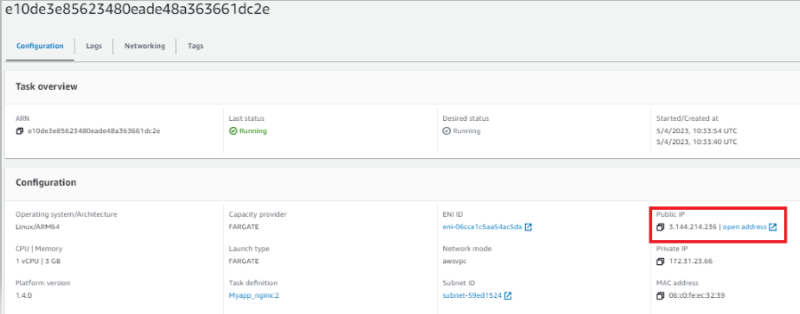
Enter the public IP address in your browser to see your app running.
Shut down the app
When you are done, you’ll want to shut down your Nginx application to avoid charges.
From the ECS page select Clusters from the left menu and select your cluster from the list of clusters.

From the table at the bottom of the page select Tasks.
Check the box next to the running task and select Stop from the dropdown menu at the top of the table.
