Monitor Azure Cobalt 100 Arm64 virtual machines using Dynatrace OneAgent
Introduction
Overview of Azure Cobalt 100 and Dynatrace
Create an Azure Cobalt 100 Arm64 virtual machine
Create a firewall rule on Azure
Install Dynatrace OneAgent on Azure Ubuntu Arm64 virtual machine
Install Dynatrace ActiveGate on Azure Ubuntu Arm64 virtual machine
Next Steps
Monitor Azure Cobalt 100 Arm64 virtual machines using Dynatrace OneAgent
Configure Azure firewall for Dynatrace ActiveGate
To allow external traffic on port 9999 for Dynatrace ActiveGate running on an Azure virtual machine, open the port in the Network Security Group (NSG) attached to the virtual machine’s network interface or subnet.
For more information about Azure setup, see Getting started with Microsoft Azure Platform .
Create a firewall rule in Azure
To expose the TCP port 9999, create a firewall rule.
Navigate to the Azure Portal , go to Virtual Machines, and select your virtual machine.
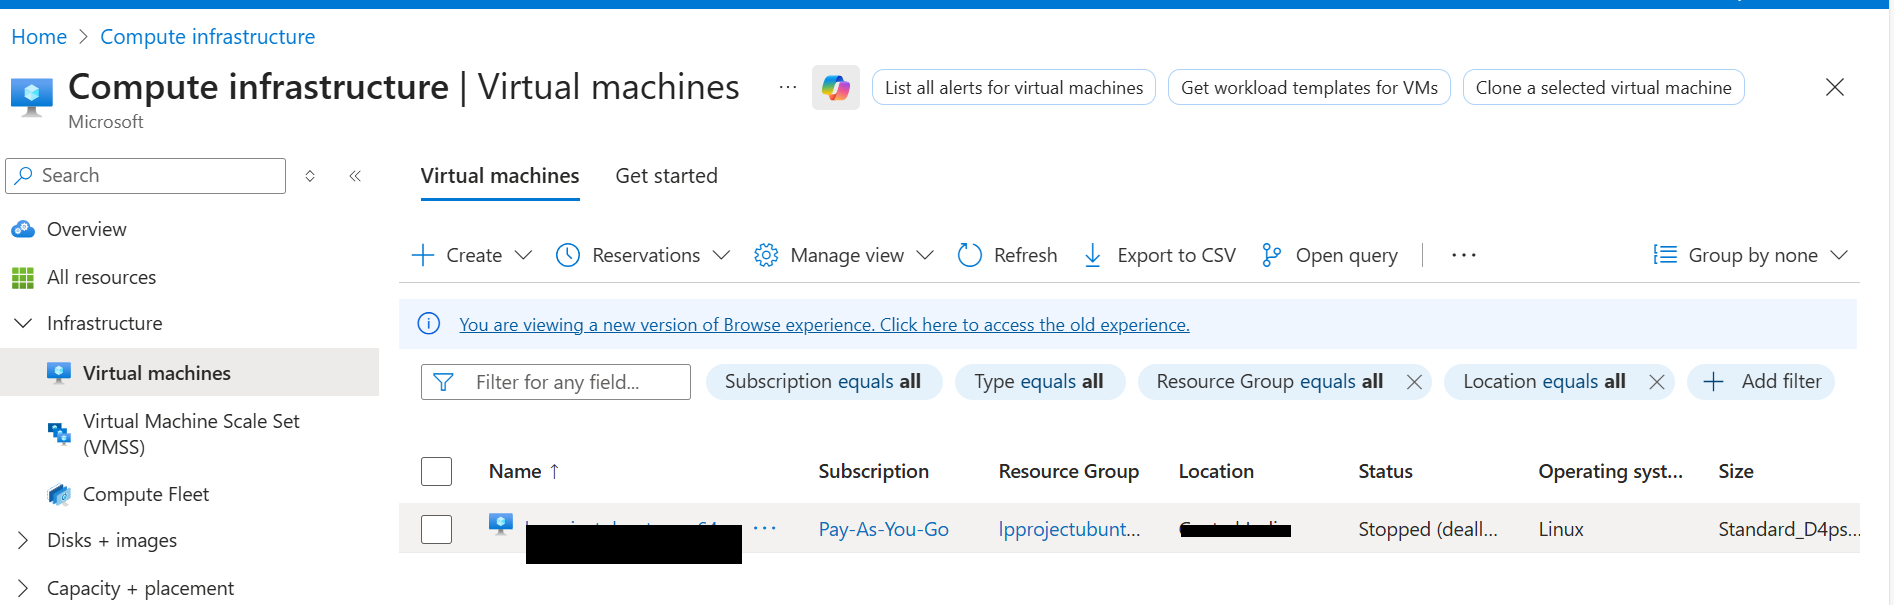 Virtual Machines
In the left menu, select Networking and in the Networking select Network settings that’s associated with the virtual machine’s network interface.
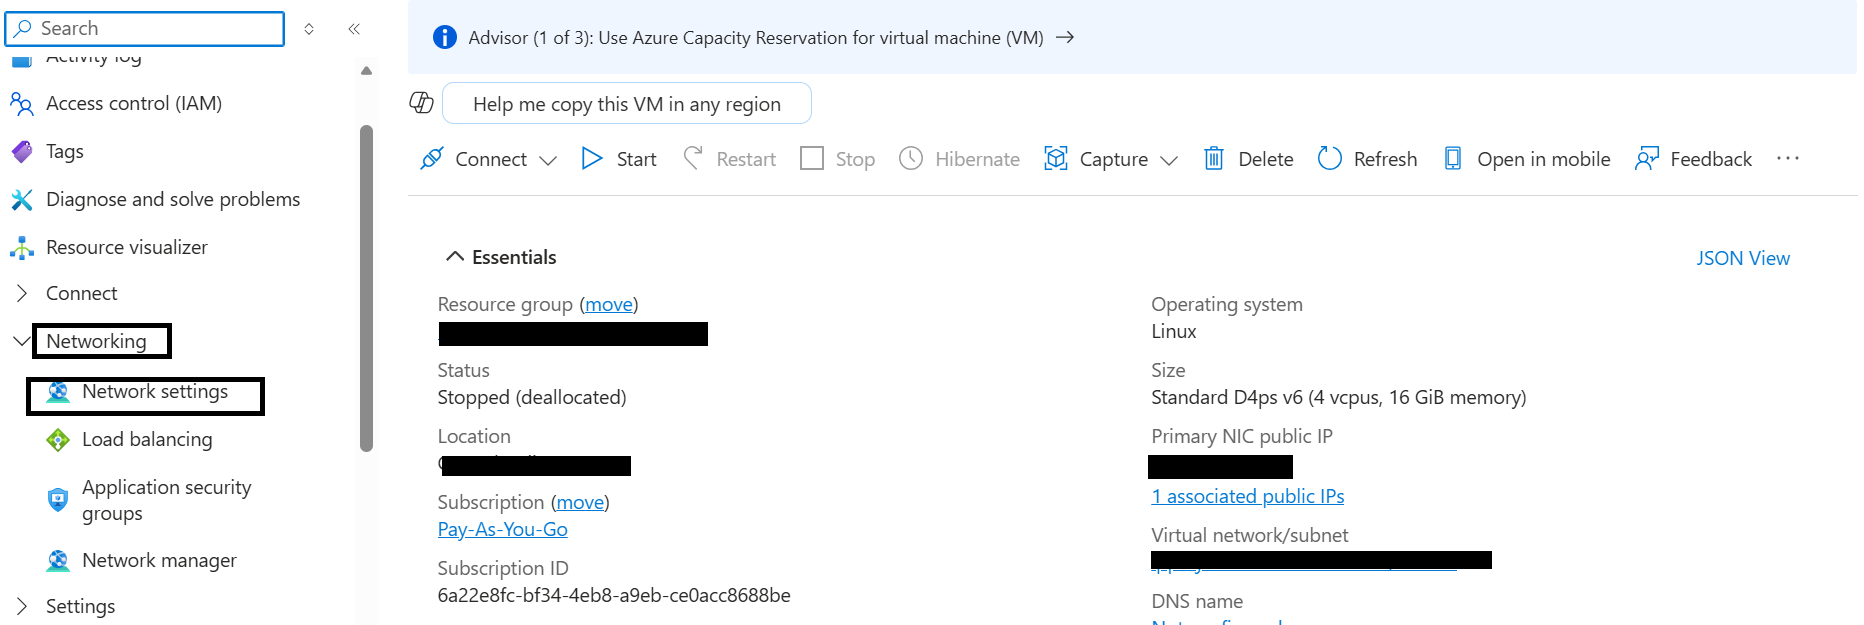 Network settings
Navigate to Create port rule, and select Inbound port rule.
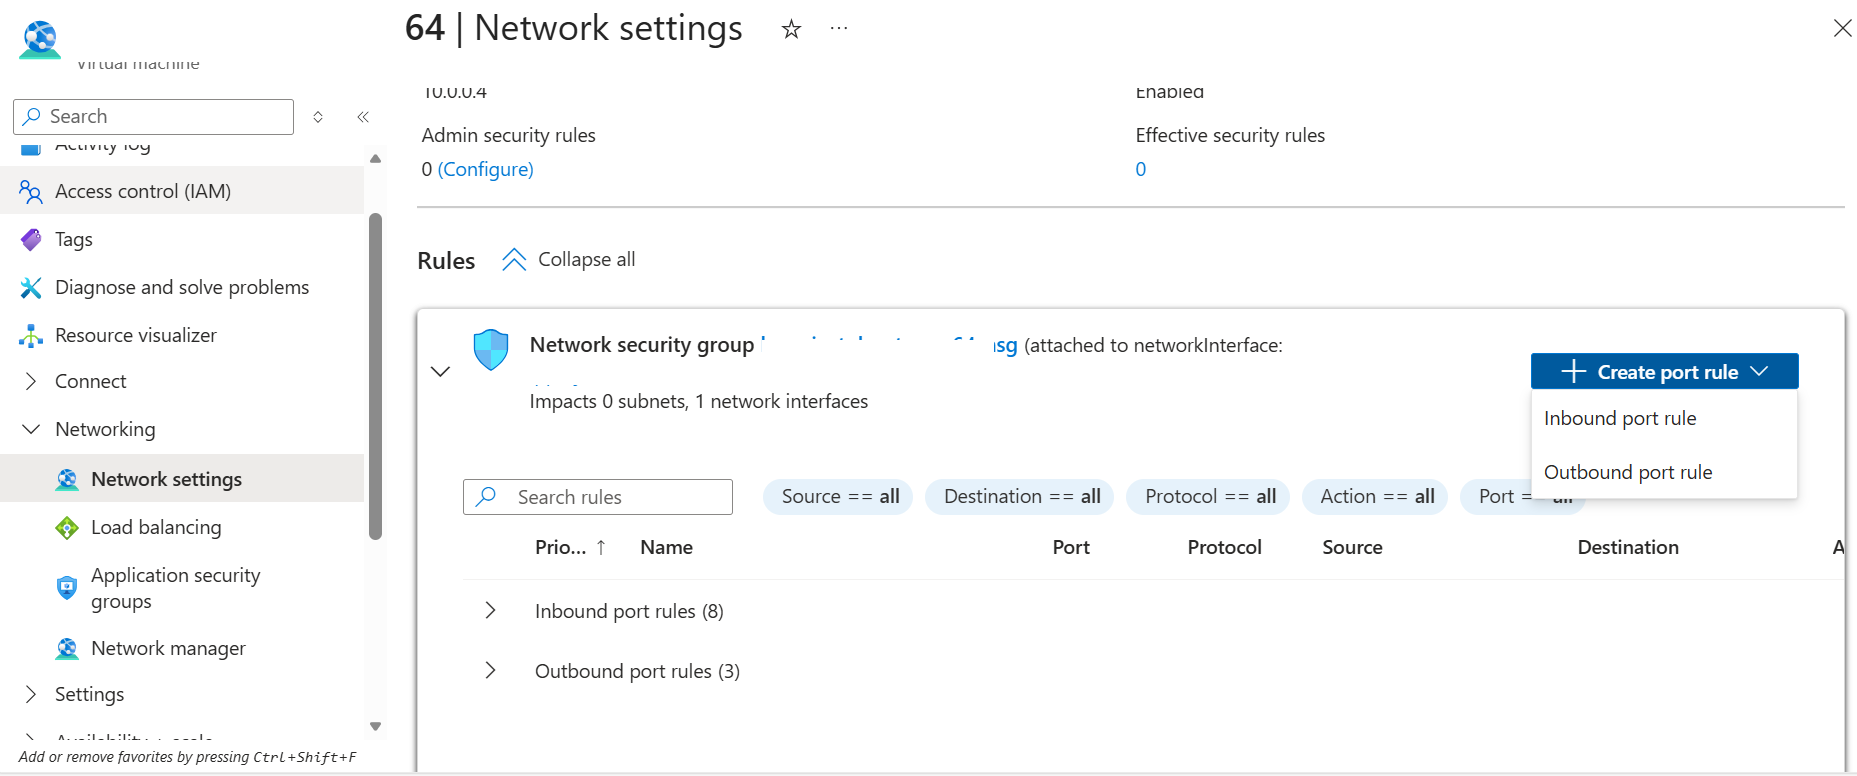 Create rule
Configure the inbound security rule with the following settings:
- Source: Any
- Source port ranges: *
- Destination: Any
- Destination port ranges: 9999
- Protocol: TCP
- Action: Allow
- Name: allow-tcp-9999
After filling in the details, select Add to save the rule.
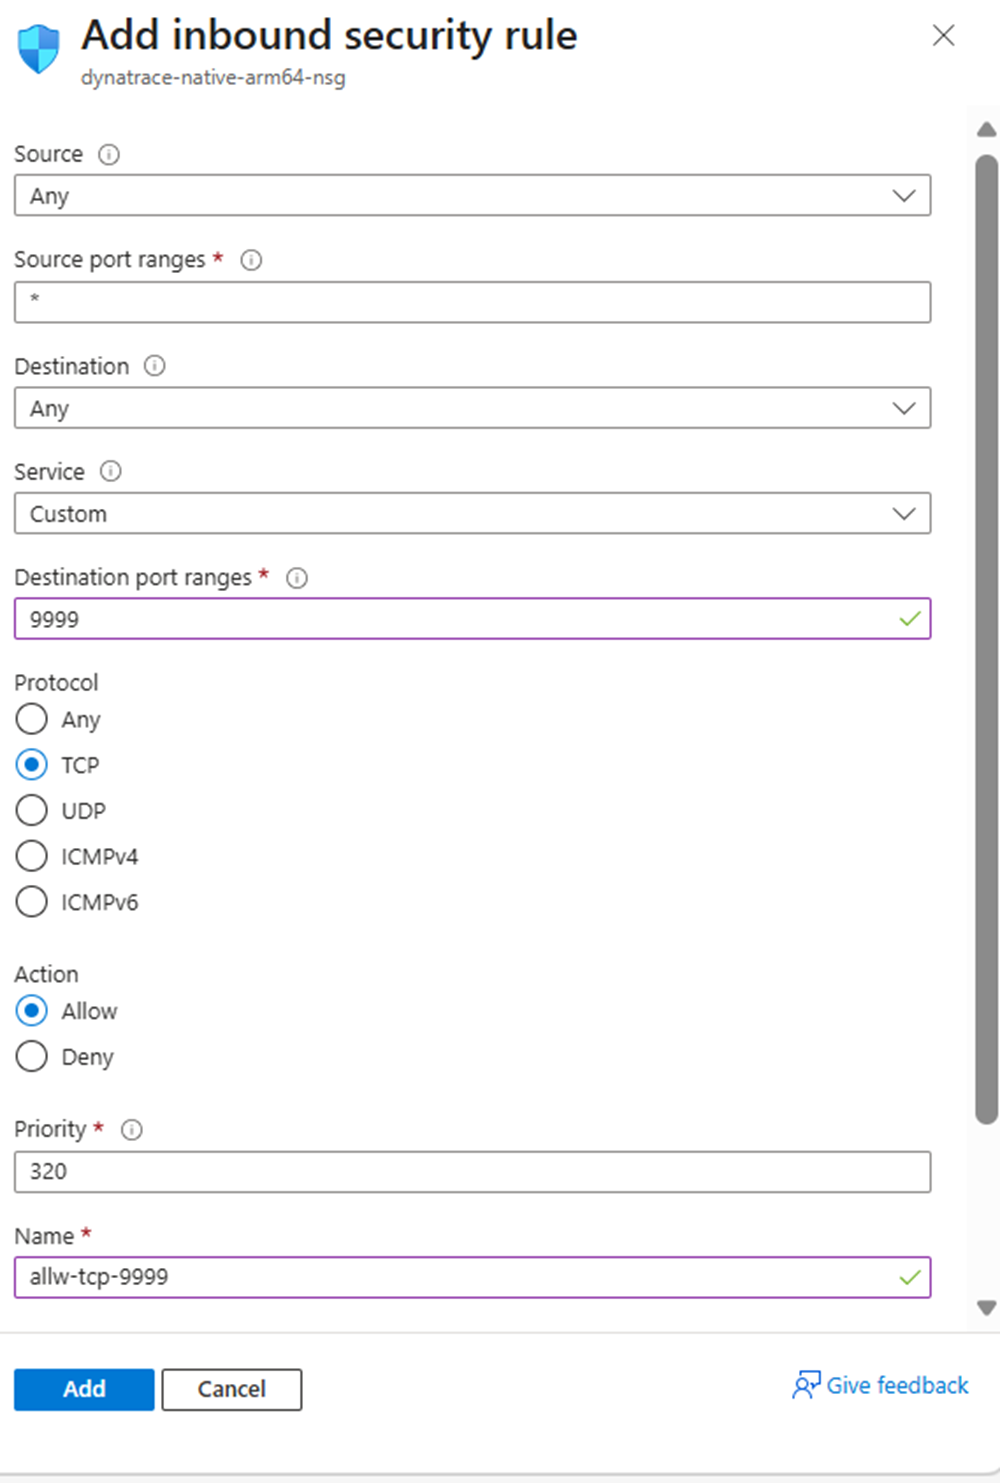 Network settings
The network firewall rule is now created, allowing Dynatrace ActiveGate to communicate over port 9999.
What you’ve learned and what’s next
You’ve configured the Azure Network Security Group to allow incoming traffic on port 9999. This firewall rule enables secure communication between your virtual machine and the Dynatrace platform when you install ActiveGate.
Next, you’ll install Dynatrace OneAgent on your Azure Cobalt 100 virtual machine to begin monitoring system resources and processes.