Oracle Cloud Infrastructure (OCI) is a public cloud computing platform.
As with most cloud service providers, OCI offers a pay-as-you-use pricing policy , including a number of free services.
This guide is to help you get started with compute services , using Arm-based Ampere processors. This is a general-purpose compute platform, essentially your own personal computer in the cloud.
Detailed instructions are available in the Oracle documentation .
Create an account
Before you start, creating an account. For a personal account, click on Sign in to Oracle Cloud , and follow the on-screen instructions to log in or register as a new user. You will get immediate access to OCI Cloud Free Tier services.
If using an organization’s account, you will likely need to consult with your internal administrator.
Once logged in, you will be presented with the Oracle Cloud console .
Create compartment
If this is your first time logging in, it is recommended to create a compartment to store your compute instances. Search for Compartments or navigate to Identity & Security > Compartments from the menu.
Navigate to the `Compartments` page
Use the Create Compartment button to start configuring your compartment.
Click on 'Create Compartment'
Create a compartment with a meaningful name (and optional description), for example Ampere_A1_instances. When finished, click Create Compartment. Full details on using compartments are described in the Oracle
documentation
.
Create a name and description for the compartment
Create your compute instance
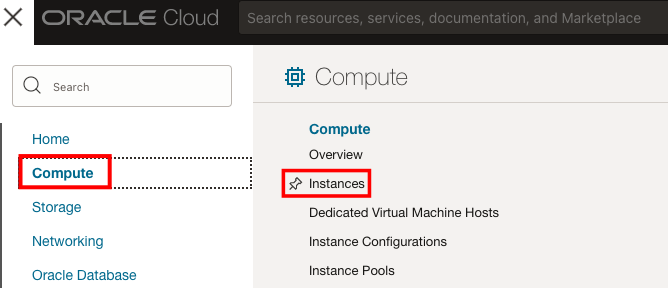
Search for Instances or navigate the menu to Compute > Instances.
 Navigate to the 'Instances' page
Use the Create Instance button to get to the Create compute instance dialog.
Click on 'Create instance'
Name your instance
Give your instance a meaningful, but arbitrary, name. This is particularly useful when creating multiple instances. Select the compartment you created above to be the location for this instance.
Specify a name for the instance and select your compartment
Placement
These settings are generally left as default. See the Oracle documentation for a full description.
Choose availability domain placement
Select instance image and shape
Click the Edit button to configure which OS image and instance shape you will use.
Click 'Edit' to change the image and shape
Click Change image to select the operating system image.
Click `Change image'
Several images are available from the
marketplace
, but for now, select a standard image, such as Canonical Ubuntu 22.04 from the list of Platform images. Click Select image to confirm.
Choose a standard image
Click Change shape, to select the instance type and processor series.
Click `Change shape'
Select the Ampere Arm-based processor shape series. Select the Shape name (for example VM.Standard.A1.Flex), and use slider to select the number of processors you wish to use. At the time of writing, the free tier allows up to 4 Ampere processors (across all instances) to be used. Click Select shape to confirm.
Choose an Ampere Arm-based processor shape
Networking
These settings can likely be left as default. Ensure that a public IP address is assigned so that you can access the instance.
Configure network settings if necessary
Add SSH keys
To be able to access the instance, you must use a key pair . Use the dialog to generate a new key pair and download the private key to your local machine, or you can upload an existing public key if you have one.
Note that if you do not generate a key and have access to the private key, you will not be able to connect to the instance.
Create or upload a key pair
Boot volume and other advanced options
These can likely be left as default. See the Oracle documentation for settings information if necessary.
Configure boot volume and advanced options if necessary
Launch instance
When all options are set, click Create to get started.
Create the VM instance
Your compute instance will be created and be available after initialization, when status is shown as RUNNING. Note the Public IP address and Username of your instance as you will need these to connect to your instance.
Confirm the instance is running and note instance details
Connect to your instance
You can connect to the instance with your preferred SSH client. For example, if using ubuntu image:
ssh -i <private_key> ubuntu@<public_ip_address>
Replace <private_key> with the private key on your local machine and <public_ip_address> with the public IP of the target VM.
Terminal applications such as PuTTY , MobaXterm and similar can be used.
Detailed instructions are given in the Oracle documentation .
Once connected, you are now ready to use your instance.
Explore your instance
Run uname
Use the uname utility to verify that you are using an Arm-based server. For example:
uname -m
will identify the host machine as aarch64.
Run hello world
Install the gcc compiler. Assuming you are using Ubuntu, use the following commands. If not, refer to the
GNU compiler install guide
:
sudo apt-get update
sudo apt install -y gcc
Using a text editor of your choice, create a file named hello.c with the contents below:
#include <stdio.h>
int main(){
    printf("hello world\n");
    return 0;
}
Build and run the application:
gcc hello.c -o hello
./hello
The output is shown below:
hello world