Alibaba Cloud is a public cloud computing platform.
As with most cloud service providers, Alibaba Cloud offers a pay-as-you-use pricing policy , including a number of free services.
This guide is to help you get started with their Elastic Compute Service (ECS) , using Arm-based processors. This is a general-purpose compute platform, essentially your own personal computer in the cloud.
Detailed instructions are available in the Alibaba Cloud documentation , as well as their ECS Learning Path .
Create an account
Before you begin, create an account. For a personal account, click on Free Trial , and follow the on-screen instructions to register. You can select an individual or business account.
If using an organization’s existing account, you will likely need to consult with your internal administrator.
Browse for an appropriate instance type
Alibaba Cloud offers a wide range of instance families , covering all performance (and pricing) points. Select an appropriate Arm-based type for your needs. You may also wish to note in which region the instance family is available.
You then select an instance size, which will be one of a number of pre-defined configurations of a number of processors and available memory. If you are unsure what your compute needs are, don’t worry, you can easily experiment with different configurations.
Create your ECS instance
The easiest way to launch your instance is via the ECS Console .
Navigate to Elastic Compute Service by search or the menu.
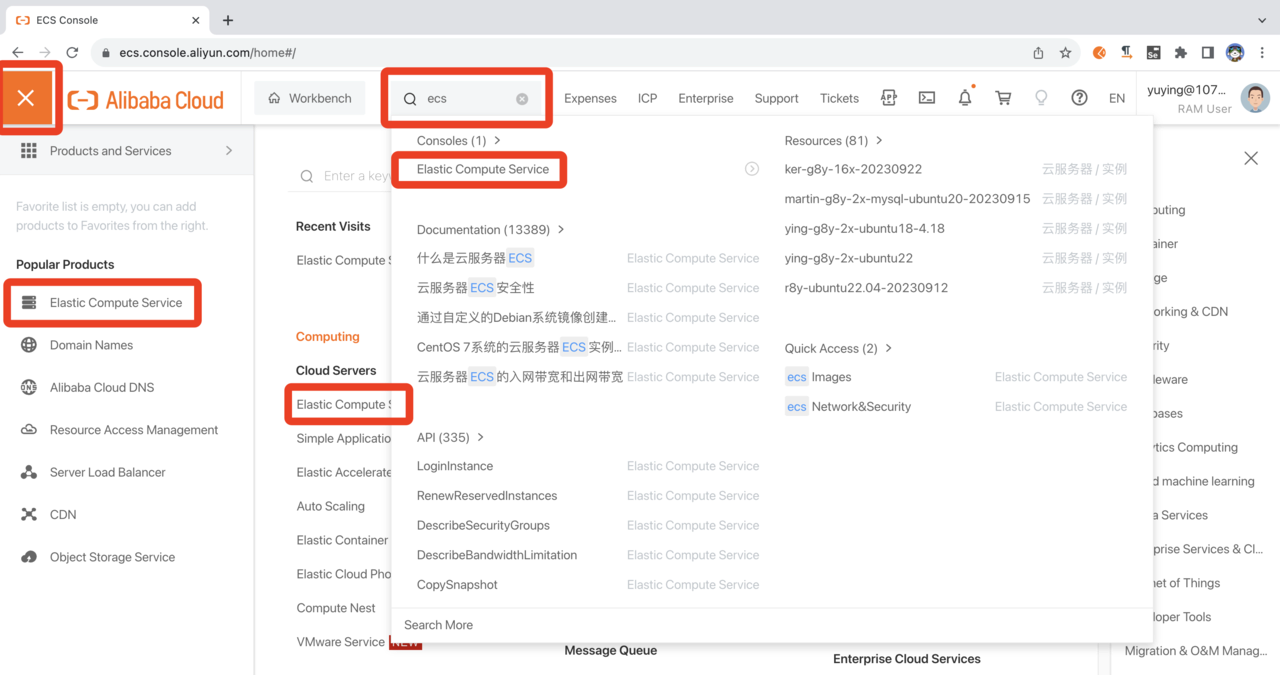 Navigate to the ECS Dashboard
Use the Create ECS Instance button to get started. Select Custom Launch configuration.
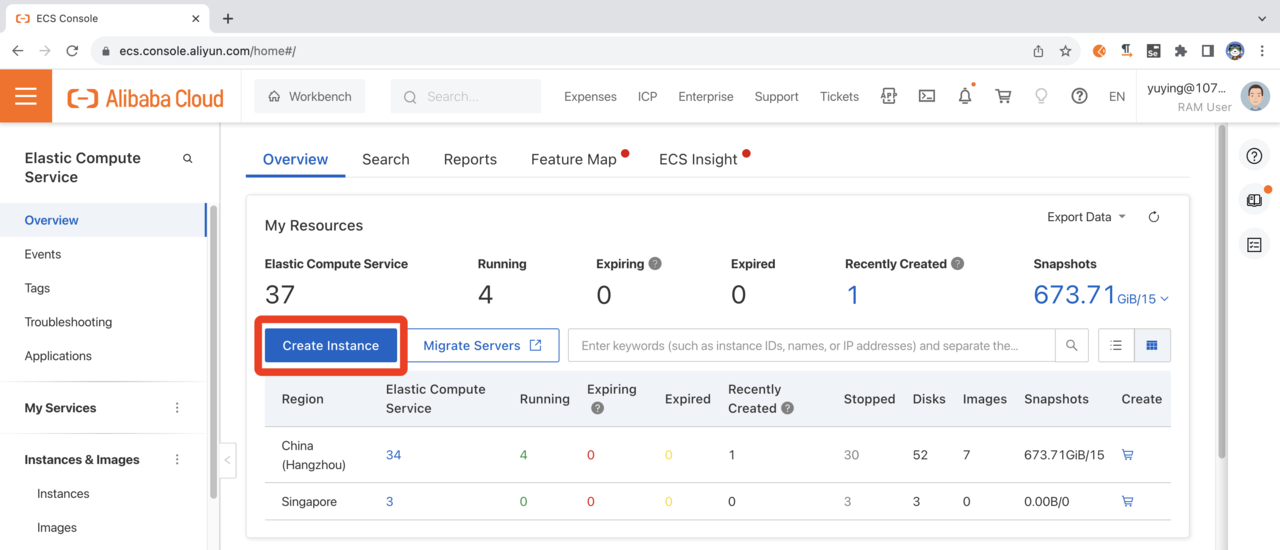 Create Instance
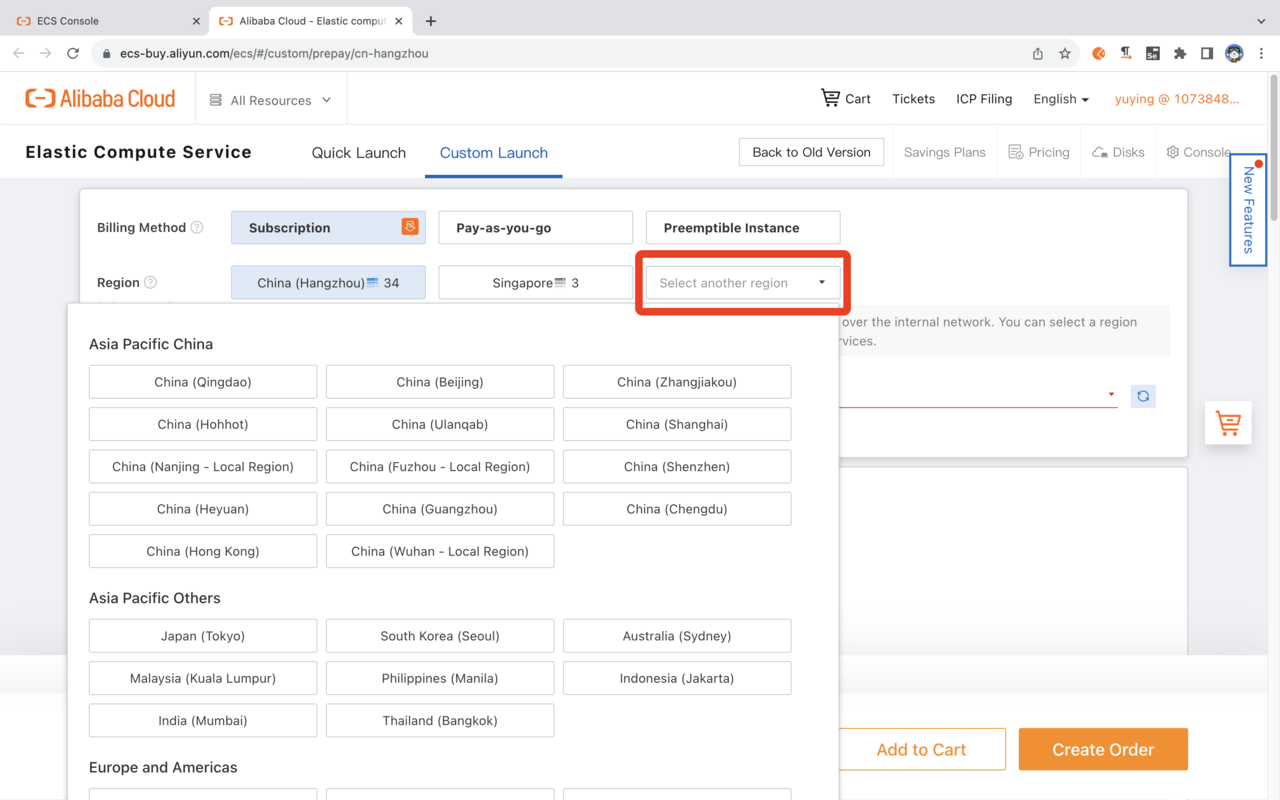 Custom Launch
Select a Billing Method
Subscription, Pay-as-you-go, or Preemptible Instance options are available. If you are experimenting initially, select Preemptible Instance for the lowest cost. You will be prompted for pricing options later.
 Select a Billing Method
Select Instance Type
Using the Type-based Selection tab, set Architecture as ARM, and Category as General Purpose, to see the available instance types. If you already know the desired instance type, you can enter this in the filter.
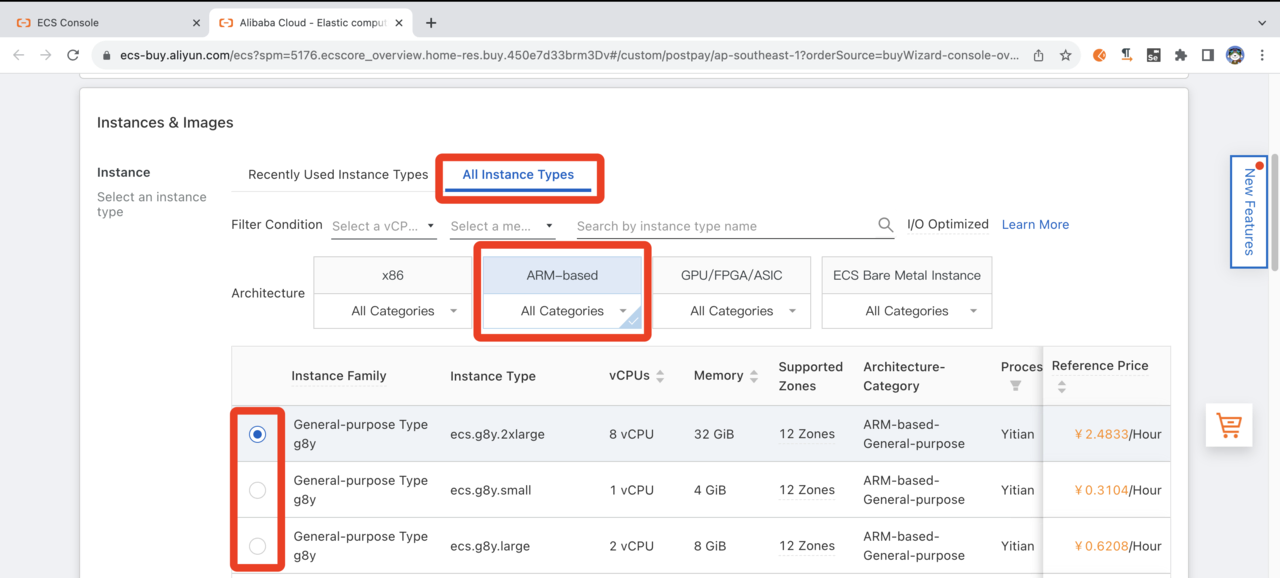 Select Instance Type
Select OS image
There are many images available on the Alibaba Cloud Marketplace , providing pre-installed or pre-configured setups.
For now, select Ubuntu version (e.g. 20.04 64-bit for ARM) from the pull-down menu.
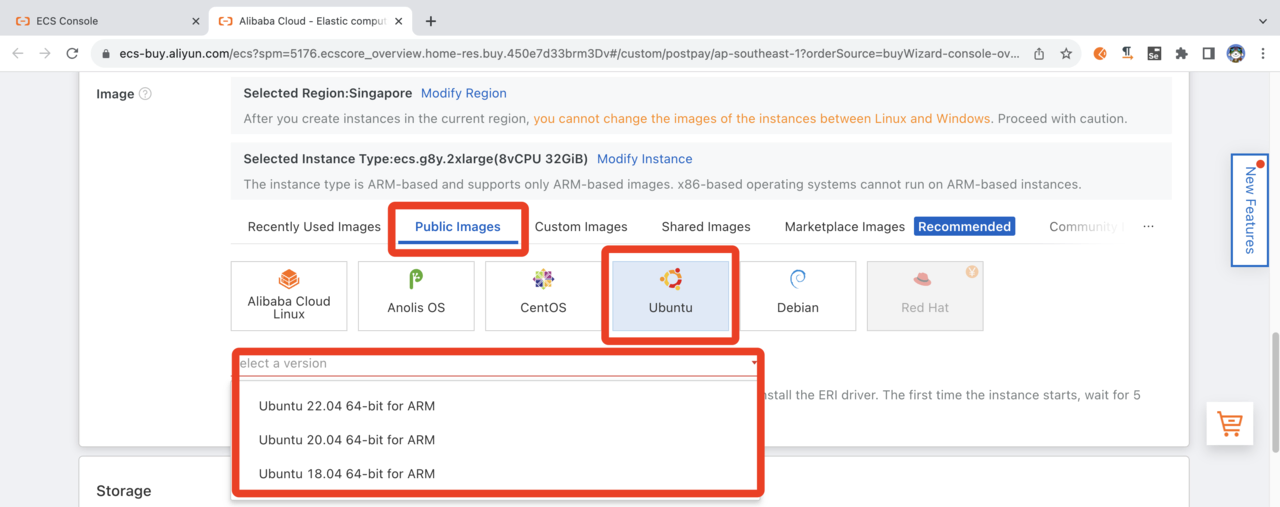 Select OS Image
Other settings
Other settings, such as storage size are selectable. For now, use the default selection. Click Next to move to Networking. Proceed with the default selection for Networking. Click Next to move to System Configurations.
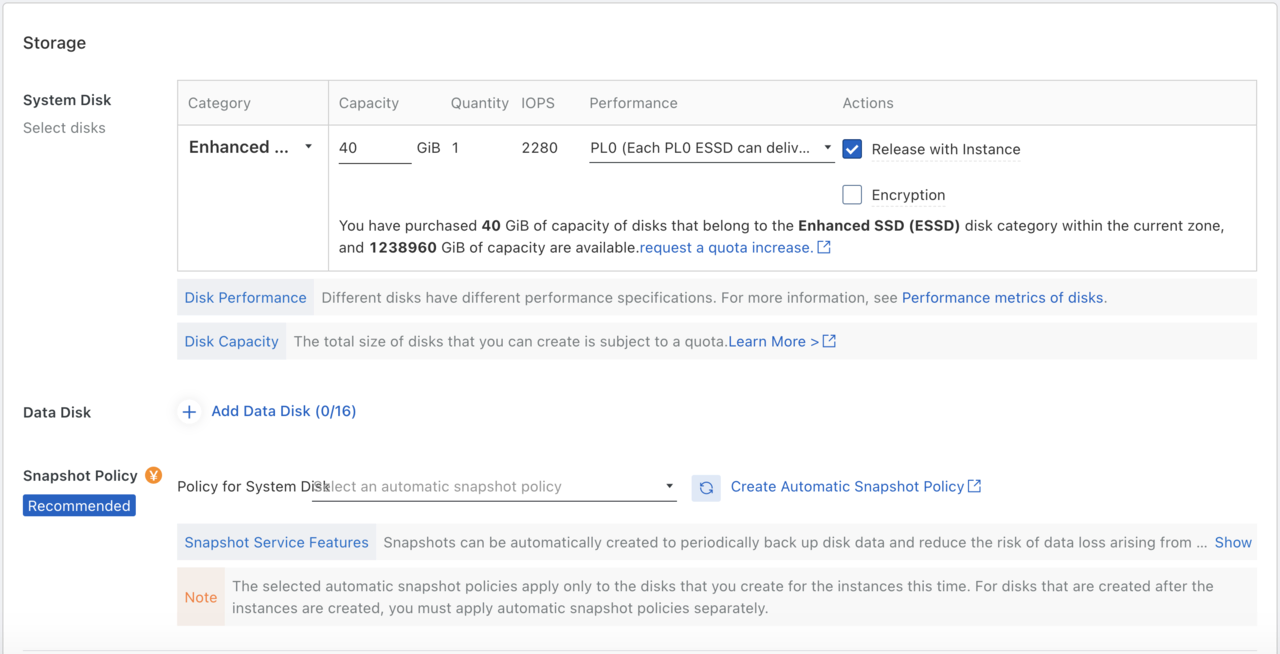 Configure Storage Options
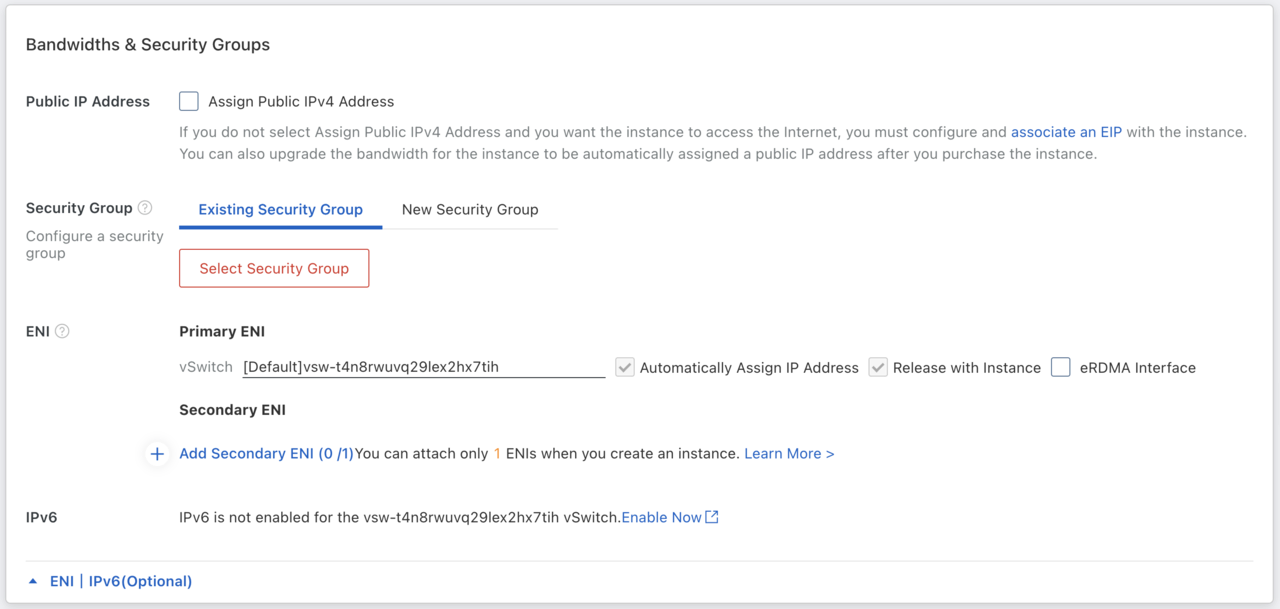 Configure Network Options
Set a Key Pair and other security settings
To be able to access the instance (see later), you must use a
key pair
. If this is your first time logging in, use the Create Key Pair dialog to create your key. The public-key will be downloaded to your local machine. When created, select from the pull-down.
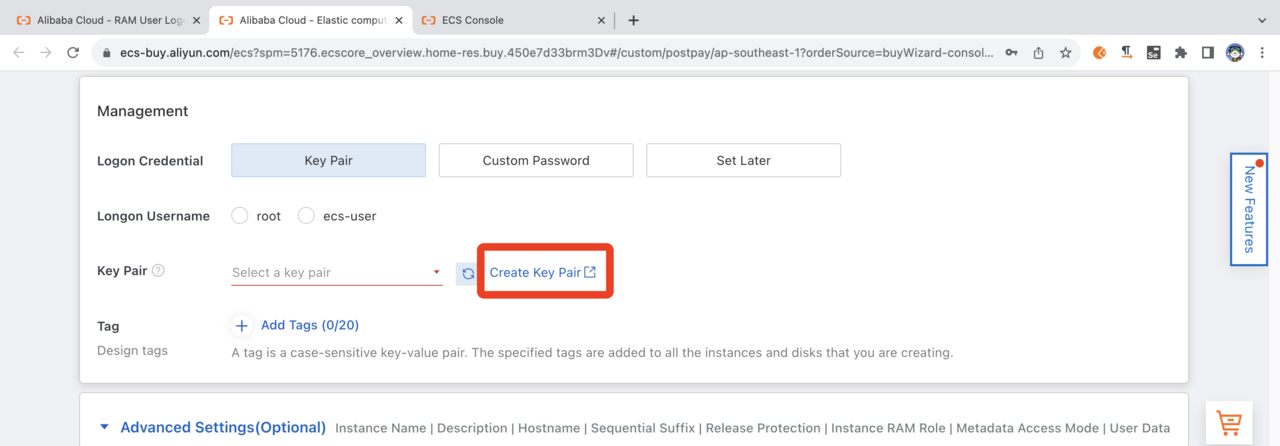 Select or create a key pair
Select Logon Credentials and set Logon Username to ecs-user and an appropriate password if desired.
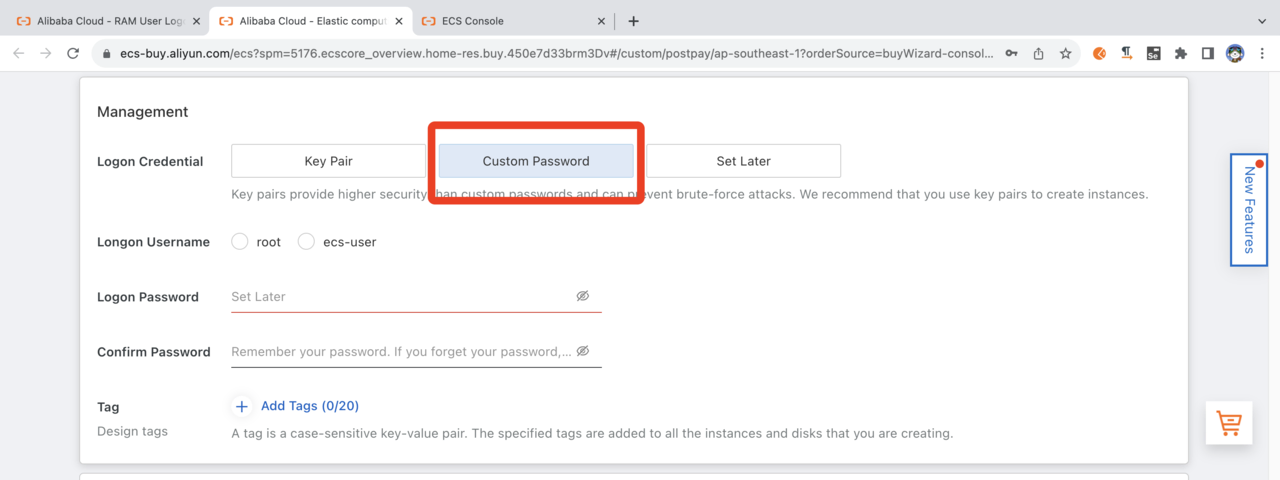 Set Username and Password for logon
Other settings such as Instance Name and Description are free-form for appropriate personal input. Other settings can be left as default.
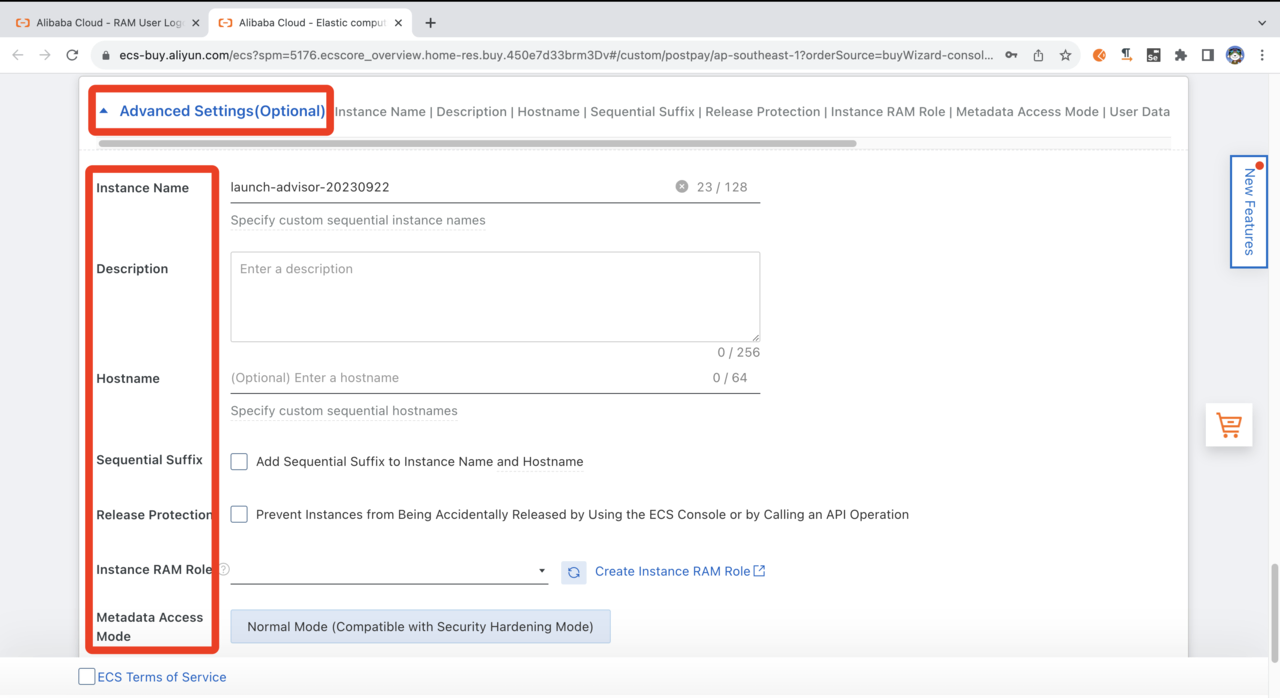 Advanced Settings(Optional)
In the Preview stage, click Create Instance. After a few moments, the instance will be available for use.
 The last step of instance creation
Connect to your instance
There are a number of different Connection methods supported.
Connecting by SSH Key Pair is likely the most convenient.
For example, to ssh into your virtual machine instance:
ssh -i <private_key> ecs-user@<public_ip_address>
Replace <private_key> with the private key on your local machine and <public_ip_address> with the public IP of the target VM.
Terminal applications such as
PuTTY
,
MobaXterm
and similar can be used to connect via ssh.
Explore your instance
Run uname
Use the uname utility to verify that you are using an Arm-based server. For example:
uname -m
will identify the host machine as aarch64.
Run hello world
Install the gcc compiler. If you are using Ubuntu, use the following commands. If not, refer to the
GNU compiler install guide
:
sudo apt-get update
sudo apt install -y gcc
Using a text editor of your choice, create a file named hello.c with the contents below:
#include <stdio.h>
int main(){
    printf("hello world\n");
    return 0;
}
Build and run the application:
gcc hello.c -o hello
./hello