Create multi-architecture Docker images with Buildkite on Google Axion
Introduction
Discover Buildkite on Google Axion C4A instances
Create a Google Axion C4A Arm virtual machine on GCP
Install Buildkite on a Google Axion C4A Arm VM
Set up and connect Buildkite agent on a Google Axion C4A Arm VM
Create a Flask app and set up the Buildkite pipeline
Run the Buildkite pipeline
Next Steps
Run the Buildkite pipeline for multi-arch builds
Follow the steps below to run your pipeline on an Arm-based Buildkite agent. You will use Docker Buildx to create a multi-architecture image for both arm64 and amd64.
Ensure the agent is running
Before running your pipeline, make sure the Buildkite agent is active and connected. On your VM, check the agent status with this command:
sudo /root/.buildkite-agent/bin/buildkite-agent status
This command checks the current state of your Buildkite agent and displays its connection status. When the agent is properly running and connected, you’ll see logs indicating “Registered agent” in the output, confirming that the agent is online and ready to receive jobs from Buildkite. The agent continuously listens for new pipeline jobs and executes the steps you’ve defined in your configuration.
Trigger the pipeline
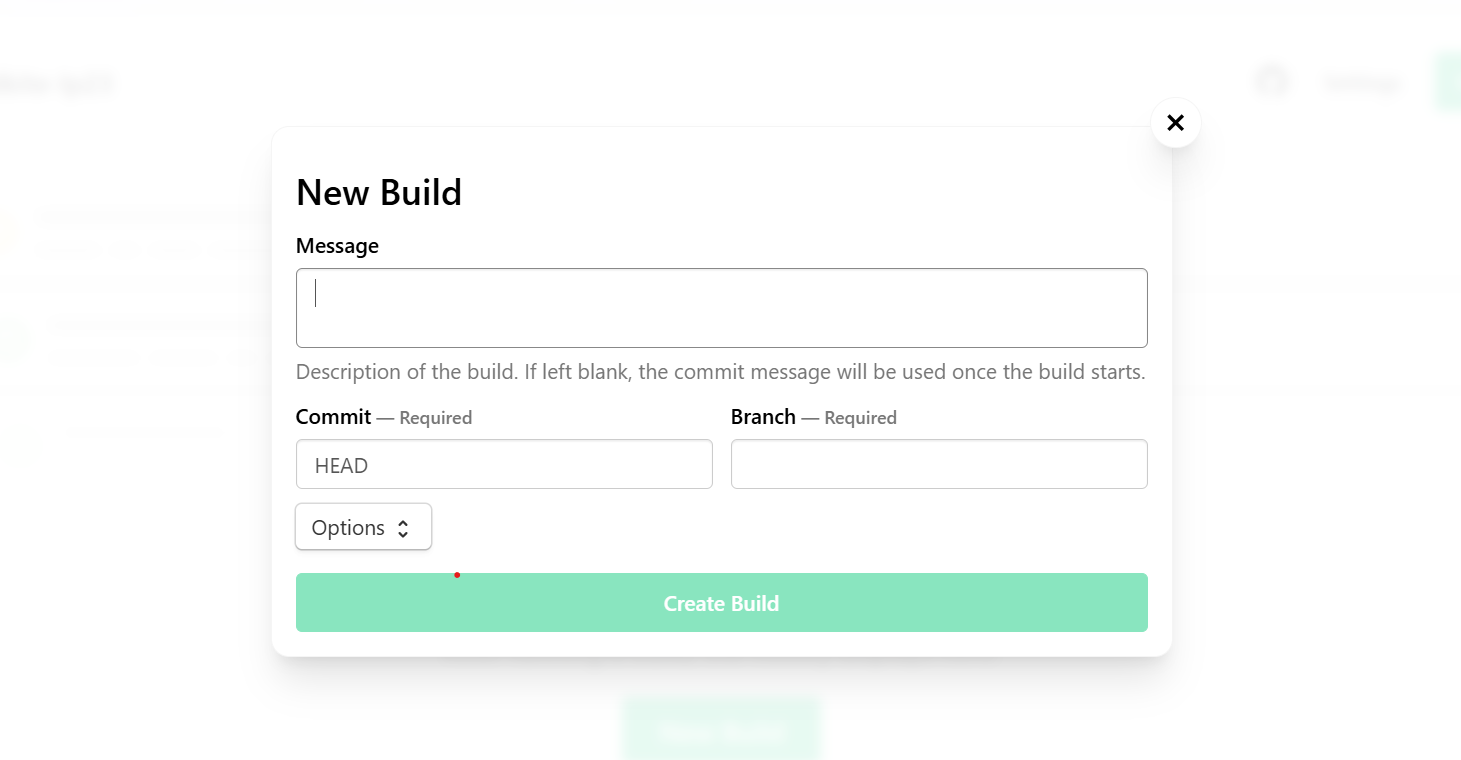
To start your pipeline, navigate to your pipeline in the Buildkite web interface. From your Buildkite dashboard, select the pipeline you created and click the “New Build” button. Choose the branch you want to build from the dropdown menu, then click “Start Build” to begin execution.
 Trigger the pipeline
When you trigger the pipeline, Buildkite sends the job to your Arm-based agent and begins executing the steps defined in your YAML configuration file. The agent will process each step in sequence, starting with Docker login, followed by creating the Buildx builder, and finally building and pushing your multi-architecture Docker image.
Monitor the build
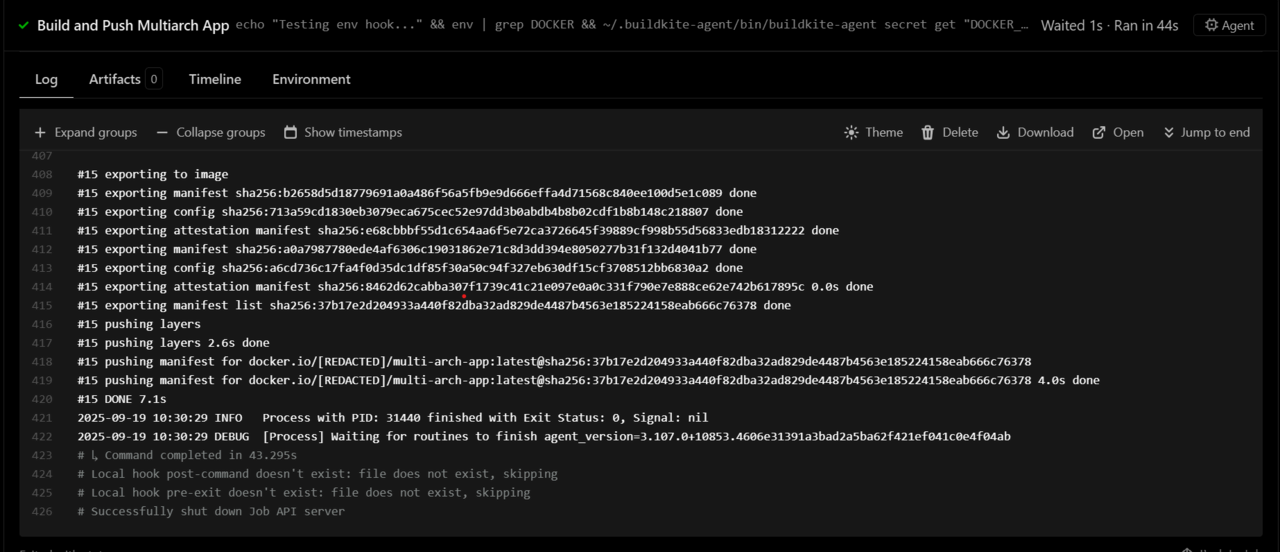
You can watch your build logs in real time in the Buildkite dashboard. Each step appears as it runs, so you can track progress and spot any issues quickly.
The main steps you’ll see are:
- Logging in to Docker
- Creating the Buildx builder
- Building and pushing the multi-architecture Docker image
 Monitor the build
Verify multi-arch image
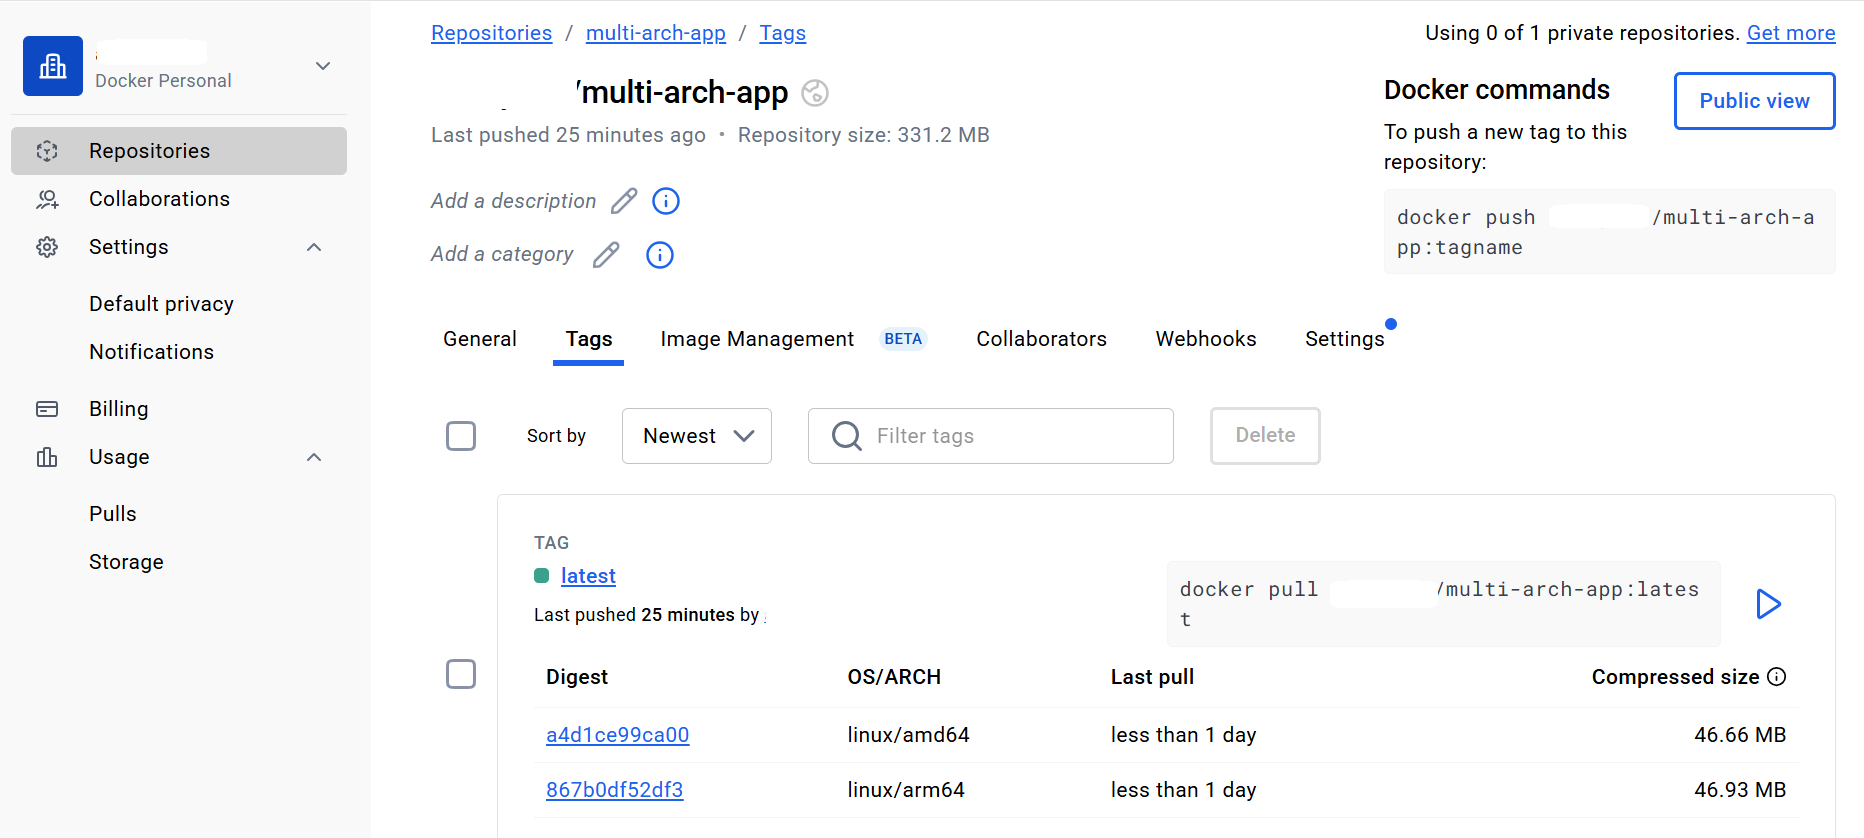
After the pipeline completes successfully, you can go to Docker Hub and verify the pushed multi-arch images:
 Docker image
Run the Flask application
docker pull <DOCKER_USERNAME>/multi-arch-app:latest
docker run --rm -p 80:5000 <DOCKER_USERNAME>/multi-arch-app:latest
This command runs the Flask application inside a container, exposing it on port 5000 inside the container and mapping it to port 80 on the host machine.
You can now visit the VM’s Public IP to access the Flask application:
http://<VM_IP>
You should see output similar to:
 Verify Docker images
What you’ve accomplished
You’ve now completed the key steps to run a Buildkite pipeline on an Arm-based Google Axion C4A VM. You verified your agent connection, triggered and monitored a multi-architecture build, and successfully deployed and tested a Flask application in a Docker container. This workflow demonstrates how to use Arm infrastructure for modern CI/CD pipelines and multi-architecture container builds. Great work, you’re now ready to apply these skills to your own Arm-based projects!