Get started with neural graphics using ML Extensions for Vulkan®
Introduction
Run neural graphics workloads with ML Extensions for Vulkan
Setting up the ML Emulation Layers for Vulkan
Simple Tensor and Data Graph
Running a test with the Scenario Runner
Use RenderDoc to debug and analyze workloads
Wrapping up
Next Steps
Get started with neural graphics using ML Extensions for Vulkan®
Overview
To run the Vulkan Samples, you first need to set up your development environment.
This setup involves two main steps:
- Install the required tools on your development machine
- Download the ML emulation layers for Vulkan, which simulate the
VK_ARM_data_graphandVK_ARM_tensorsextensions
Install required tools for development
Before building and running the samples, ensure the following tools are installed on your development machine:
- CMake (version 3.12 or later)
- Python 3
- Git
To verify your installation, run the following commands:
cmake --version
python3 --version
git --version
Each command should print the installed version of the tool.
Install Vulkan Software Development Kit
Go to the Getting Started with the Windows Vulkan SDK and download the SDK Installer for Windows. This installs Vulkan Configurator which is used to run the emulation layers.
You must use a version >= 1.4.321 for the Vulkan SDK.
Download the emulation layers
For this Learning Path, a pre-built of package of the emulation layers is available. Download them by clicking the link.
Extract the downloaded file in a location of your choice. You’re now ready to enable the emulation layers in Vulkan Configurator.
Enable the emulation layers in Vulkan Configurator
Next, enable the emulation layers using the Vulkan Configurator to simulate the VK_ARM_data_graph and VK_ARM_tensors extensions. Open Vulkan Configurator.
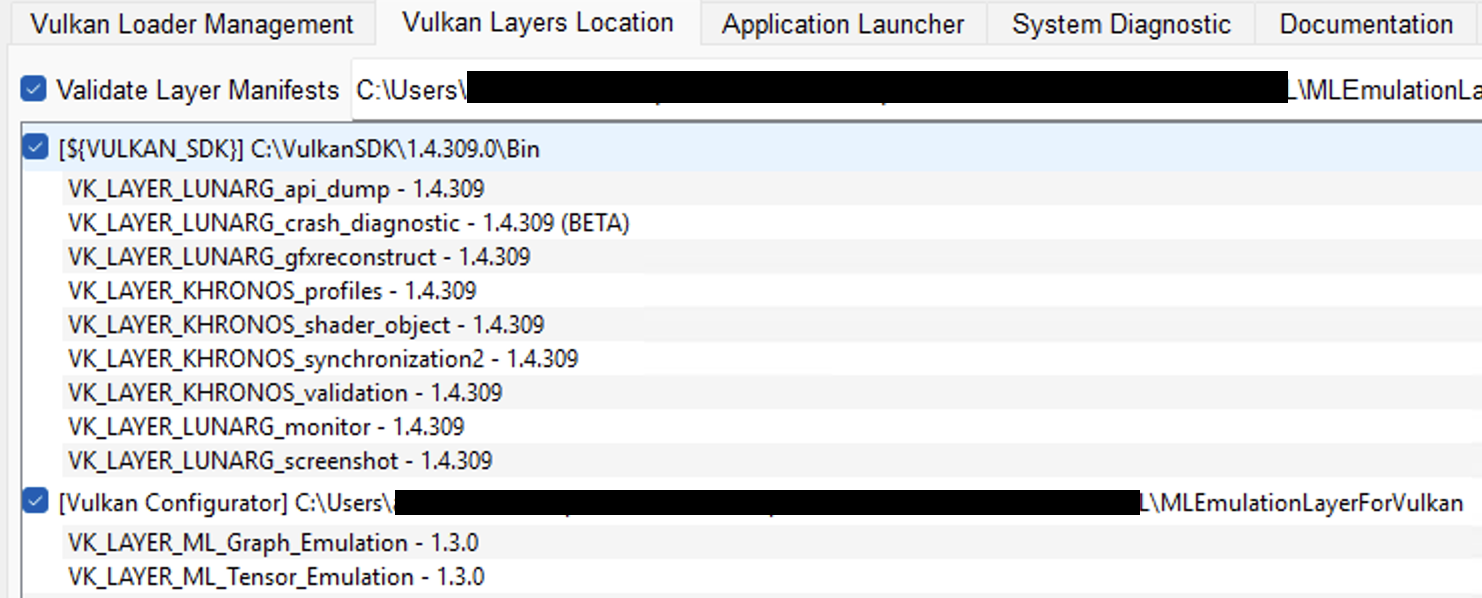
Under the Vulkan Layers Location tab, add the path to your MLEmulationLayerForVulkan folder.
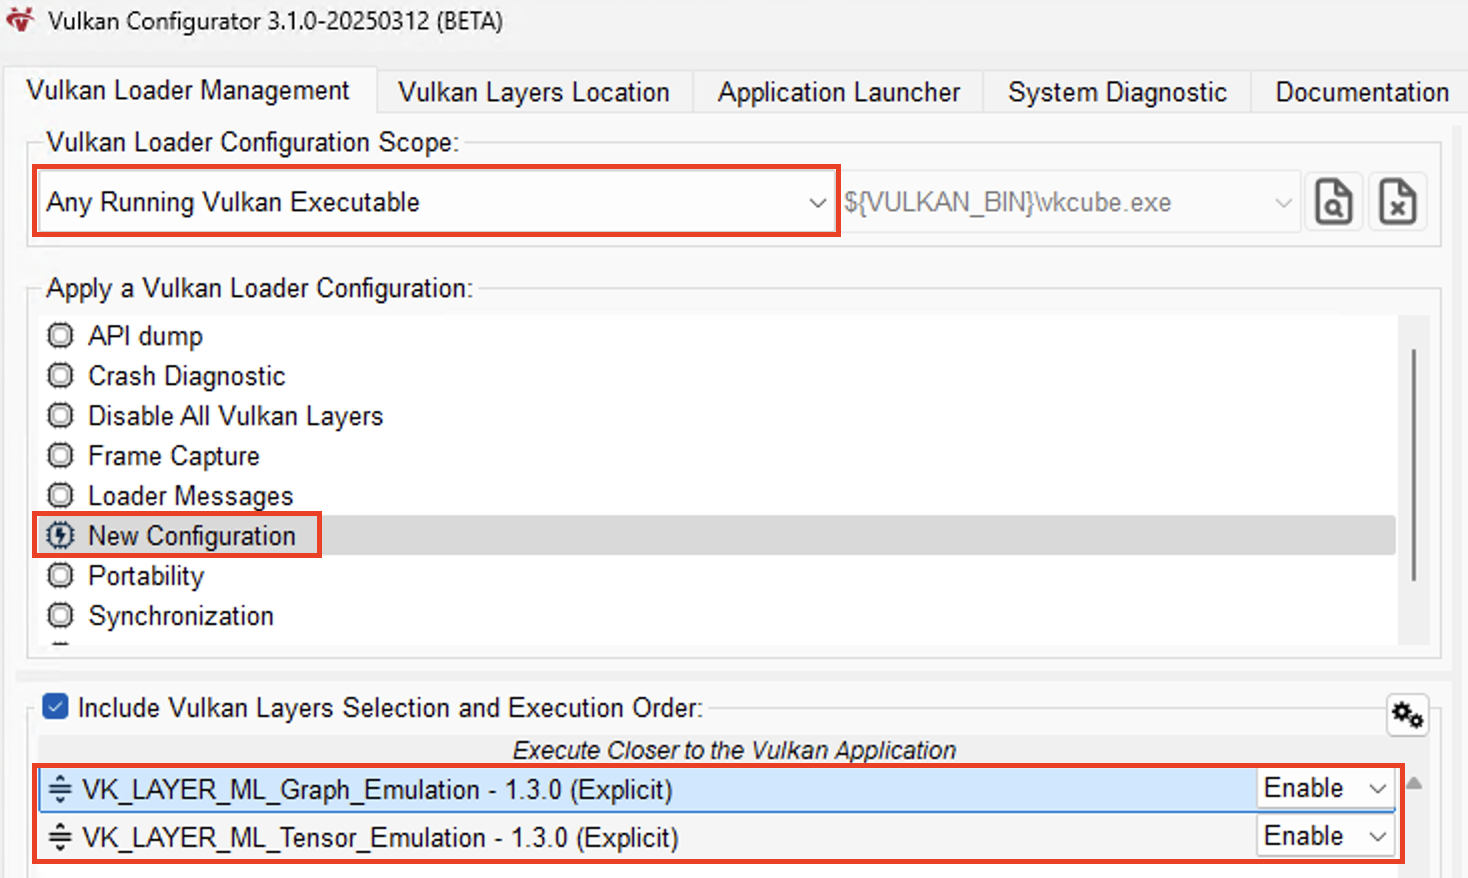
Switch back to the Vulkan Loader Management tab. In the Apply a Vulkan Loader Configuration list, right-click and choose Create a new Configuration. You can give the new configuration any name, for example tensor_and_data_graph.
 Add emulation layers in Vulkan Configurator
Ensure that the Graph layer is listed above the Tensor layer.
 Reorder layers in Vulkan Configurator
Keep Vulkan Configurator running while you run the Vulkan samples.
With the emulation layers configured, you’re ready to build the Vulkan Samples. Continue to the next section to get started.