Upscale an image with Swin2SR and Arm VGF
Check the dimensions of the upscaled image
Confirm that the input is 64 × 64 and that the model created a 128 × 128 RGB image:
python - <<'PY'
from PIL import Image

for name in ("demo_lr_64.png", "demo_sr_128.png", "demo_hr_128.png"):
    with Image.open(f"swin2sr-work/runtime/{name}") as image:
        print(f"{name}: {image.width} x {image.height}, {image.mode}")
PY
The expected output is:
        demo_lr_64.png: 64 x 64, RGB
demo_sr_128.png: 128 x 128, RGB
demo_hr_128.png: 128 x 128, RGB
Twice the width and twice the height give you four times as many pixels.
Compare the images
Open swin2sr-work/runtime/ in your image viewer. Compare the low-resolution input, the Swin2SR output, and the high-resolution reference. Enlarge the input to the same display size so that you can compare the same text and edges.
The high-resolution reference is the original 128 × 128 crop, before downsampling creates the 64 × 64 input. Use the reference for comparison; the model receives only the low-resolution input.
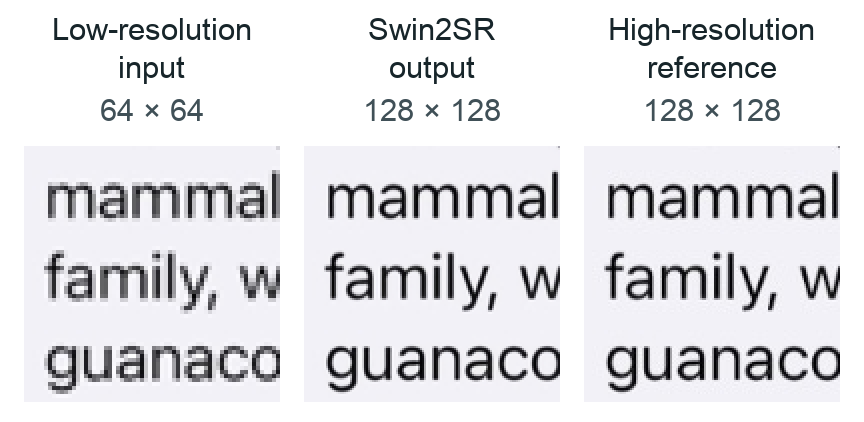 Low-resolution input, Swin2SR output, and high-resolution reference at the same display size
The example output comes from an earlier run with the same checkpoint and demo image. The output illustrates the comparison and isn’t a new measurement on your host.
Look at the edges of the letters. The output estimates detail that was lost when the original was reduced to 64 × 64. It won’t reproduce every detail of the original. A larger image doesn’t automatically mean a more accurate one.
The following factors indicate the successful completion of the image upscaling flow:
- The runner finishes
- The generated image has the expected dimensions
- The generated image shows the same scene without obvious corruption
This visual check doesn’t establish a quality benchmark or a performance result.
Try another image
Use another 64 × 64 RGB image with the same program. Replace my-image.png with its path and choose a new output name:
python examples/arm/super_resolution_example_vgf/runtime/run_super_resolution.py \
  --model-path swin2sr-work/swin2sr.pte \
  --runner swin2sr-work/build/executor_runner \
  --input-image my-image.png \
  --output-image swin2sr-work/runtime/my-image-sr.png
For a different input size, export a matching program first. The helper doesn’t resize or tile images automatically.
What you’ve accomplished
You’ve prepared an image, exported a pretrained Swin2SR model, and run it through Arm Vulkan Graph Format (VGF) with ExecuTorch. You’ve then inspected the upscaled output.
You can now repeat the same flow with your own 64 × 64 images.