Enable Neural Super Sampling in Unreal Engine with ML Extensions
Introduction
Introduction to neural graphics and Neural Super Sampling (NSS)
Setting up the emulation layers
Create an example game
Run the example
Using RenderDoc for Debugging and Analysis
Wrapping up
Next Steps
Enable Neural Super Sampling in Unreal Engine with ML Extensions
Download the Arm Neural Graphics Plugin
The Arm Neural Graphics Plugin 1.1.0 release package contains the plugin and VGF model file you need to set up NSS for Unreal Engine.
Arm Neural Graphics Plugin → GitHub repository
Download the 1.1.0 release .zip and extract it on your Windows machine.
Enable NSS for Unreal Engine
- Open Unreal Engine and create a new Third Person template project using the C++ option.
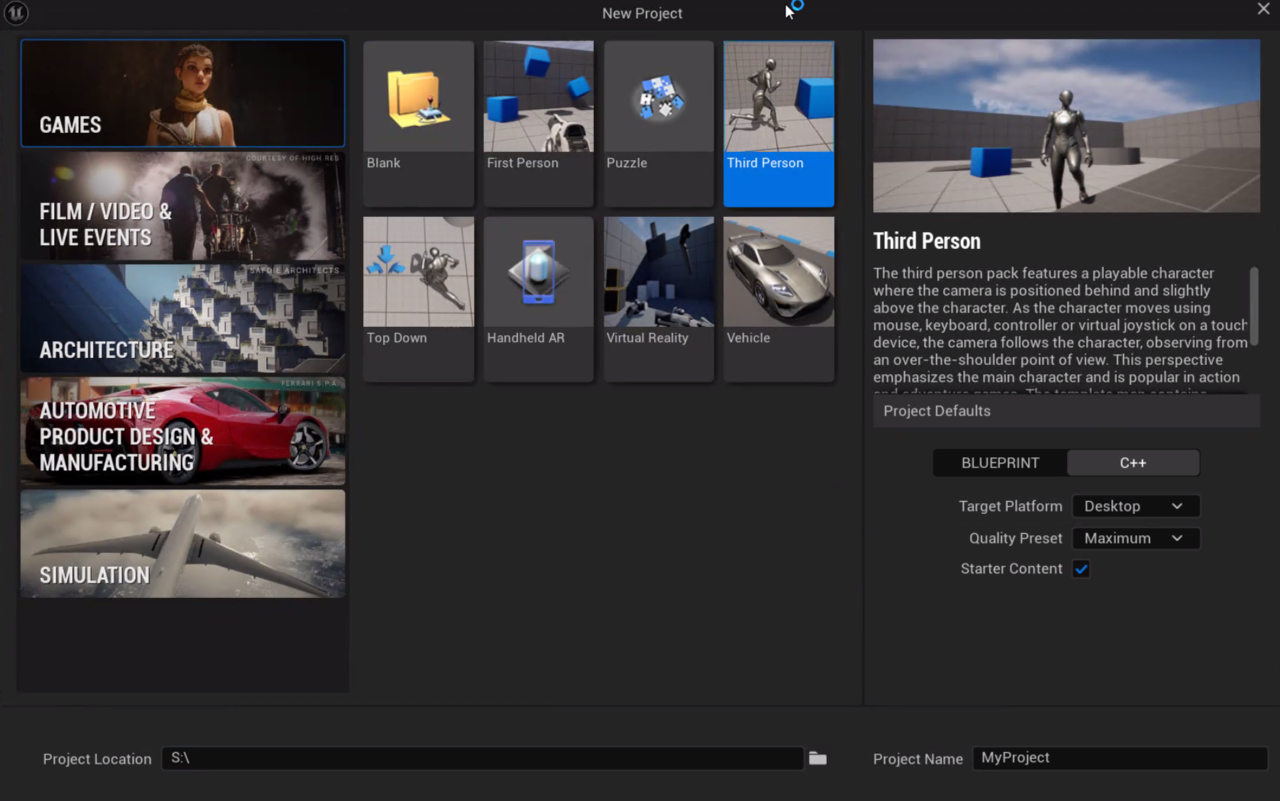 Figure 3: Create a new C++ project in Unreal Engine.
- Open the project in Visual Studio. Build it from source through Build > Build Solution or with
Ctrl+Shift+B.
After the build is finished, open your project in Unreal Engine.
Change Unreal’s Rendering Interface to Vulkan
By default, Unreal uses DirectX. Instead, you need to choose Vulkan as the default RHI:
- Go to:
Project Settings > Platform > Windows > Targeted RHIs > Default RHI - Select Vulkan.
- Restart Unreal Engine to apply the change.
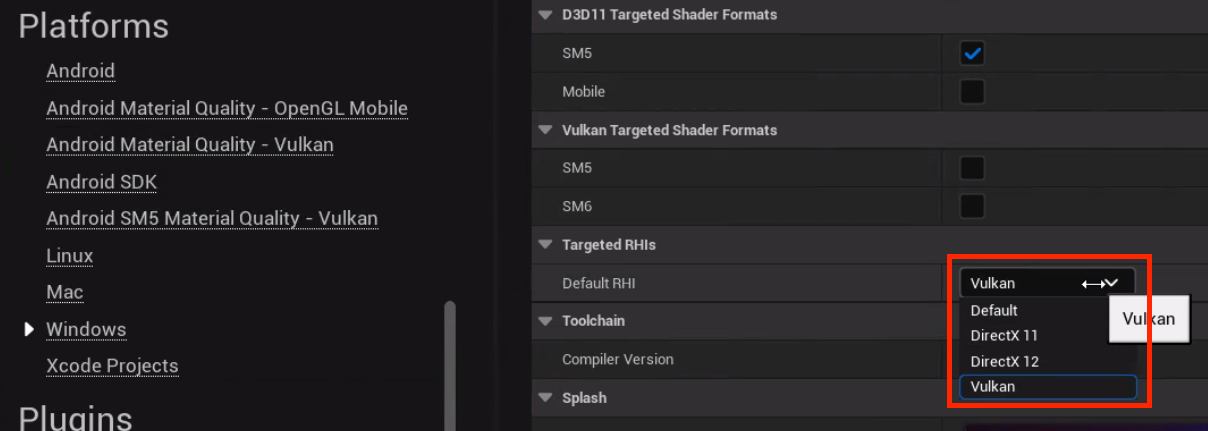 Figure 4: Set Vulkan as the default RHI.
Create the Plugins directory
Open your project directory in Windows explorer, and create a new folder called Plugins.
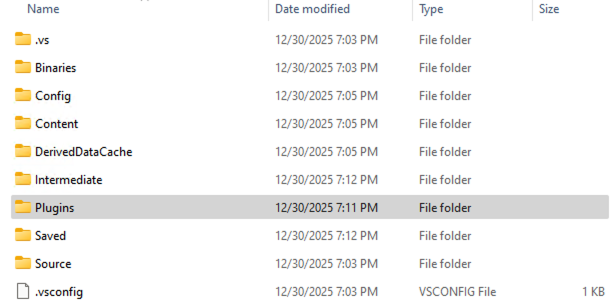 Figure 5: The new Plugins directory
Enable the plugin
The extracted archive contains the Arm Neural Graphics Plugin in the neural-graphics-for-unreal folder.
- Copy the
neural-graphics-for-unrealfolder into your project’sPluginsdirectory. - Reopen Unreal Engine. When prompted, confirm that you want to enable the plugin.
- Rebuild your project from source in Visual Studio.
- Open Edit > Plugins and search for Arm Neural Graphics Plugin. If its checkbox is clear, select it. Restart Unreal Engine if prompted.
With the emulation layers and Arm Neural Graphics Plugin configured, you’re ready to run Neural Super Sampling in Unreal Engine. Continue to the next section to test the integration.