Run ExecuTorch Llama 3.2 1B Instruct on an Android phone with Vulkan
Introduction
Prepare a Linux host and Android device for ExecuTorch Vulkan
Install ExecuTorch and download the model on the Linux host
Export the Vulkan PTE
Build the Android Vulkan runtime
Deploy and measure Llama 3.2 with ExecuTorch Vulkan on Android
Next Steps
Run ExecuTorch Llama 3.2 1B Instruct on an Android phone with Vulkan
Linux host architecture
You’ll run Meta Llama 3.2 1B Instruct directly on a Vivo X300 Pro or similar Android phone with ExecuTorch, using the phone GPU through the Vulkan backend.
You’ll use a Linux host for the following:
- Model export
- Quantization
- Graph lowering and partitioning
- Android cross-compilation
adbdeployment
The Linux host doesn’t need CUDA, ROCm, or a working Vulkan GPU.
The following diagram shows what you’ll run on the Linux host:
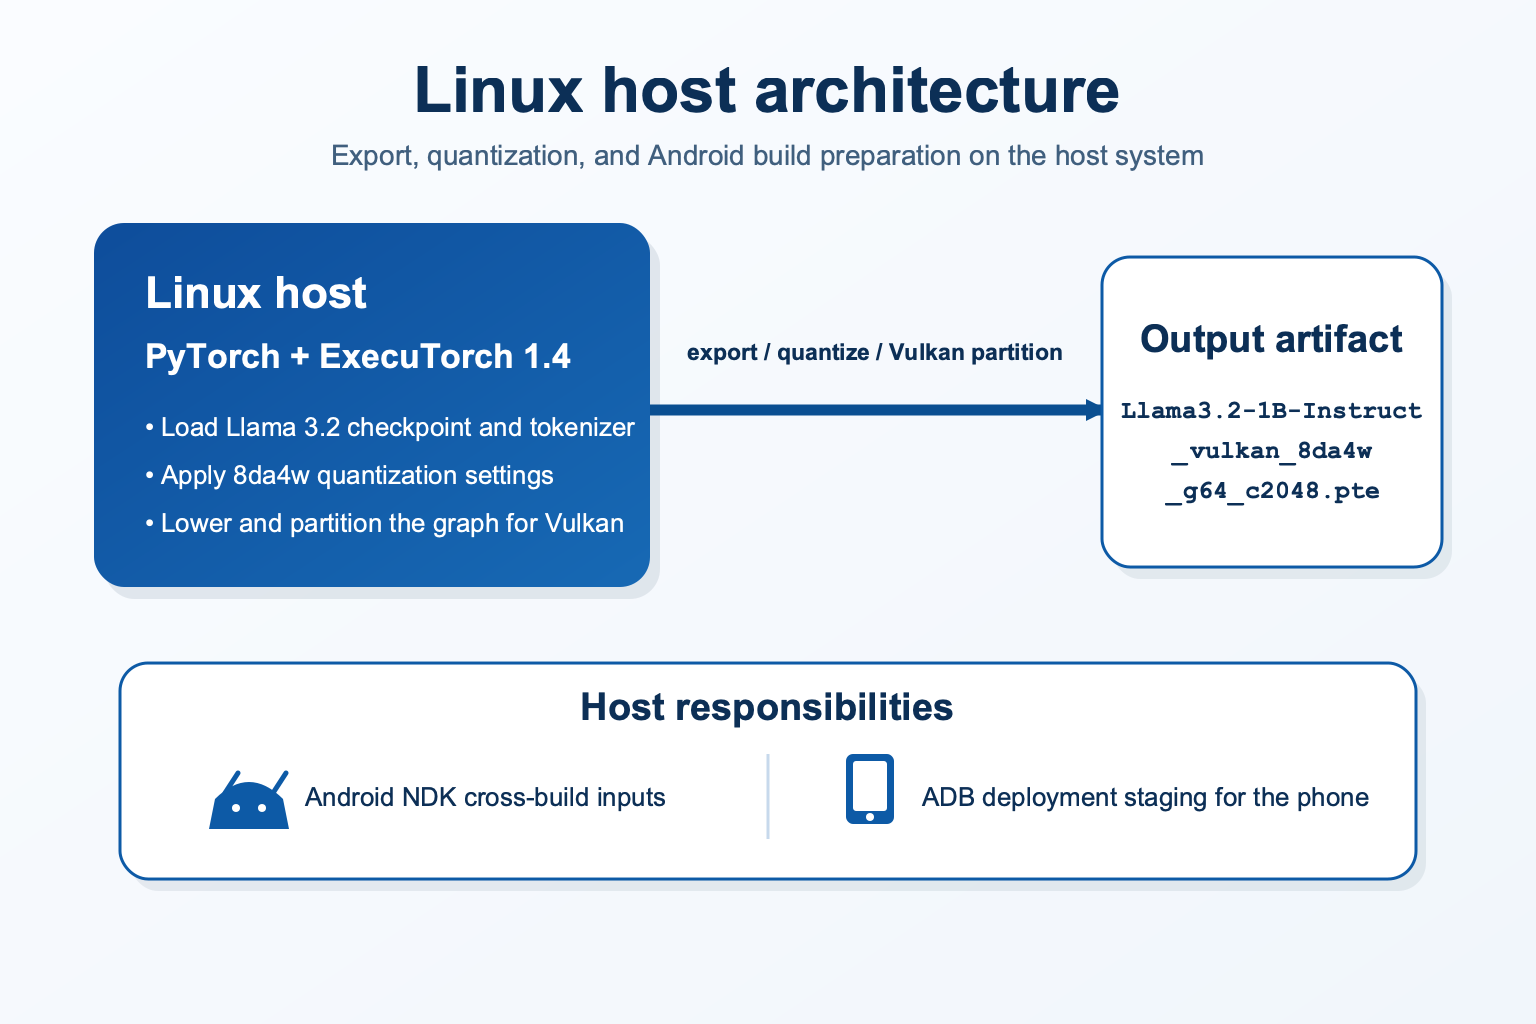 Linux host architecture for the ExecuTorch Vulkan workflow
Install Android SDK and NDK on the host
You can install the Android tools entirely from the Linux command line. Use Google’s
Android command-line tools
and
sdkmanager
to install the following components:
- Android SDK Platform-Tools
- Android SDK Command-line Tools
- CMake
3.31.6 - Android NDK
r28c(28.2.13676358)
If you already installed these components with Android Studio, skip to Set Android environment variables .
Install the command-line tools
Install the host packages:
sudo apt update
sudo apt install -y build-essential curl git unzip openjdk-17-jre-headless python3.12-dev python3.12-venv
Set the SDK location for the current terminal session:
export ANDROID_HOME="$HOME/Android/Sdk"
export PATH="$ANDROID_HOME/cmdline-tools/latest/bin:$PATH"
mkdir -p "$ANDROID_HOME/cmdline-tools/latest"
Download the pinned Linux command-line tools package and verify its SHA-256 checksum:
export ANDROID_CLI_TOOLS_VERSION="15859902"
export ANDROID_CLI_TOOLS_ARCHIVE="/tmp/commandlinetools-linux-${ANDROID_CLI_TOOLS_VERSION}_latest.zip"
export ANDROID_CLI_TOOLS_TMP="$(mktemp -d)"

curl -fL \
  "https://dl.google.com/android/repository/commandlinetools-linux-${ANDROID_CLI_TOOLS_VERSION}_latest.zip" \
  -o "$ANDROID_CLI_TOOLS_ARCHIVE"

printf '%s  %s\n' \
  "4e4c464f145a7512b57d088ac6c278c03c9eea610886b35a5e0804e74eedf583" \
  "$ANDROID_CLI_TOOLS_ARCHIVE" | sha256sum --check
The checksum command should report OK.
Extract the tools into the directory layout expected by sdkmanager:
unzip -q "$ANDROID_CLI_TOOLS_ARCHIVE" -d "$ANDROID_CLI_TOOLS_TMP"
cp -R "$ANDROID_CLI_TOOLS_TMP/cmdline-tools/." \
  "$ANDROID_HOME/cmdline-tools/latest/"

sdkmanager --version
Install the Android packages
Review and accept the Android SDK licenses:
sdkmanager --sdk_root="$ANDROID_HOME" --licenses
Install the package versions that you’ll use:
sdkmanager --sdk_root="$ANDROID_HOME" \
  "platform-tools" \
  "ndk;28.2.13676358" \
  "cmake;3.31.6"
The NDK supplies the Android cross-compilation toolchain. The Android SDK CMake package also includes Ninja and keeps both build tools under the SDK directory.
You can instead use Android Studio’s SDK Manager to install Android SDK Platform-Tools, Android SDK Command-line Tools, Make 3.31.6, and NDK (Side by side) 28.2.13676358.
Set Android environment variables
Set the SDK, NDK, and build-tool paths for the current terminal session:
export ANDROID_HOME="$HOME/Android/Sdk"
export ANDROID_NDK="$ANDROID_HOME/ndk/28.2.13676358"
export PATH="$ANDROID_HOME/platform-tools:$PATH"
export PATH="$ANDROID_HOME/cmdline-tools/latest/bin:$PATH"
export PATH="$ANDROID_HOME/cmake/3.31.6/bin:$PATH"
These variables remain set until you close the terminal.
To make the configuration available in future terminal sessions, add the same five export commands to your shell startup file. For Bash, use ~/.bashrc. Check the file first to avoid duplicate entries. Then, run source ~/.bashrc.
The SDK and NDK are now located at:
$HOME/Android/Sdk
$HOME/Android/Sdk/ndk/28.2.13676358
Verify the installed tools and NDK layout:
echo "$ANDROID_HOME"
echo "$ANDROID_NDK"
adb --version
cmake --version
ninja --version
test -f "$ANDROID_NDK/NOTICE" && echo "NDK OK"
test -f "$ANDROID_NDK/build/cmake/android.toolchain.cmake" && echo "Toolchain OK"
Connect to the Android device over ADB
If adb devices shows no permissions, add the user to plugdev, install the generic Android udev helpers, and reload the rules:
sudo usermod -aG plugdev "$USER"
sudo apt install -y android-sdk-platform-tools-common
sudo udevadm control --reload-rules
sudo udevadm trigger
newgrp plugdev
The tested device reported this USB ID:
Bus 002 Device 002: ID 2d95:6001 vivo vivo X300 Pro
If the default rules aren’t enough, add a rule specific to your device. The following rule is specific to Vivo:
sudo tee /etc/udev/rules.d/51-vivo-android.rules >/dev/null <<'EOF'
SUBSYSTEM=="usb", ATTR{idVendor}=="2d95", MODE="0660", GROUP="plugdev", TAG+="uaccess"
EOF

sudo chmod 644 /etc/udev/rules.d/51-vivo-android.rules
sudo udevadm control --reload-rules
sudo udevadm trigger
Then, restart adb and accept the RSA prompt on the phone:
adb kill-server
adb start-server
adb devices
The output is similar to:
10AFB40J6Q0031C device
Verify Vulkan support on the Android device
Check the Vulkan implementation:
adb shell getprop ro.hardware.vulkan
The output is similar to:
mali
Then, verify the relevant Android features:
adb shell pm list features | grep -i vulkan
The output is similar to:
        feature:android.hardware.vulkan.compute
feature:android.hardware.vulkan.level=1
feature:android.hardware.vulkan.version=4206592
feature:android.software.vulkan.deqp.level=132711169
Ensure that the device advertises android.hardware.vulkan.compute.
vulkan_renderengine: false from SurfaceFlinger doesn’t block application-side Vulkan compute.
What you’ve accomplished and what’s next
You’ve now prepared the Linux host and connected to the Android device.
Next, you’ll install ExecuTorch and download the model on the host.