Build an Android chat app with Llama, KleidiAI, ExecuTorch, and XNNPACK
Introduction
Create a development environment
ExecuTorch Setup
Understanding Llama models
Prepare Llama models for ExecuTorch
Run Benchmark on Android phone
Build and Run Android chat app
Next Steps
Build an Android chat app with Llama, KleidiAI, ExecuTorch, and XNNPACK
In this section, you will use a Android demo application to demonstrate local inference with ExecuTorch.
Build the Android Archive (AAR)
Open a terminal window and navigate to the root directory of the
executorchrepository.If you haven’t already, set the following environment variables:
export ANDROID_NDK=$ANDROID_HOME/ndk/29.0.14206865/
export ANDROID_ABI=arm64-v8a
export ANDROID_SDK=$ANDROID_HOME
<path_to_android_ndk> is the root for the NDK, which is usually under ~/Library/Android/sdk/ndk/XX.Y.ZZZZZ for macOS, and contains NOTICE and README.md. Make sure you can confirm <path_to_android_ndk>/build/cmake/android.toolchain.cmake is available for CMake to cross-compile.
Run the following command to set up the required JNI library:
sh scripts/build_android_library.sh
Getting models
Make sure the exported model and tokenizer are copied to the Android phone:
Option 1: using adb
- Check if the files are available on the phone:
adb shell "ls -la /data/local/tmp/llama/"
- If not, copy them:
adb shell mkdir -p /data/local/tmp/llama
adb push <model.pte> /data/local/tmp/llama/
adb push <tokenizer.bin> /data/local/tmp/llama/
Option 2: Using Android Studio
- Use Android Studio’s device explorer to look for the model files.
 Figure 1. Android Studio Device Explorer
- Upload the files.
If the files are not on the device, use the device explorer to copy them.
 Figure 2. Android Studio upload files using Device Explorer
Build the Android Package Kit
Before starting, you need to obtain the example app by cloning executorch-examples:
git clone https://github.com/meta-pytorch/executorch-examples.git
Option 1: Using Android Studio
This is the recommended option.
Open Android Studio and select Open an existing Android Studio project and navigate to open
executorch-examples/llm/android/LlamaDemo.Run the app (^R). This builds and launches the app on the phone.
Option 2: Command line
Without Android Studio UI, you can run gradle directly to build the app. You need to set up the Android SDK path and invoke gradle. Navigate to the newly cloned executorch-examples repository.
pushd llm/android/LlamaDemo
./gradlew :app:installDebug
popd
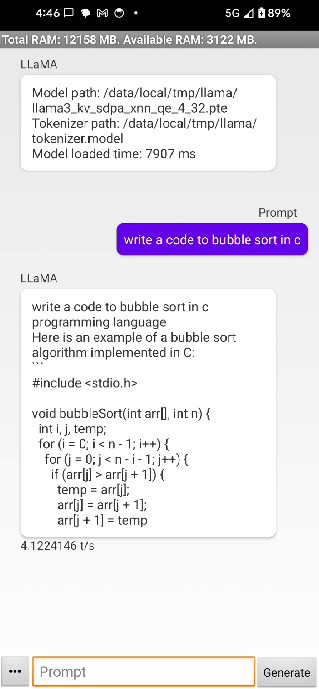
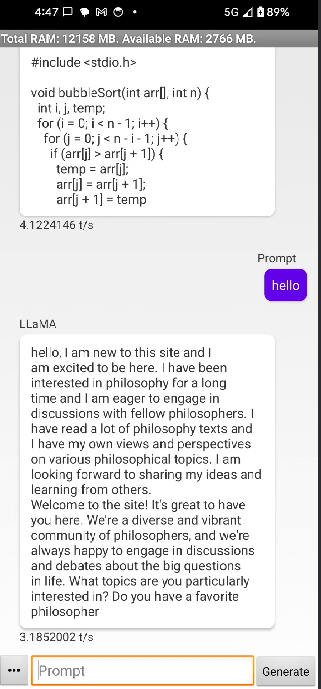
You should now see a running app on your phone that looks like this: