Accelerate an OpenCV-based Android Application with KleidiCV
Introduction
Overview
Create a project and add OpenCV
Define the UI
Processing the Images
Summary
Next Steps
Accelerate an OpenCV-based Android Application with KleidiCV
Create a project
You will need a development computer with Android Studio installed. This example uses Android Studio Ladybug 2024.2.1, Patch 3.
You can create a project and add OpenCV with KleidiCV support by following the steps outlined in this section.
Start by creating a new project, and configuring it:
- Open Android Studio on your development machine, and click the + New Project icon.
- In the New Project window, select Empty Views Activity:
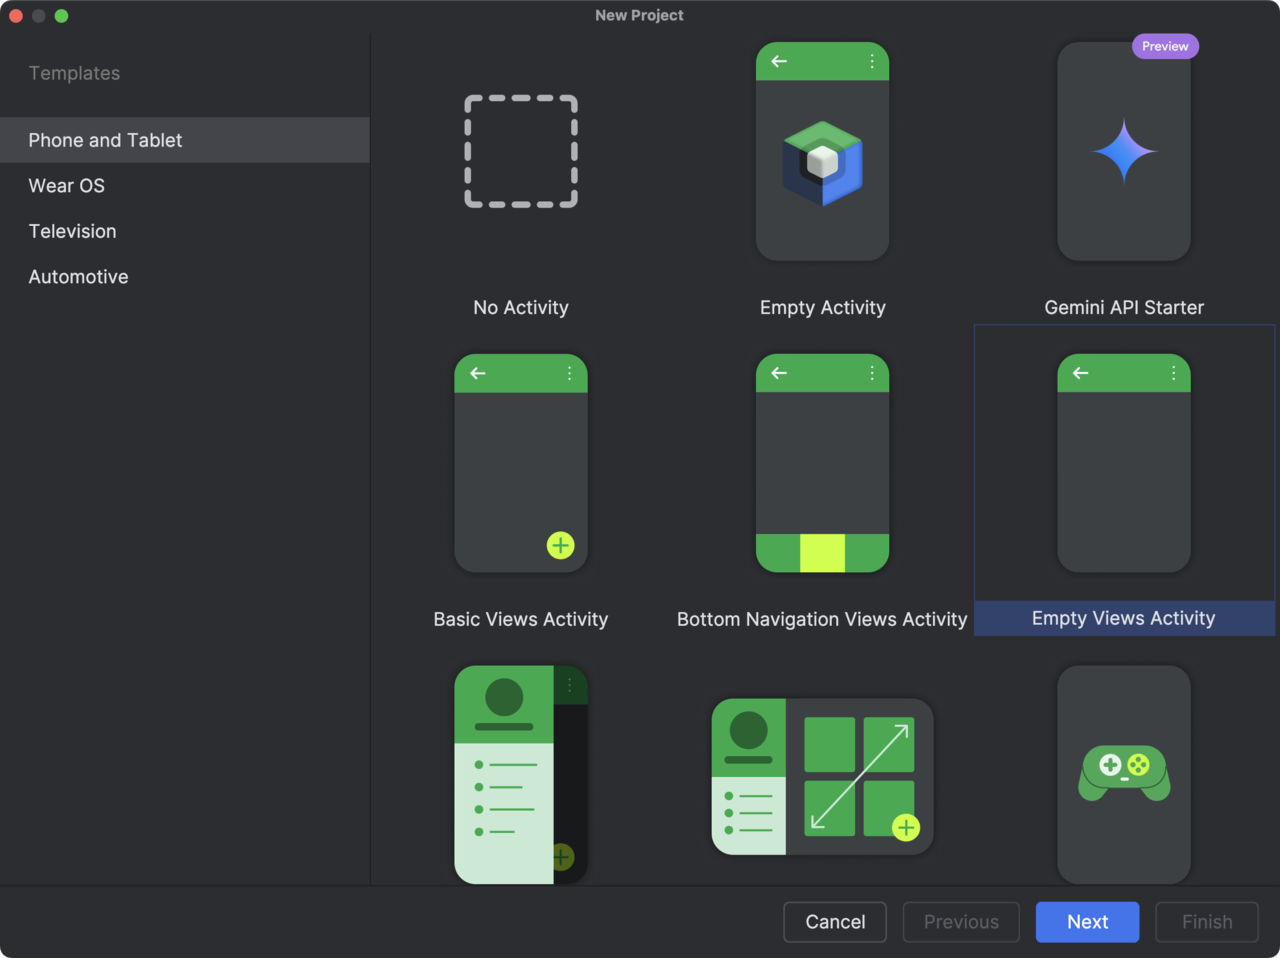 Figure 1: Creating a new project.
- Figure 2 shows you how to configure the project:
- Name: Arm64.KleidiCV.Demo.
- Package name: com.arm.arm64kleidicvdemo.
- Save location: Select relevant file location for your setup.
- Language: Kotlin.
- Minimum SDK: API 24.
- Build configuration language: Kotlin DSL.
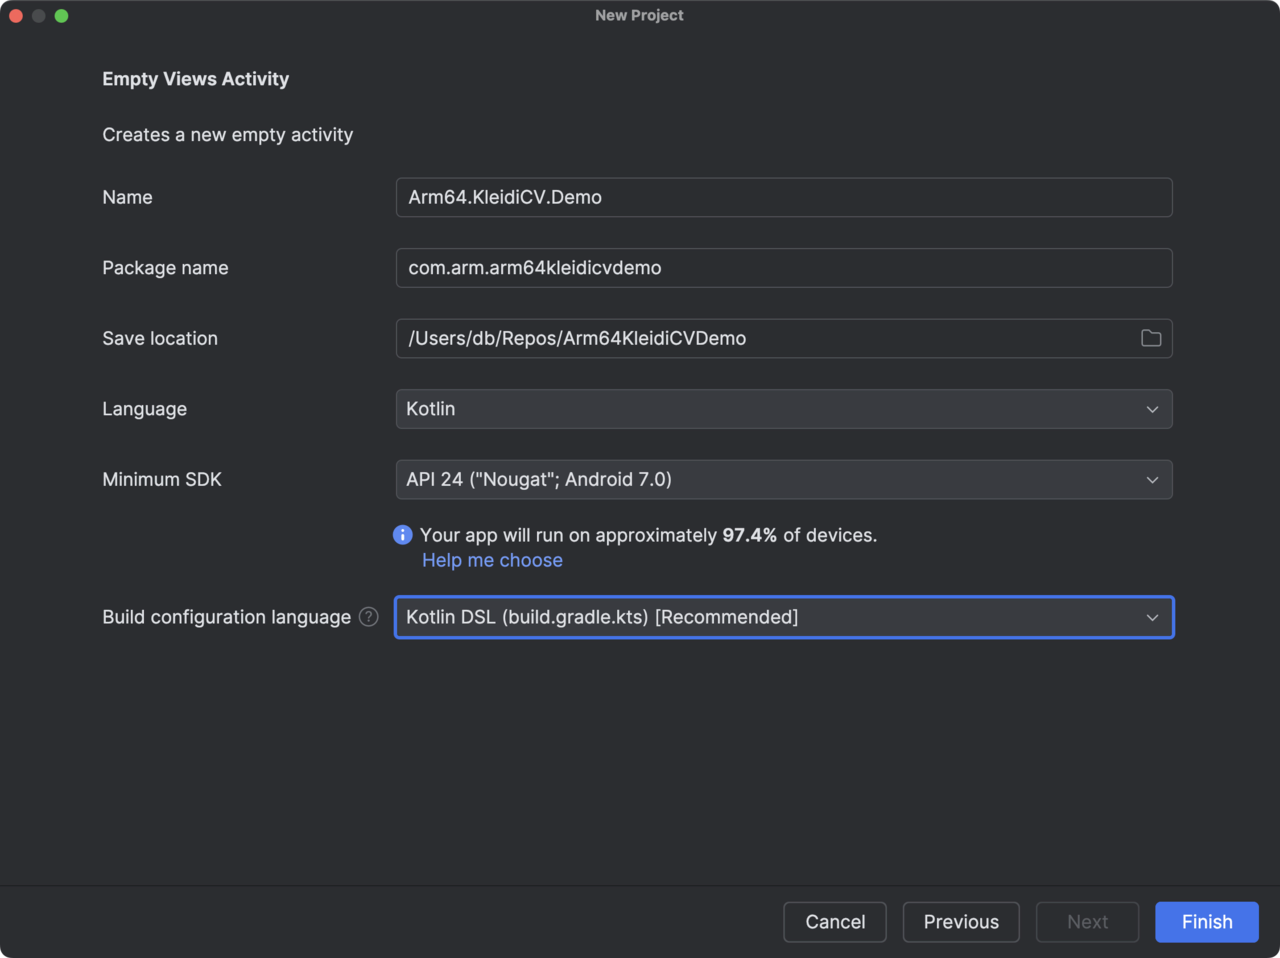 Figure 2: Configuring your new project.
- Click the Finish button.
Now wait a few moments until your project is ready. You will be able to configure the project further later on.
Add OpenCV support
To add OpenCV support for Arm64 (AArch64), open the build.gradle.ts (Module: app), and add the following line under the dependencies:
implementation("org.opencv:opencv:4.11.0")
Make sure that compileSdk is set to 35. The contents of the file should look like this:
plugins {
    alias(libs.plugins.android.application)
    alias(libs.plugins.kotlin.android)
}

android {
    namespace = "com.arm.arm64kleidicvdemo"
    compileSdk = 35

    defaultConfig {
        applicationId = "com.arm.arm64kleidicvdemo"
        minSdk = 24
        targetSdk = 34
        versionCode = 1
        versionName = "1.0"

        testInstrumentationRunner = "androidx.test.runner.AndroidJUnitRunner"
    }

    buildTypes {
        release {
            isMinifyEnabled = false
            proguardFiles(
                getDefaultProguardFile("proguard-android-optimize.txt"),
                "proguard-rules.pro"
            )
        }
    }
    compileOptions {
        sourceCompatibility = JavaVersion.VERSION_11
        targetCompatibility = JavaVersion.VERSION_11
    }
    kotlinOptions {
        jvmTarget = "11"
    }
}

dependencies {
    implementation(libs.androidx.core.ktx)
    implementation(libs.androidx.appcompat)
    implementation(libs.material)
    implementation(libs.androidx.activity)
    implementation(libs.androidx.constraintlayout)
    testImplementation(libs.junit)
    androidTestImplementation(libs.androidx.junit)
    androidTestImplementation(libs.androidx.espresso.core)
    implementation("org.opencv:opencv:4.11.0")
}
Now click the Sync Now link in the top pane that appears.
You can now use OpenCV with KleidiCV support in your application.
Save the file. In the next step, you will define the application UI.