Build and run an image classification NN model on an STM32L4 Discovery board
Introduction
Prepare environment
Build an image classification NN model trained with the CIFAR-10 dataset
Deploy the image classification NN model on STM32
Run the image classification NN model on STM32
Next Steps
Build and run an image classification NN model on an STM32L4 Discovery board
In this section, you will deploy the model directly on the STM32 board.
Setup STM32CubeMX project
STM32CubeMX
is a graphical tool for configuring STM32 microcontrollers.
STM32Cube.AI
is an extension of STM32CubeMX to import ML models.
- The testing tool (see later) has been written with
X-CUBE-AI 7.0.0. Please select this version when installing. Later versions may not connect successfully.
Download the Windows installer for STM32CubeMX from the STM32CubeMX product page .
Run the Windows installer and install in desired location of your Windows Machine.
Open STM32CubeMX IDE.
Click
Access to Board Selector. Find yourB-L475E-IOT01Aboard and clickStart Project.Go to
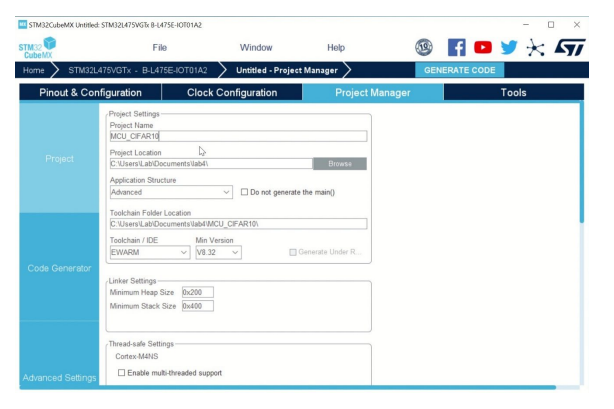
Project Manager. Enter a project name and select the project location where the project will be saved.Under
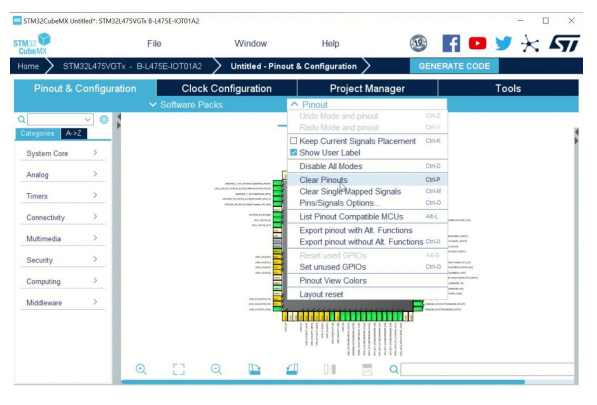
Pinout & Configuration, expandPinoutmenu, and clickClear pinouts.Now install Cube AI and enable it for your project.
Expand
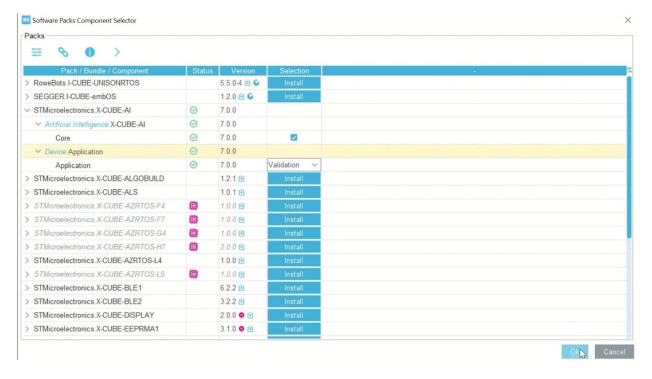
Software Packsmenu, and clickSelect Components.Locate
X-CUBE-AI, and click itsInstallbutton.Expand the menu and enable
X-CUBE-AI>Core. For device application, chooseValidation. If the status shows a yellow warning, clickResolveto install any necessary dependencies.Click
OKwhen done.
Deploy the model with STM32CubeMX
Open STM32CubeMX.
Click
Access to Board Selector.Find the
B-L475E-IOT01A2board and clickStart Project. Accept any defaults.Go to
Project Manager. Set the project name and save location.Set
Toolchain/IDEasSTM32CubeIDE
- Go to
Pinout & Configurationand clear pinouts from thePinoutmenu.
- In
Software Packsmenu, clickSelect Components. EnableX-CUBE-AI. For device application, chooseValidation. ClickOKto save.
Navigate to
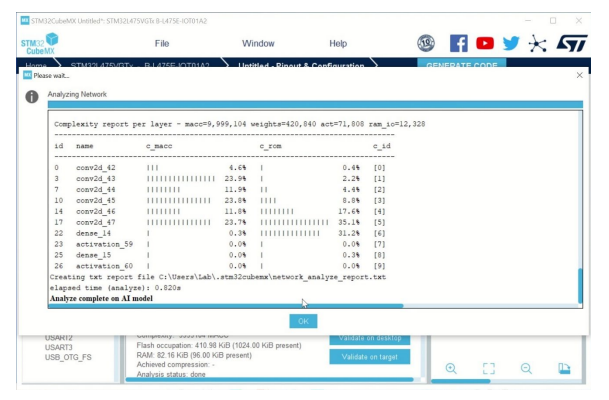
X-CUBE-AIconfiguration.Click
Add network. Browse to the model provided (Data/models/cifar10_model.h5) or the model you trained by yourself (Data/models/own_cifar10_model.h5).Click
Analyzeto check the model.Generate the validation code for the model by clicking
Generate Code.
Open STM32CubeIDE.
Navigate to
File>New>Project>ST>STM32 Project from an Existing STM32CubeMX Configuration File.Go to the project folder and open the
.iocfile.Ensure that the board is connected to your computer. If it is correctly connected, build and flash the code by clicking
Run As.
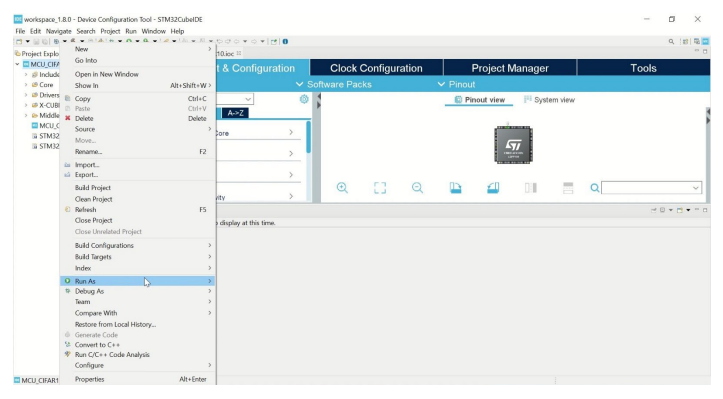
- If you get an ‘undefined reference’ error, go to
Core/Src/main.c. Removestaticfrom the declaration of theMX_USART1_UART_Init()function and also from its definition. TryRun Asagain.

With the model now deployed on the STM32 board, you are ready to test it.