Deploy GitHub Actions workflows using Windows Sandbox
Introduction
Configure Windows Sandbox as your GitHub Actions self-hosted Arm64 runner
Build and run the .NET application using the GitHub Actions workflow
Next Steps
Deploy GitHub Actions workflows using Windows Sandbox
Overview
In this Learning Path, you will deploy a CI/CD GitHub Actions workflow to build and publish a sample Windows Presentation Foundation (WPF) application that solves a well-known algorithmic problem, the Traveling Salesman Problem .
You will learn how to configure and use Windows Sandbox as a self-hosted Arm64 runner to build this sample .NET WPF application. Runners are machines that execute the jobs in the GitHub Actions workflow. A self-hosted runner is a machine that you deploy and manage to execute jobs from GitHub Actions.
Self-hosted runners offer more control and flexibility of hardware, software tools, and operating systems than GitHub-hosted runners provide.
Prepare GitHub repository
All the code you will need to follow this learning path is provided in this repository . The repository includes the source code to build and compile the sample WPF application with .NET 8. Support for WPF on Arm is included in .NET 6 and newer versions.
Start by preparing your GitHub repository:
- Log in to GitHub using your account credentials.
- On the top right corner, click the + dropdown and select Import repository.
- In the Import your project to GitHub section, enter https://github.com/pareenaverma/win-sandbox-dotnet-app in the The URL for your source repository field.

- Set the repository name, for example, sandbox-ci-cd-net.
- Click the Begin import button.
In a few minutes, the contents of the source repository are imported into the new repository.
Configure Windows Sandbox as the self-hosted runner
You are now ready to register Windows Sandbox as your self-hosted Arm64 runner.
In your imported GitHub repository, go to the Actions tab, and under Management, click on Runners. If you do not see the Actions tab, navigate to Settings > Actions and select Allow all actions and reusable workflows. This will display the following window:

Then, click on the New runner button, followed by New self-hosted runner. In the Add new self-hosted runner section, proceed as follows:
- For Runner Image, select Windows.
- For Architecture, select ARM64.
You will see instructions displayed on this page. These are commands you now need to run in Windows Sandbox to configure it as your self-hosted Arm64 Windows runner.
On your host machine, click on the Search bar and enter Windows Sandbox.
In your running Windows Sandbox, open up PowerShell. You will now copy and paste all the commands into PowerShell.
The commands are also shown here for your convenience. To download the runner package:
mkdir actions-runner && cd actions-runner

Invoke-WebRequest -Uri https://github.com/actions/runner/releases/download/v2.316.1/actions-runner-win-arm64-2.316.1.zip -OutFile actions-runner-win-arm64-2.316.1.zip

if((Get-FileHash -Path actions-runner-win-arm64-2.316.1.zip -Algorithm SHA256).Hash.ToUpper() -ne '3efe553a881f24eb20e79750033f69c23fcff35d78448aedf539f606cf9b869f'.ToUpper()){ throw 'Computed checksum did not match' }

Add-Type -AssemblyName System.IO.Compression.FileSystem ; [System.IO.Compression.ZipFile]::ExtractToDirectory("$PWD/actions-runner-win-arm64-2.316.1.zip", "$PWD")
Next, configure it with the following command:
./config.sh --url https://github.com/pareenaverma/sandbox-ci-cd-net --token <TYPE_YOUR_TOKEN>
You will be prompted to provide the runner group, the name of the runner, and the work folder name. You can accept the defaults by pressing Enter at each step or you can choose to override the Defaults. In this example, the name of the runner is windows-sandbox.
Finally, start the runner by executing:
./run.sh
You have successfully configured Windows Sandbox as your self-hosted runner and and it is ready to receive jobs. The output should look similar to:
        √ Connected to GitHub

Current runner version: '2.314.1'
2024-03-25 16:21:59Z: Listening for Jobs
Return to the imported GitHub repository on your host machine. The runner will now be visible in the GitHub actions:
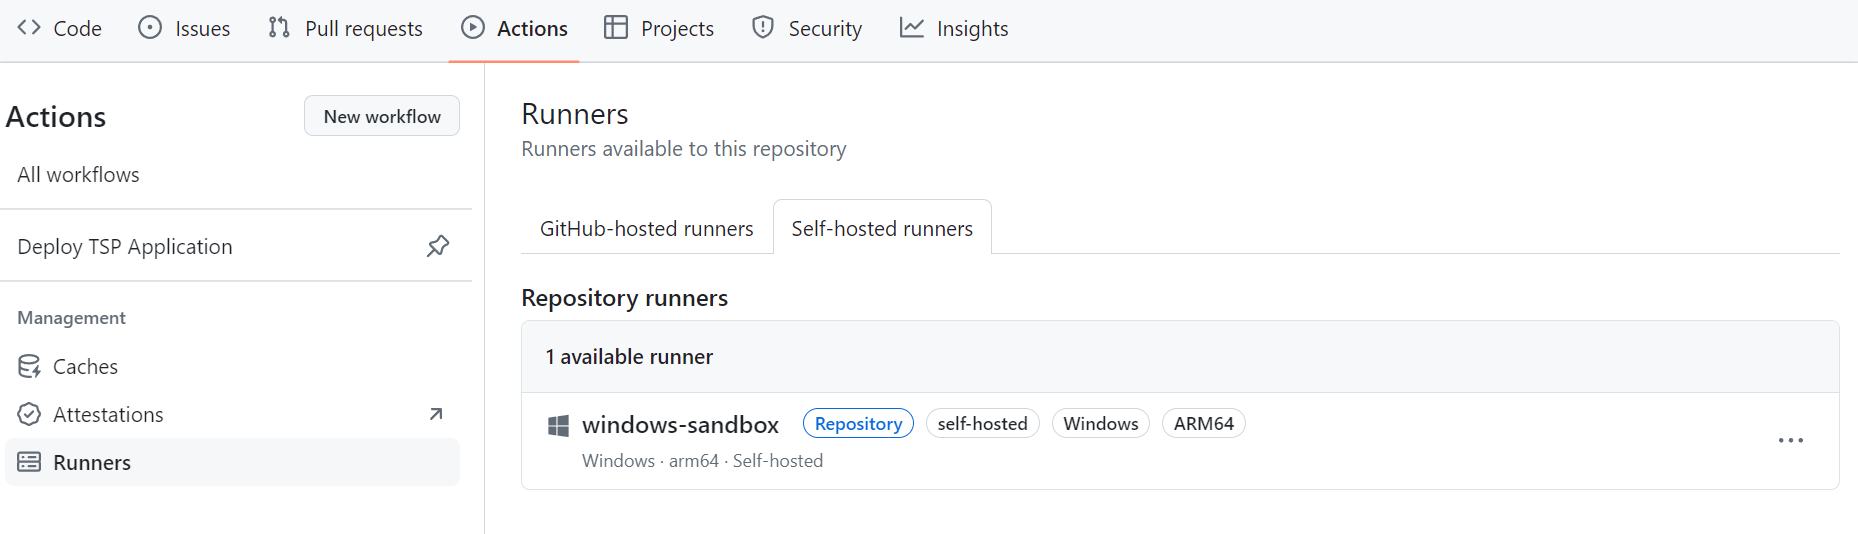
You have successfully prepared your repository to run the CI/CD pipeline on the Windows Sandbox self-hosted runner. In the next step, you will test it.