Run ASP.NET Core Web Server on Arm64
Introduction
Create a ASP.NET Core Web API project
Build, run, and access the web server
Next Steps
Run ASP.NET Core Web Server on Arm64
Objective
In this section, you will build and run the Arm64.HeadlessIoT project you created.
Building and running the application
To build and run the application proceed as follows.
Open the command prompt window, go to the project’s folder and type:
dotnet run
The command will generate the following output:
        dotnet run
Building...
info: Microsoft.Hosting.Lifetime[14]
      Now listening on: http://localhost:5203
info: Microsoft.Hosting.Lifetime[0]
      Application started. Press Ctrl+C to shut down.
info: Microsoft.Hosting.Lifetime[0]
      Hosting environment: Development
info: Microsoft.Hosting.Lifetime[0]
      Content root path: C:\Arm64.HeadlessIoT
You can check the processor architecture used by the app by opening the Task Manager and clicking on the Details pane:
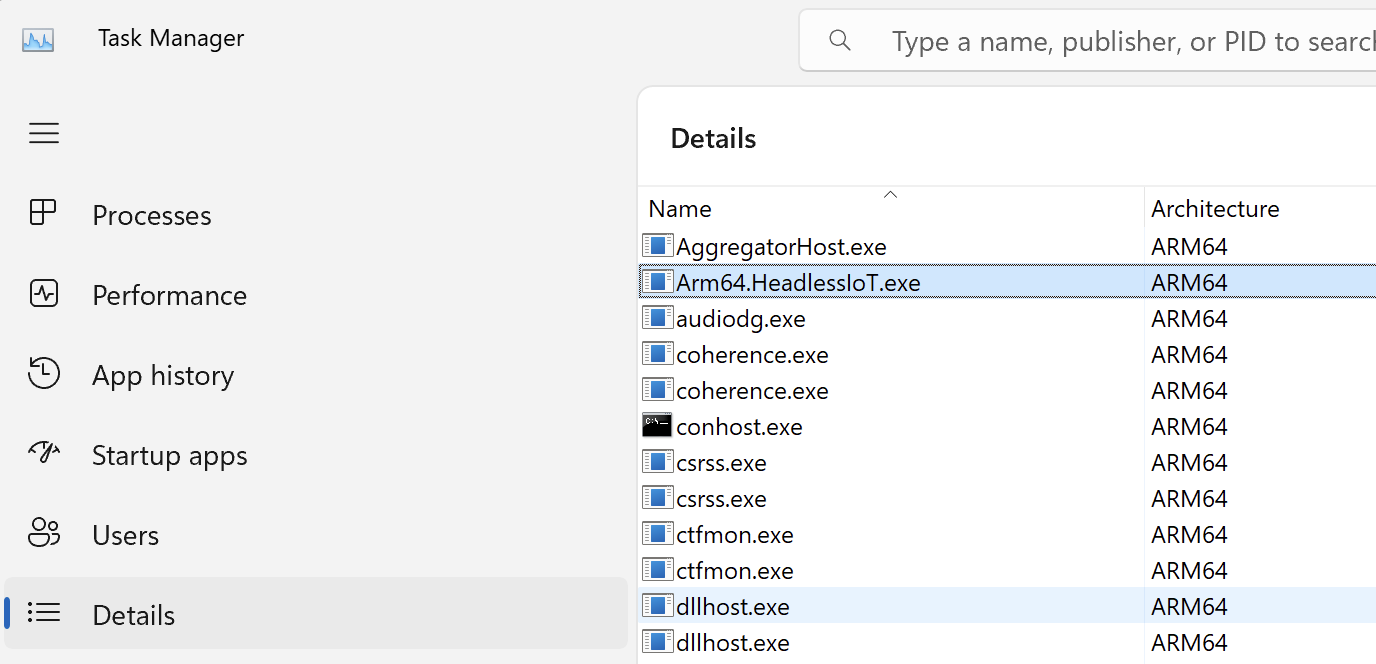
Here the architecture is ARM64.
The dotnet run command uses Arm64 architecture by default. If you have multiple SDKs , you must explicitly specify the architecture using the -a parameter. For example:
dotnet run -a x64
Test the GET request
Now, open the web browser (or use wget) and navigate to http://localhost:
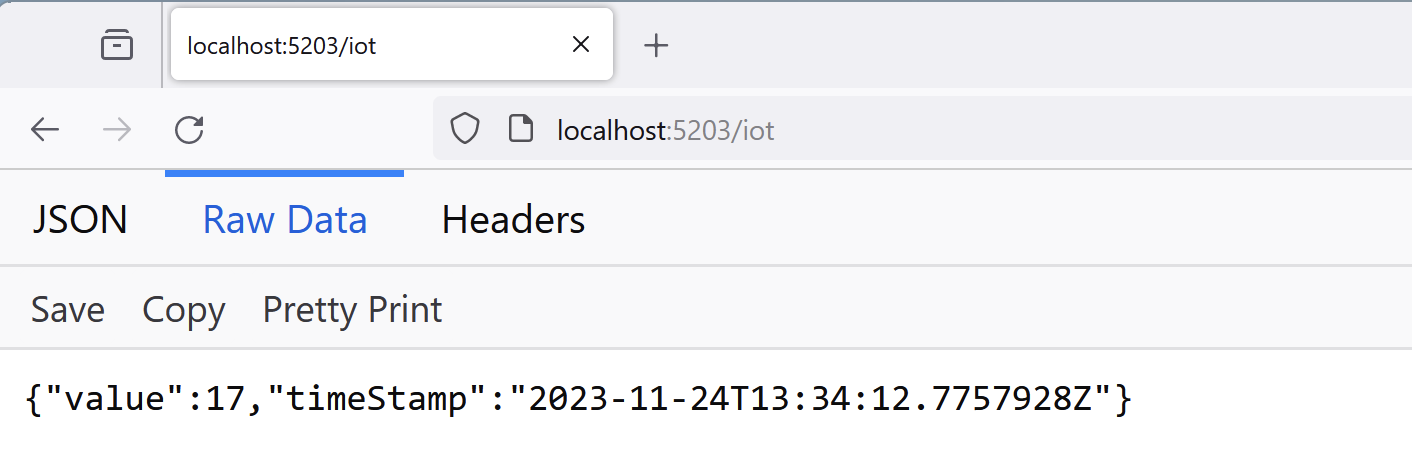
The web server outputs an emulated sensor reading which in this case reported a temperature value of 17.
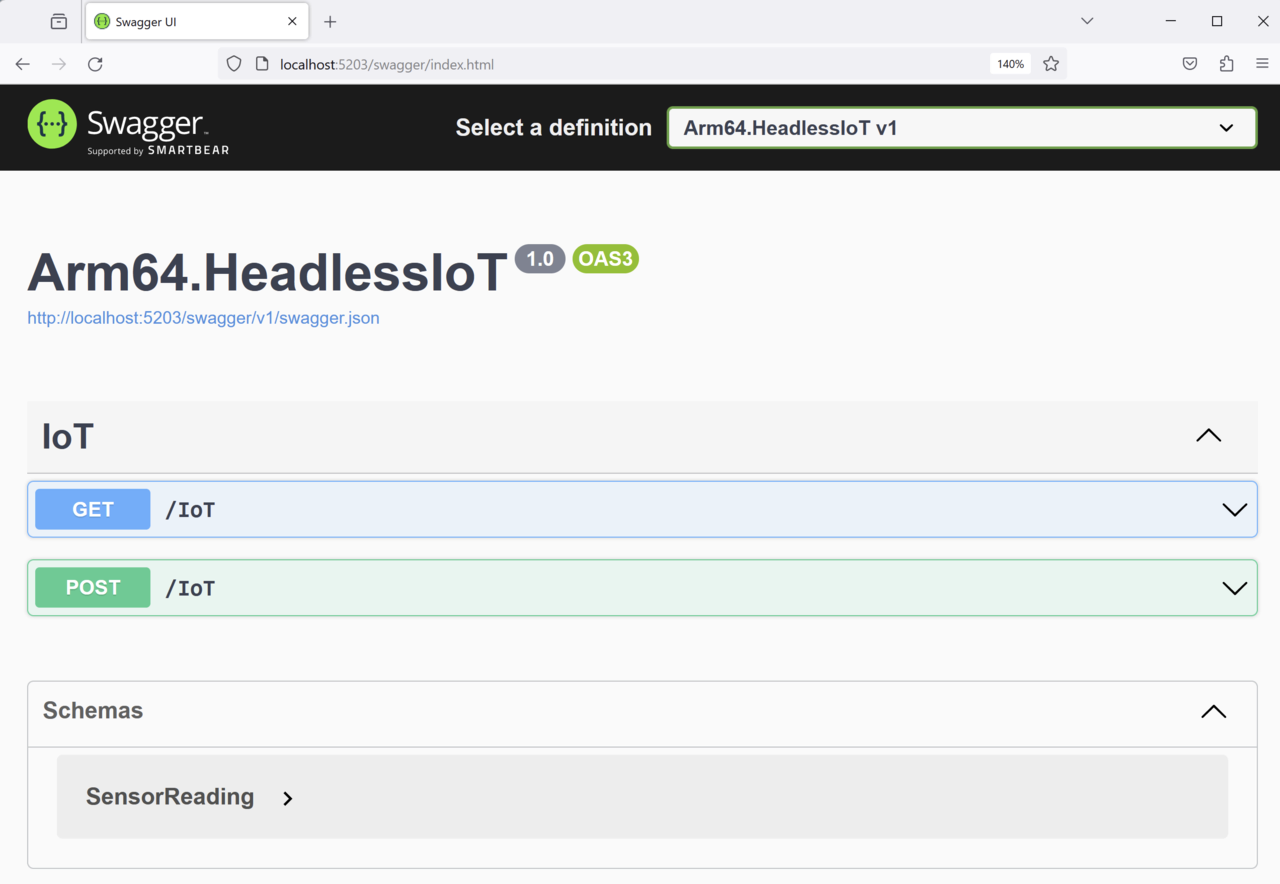
Test the POST request
To test the POST method of the IoTController class, use curl, Postman, or Swagger. Swagger is the simplest to use as it’s available in the project you created.
To access Swagger, type http://localhost:
Now, expand the POST section and click the Try it out button. The caption of this button will change to Cancel, and the isActive drop-down list becomes active. Set isActive to false, and then click Execute:
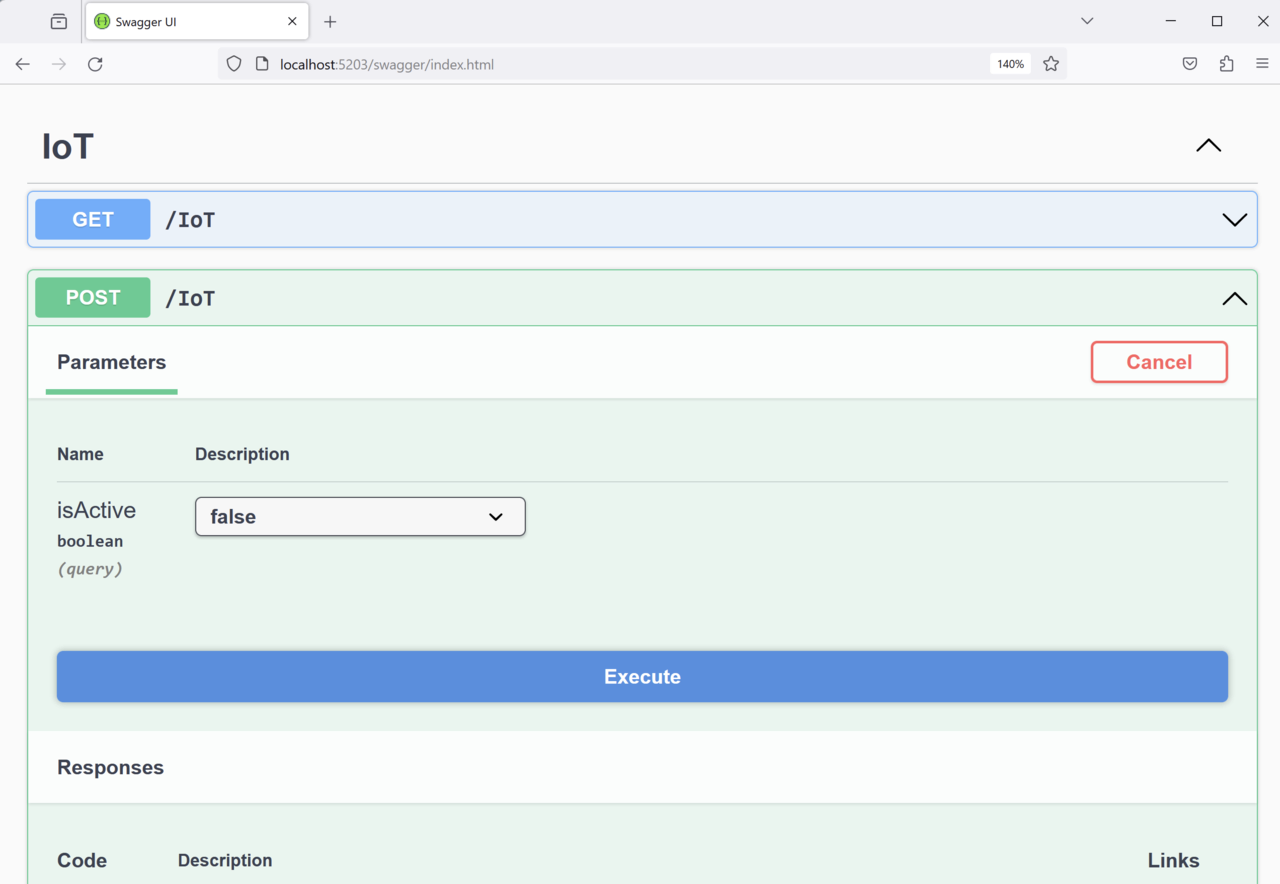
This action sends the POST request to IoTController and disables the emulator. All subsequent GET calls to the IoTController will return the last known sensor reading (which is the final reading generated before disabling the emulator). When you set isActive back to true and send the GET request to the web server, you will see the temperature setting update.
Summary
This learning path has demonstrated how to use ASP.NET Core to implement a web API server for headless IoT apps running on Windows 11 on Arm. It showed how the web server can retrieve simulated sensor readings from a temperature sensor emulator. It also showed how to control the emulator through a web server. Finally, it demonstrated the use of the dependency injection in ASP.NET Core and Swagger to test a web API. ASP.NET Core is cross-platform, allowing you to use a similar approach to run web servers on non-Windows platforms.
By combining ASP.NET Core with Arm64, you can implement high-performance, low-power consumption web servers for all your applications.