Extend OpenClaw for a local-first AI assistant across Arm platforms
Introduction
Understand the architecture and local data boundaries
Prepare the DGX Spark host and local services
Configure and start the OpenClaw runtime on DGX Spark
Validate memory persistence and routing with Telegram and Qdrant
Validate document RAG, web search, and proactive tasks
(Optional) Port the app to a CPU-only Armv9 system
Next Steps
Extend OpenClaw for a local-first AI assistant across Arm platforms
Introduction
Understand the architecture and local data boundaries
Prepare the DGX Spark host and local services
Configure and start the OpenClaw runtime on DGX Spark
Validate memory persistence and routing with Telegram and Qdrant
Validate document RAG, web search, and proactive tasks
(Optional) Port the app to a CPU-only Armv9 system
Next Steps
Configure the Telegram bot environment variables
With the host and local services ready, configure the Telegram bot.
You need a Telegram account, a bot token, and the numeric chat ID for the account that will use the bot. Create a Telegram account if you don’t already have one. You can use the Telegram desktop, mobile, or web client for the following steps.
To create a bot and obtain its token:
Open Telegram and start a chat with BotFather.
Send the following command:
/newbotFollow BotFather’s prompts to name the bot and choose a username.
Copy the HTTP API token that BotFather returns. You’ll add it to the
.envfile later.
For more information about creating and managing bots, see the official Telegram Bot tutorial .
Next, obtain the chat ID for your Telegram account:
Open a chat with the bot that you created and send a test message, such as
Hello. The message creates an update that the Telegram Bot API can return.Open a terminal on your local machine and query the updates. Replace
<your-telegram-bot-token>with the HTTP API token from BotFather:curl "https://api.telegram.org/bot<your-telegram-bot-token>/getUpdates"The output is similar to:
        {
  "ok": true,
  "result": [
    {
      "update_id": (...),
      "message": {
        (...)
      },
      "chat": {
        (...)
      },
      "date": (...),
      "text": "Hello"
    }
  ]
}
Copy the
message.chat.idvalue. You’ll use this value for<your-telegram-chat-id>in the.envfile. If theresultarray is empty, send another message to the bot and run the command again.
Copy the DGX Spark environment template:
cp .env.example .env
Keep .env in the openclaw-arm-continuum repository root, alongside .env.example. The deployment command reads it from this location.
Then, generate a Gateway token:
openssl rand -hex 32
Edit .env and set the four private values:
OPENCLAW_TELEGRAM_BOT_TOKEN=<your-telegram-bot-token>
OPENCLAW_TELEGRAM_ALLOWED_CHAT_IDS=<your-telegram-chat-id>
OPENCLAW_CRON_CHAT_IDS=<your-telegram-chat-id>
OPENCLAW_GATEWAY_TOKEN=<generated-gateway-token>
Set OPENCLAW_CRON_TIMEZONE to your local
IANA timezone
. For example, use Europe/London, America/New_York, or Asia/Singapore:
OPENCLAW_CRON_TIMEZONE=<your-IANA-timezone>
Scheduled jobs use UTC when this setting is omitted.
You’ll name the location explicitly when asking weather-related questions, so you don’t need to configure OPENCLAW_DEFAULT_WEATHER_LOCATION.
Don’t share your Telegram bot token or chat ID with anyone, and don’t include them in screenshots, logs, or public repositories.
Only allowlisted chat IDs can send commands to this runtime.
The main tutorial flow uses the default personal collections:
personal_tracker_memory
personal_knowledge_base
You don’t need to add collection settings to .env for this default path. Use only the synthetic data provided in the exercises.
If this host already contains personal runtime data, or if you’re preparing a public demonstration, add the following optional settings to .env to isolate the tutorial data:
OPENCLAW_TRACKER_COLLECTION=demo_tracker_memory
OPENCLAW_KNOWLEDGE_COLLECTION=demo_knowledge_base
OPENCLAW_RUNTIME_LABEL=DGX Spark Demo
If you choose this option, replace the personal_* collection names in later verification commands with the corresponding demo_* names.
The DGX model that you’ll use is text-first. Disable experimental vision routing:
OPENCLAW_VISION_ENABLED=false
Initialize and start the runtime stack
The Gateway runs as user ID 1000 inside its container and needs write access to its persistent state directory. Prepare the directory before starting the stack:
mkdir -p gateway-data/state
sudo chown -R 1000:1000 gateway-data
sudo chmod -R u+rwX gateway-data
Start the complete DGX Spark stack:
docker compose --env-file .env -f compose.yaml up -d
The first start takes longer than subsequent starts because vLLM downloads the approximately 30 GiB Qwen model before loading it. The download time depends on your network connection and can make the initial startup longer. Subsequent starts use the cached model. A running container doesn’t mean that its API is ready.
Check service status and API readiness:
docker compose --env-file .env -f compose.yaml ps -a
docker logs --tail 80 openclaw-vllm
docker logs --tail 80 openclaw-gateway
docker logs --tail 80 openclaw-telegram
docker logs --tail 80 openclaw-cron
Follow the vLLM log during the first startup:
docker logs -f openclaw-vllm
Wait for Application startup complete. Press Ctrl+C to leave the log view without stopping the container.
Confirm that the model API is ready:
curl http://127.0.0.1:8000/v1/models
Verify that a project container can reach both host services through the Docker host gateway:
docker exec openclaw-telegram python -c "import urllib.request; print(urllib.request.urlopen('http://host.docker.internal:11434/api/tags').status)"
docker exec openclaw-telegram python -c "import urllib.request; print(urllib.request.urlopen('http://host.docker.internal:6333/collections').status)"
Both commands should print HTTP status 200.
Confirm the local Gateway dashboard endpoint:
curl -I http://127.0.0.1:18789/
An HTTP 200 response confirms that the Gateway dashboard is reachable.
Run the first Telegram test
Creating the bot with BotFather registers its name and username in Telegram. The openclaw-telegram container uses the token in .env to connect the Telegram bot to the local Gateway and AI services on DGX Spark.
Find the bot in Telegram by searching for the username that you chose in BotFather. You can also replace <your-bot-username> in https://t.me/<your-bot-username> with that username and open the URL. Select Start to open a chat. The bot doesn’t start a chat with you or automatically appear in your chat list.
Messages use the following path:
Telegram client -> Telegram Bot API -> openclaw-telegram container on DGX Spark
    -> local Gateway and AI services -> openclaw-telegram container -> Telegram client
After the containers are running and you’ve started the Telegram chat, send:
/help
The bot should return the OpenClaw command card. Next, send a short general message:
Explain one benefit of running an AI assistant locally in one sentence.
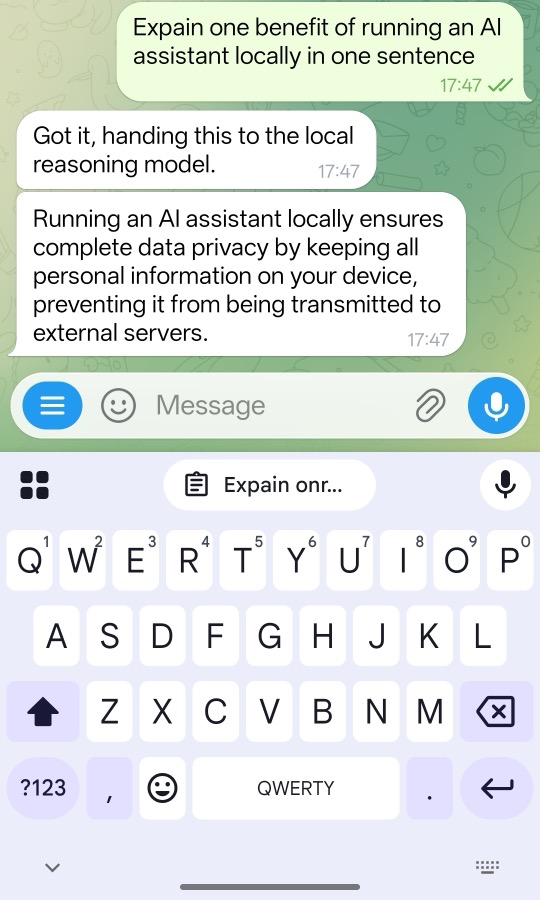 Telegram response from the local reference runtime
Watch the Telegram logs while the request is processed:
docker logs --tail 10 openclaw-telegram
The output is similar to:
        2026-07-17T15:38:47+00:00 [telegram] chat_id=<your-telegram-chat-id> text_chars=69
2026-07-17T15:38:47+00:00 [runtime] start chat_id=<your-telegram-chat-id> active=1
2026-07-17T15:38:51+00:00 [runtime] done chat_id=<your-telegram-chat-id> task_id=<task-id> agent=chat_agent duration_ms=4153 answer_chars=180
Watch the Telegram logs while the request is processed:
docker logs --tail 10 openclaw-vllm
The recent log should include a successful local completion request similar to:
(APIServer pid=1) INFO: 172.18.0.7:48686 - "POST /v1/chat/completions HTTP/1.1" 200 OK
The request appearing in the local logs confirms the runtime path. The model’s text alone isn’t evidence that inference was local.
Execute test suites
Run the repository tests from the host:
OPENCLAW_OLLAMA_BASE_URL=http://127.0.0.1:11434 \
OPENCLAW_QDRANT_BASE_URL=http://127.0.0.1:6333 \
PYTHONPATH=app python3 -m unittest discover -s tests
The final lines are similar to:
        Ran 121 tests in 4.256s
OK (skipped=5)
The count and time can change. OK confirms that the software behavior tests passed. These aren’t hardware benchmarks.
What you’ve accomplished and what’s next
You’ve now deployed the personal reference runtime on NVIDIA DGX Spark, connected it to your Telegram bot, verified the local vLLM endpoint, and checked the runtime tests.
Next, you’ll use the deployment as a local-first household assistant and confirm that memory is stored in local Qdrant collections.