Fine-tune SmolVLA for an SO-101 pick-and-place task on an NVIDIA DGX Spark
Introduction
Understand the SmolVLA fine-tuning workflow
Install LeRobot and prepare a Python environment
Connect the SO-101 and cameras
Calibrate and teleoperate the SO-101
Record and validate a pick-and-place dataset
Fine-tune SmolVLA with the recorded SO-101 demonstrations
Evaluate the fine-tuned SmolVLA model
Next Steps
Fine-tune SmolVLA for an SO-101 pick-and-place task on an NVIDIA DGX Spark
Introduction
Understand the SmolVLA fine-tuning workflow
Install LeRobot and prepare a Python environment
Connect the SO-101 and cameras
Calibrate and teleoperate the SO-101
Record and validate a pick-and-place dataset
Fine-tune SmolVLA with the recorded SO-101 demonstrations
Evaluate the fine-tuned SmolVLA model
Next Steps
Connect the SO-101 hardware
Connect the SO-101 leader, SO-101 follower, gripper camera, and workspace camera to the DGX Spark over USB.
The connections are:
SO-101 leader ------- USB ---\
SO-101 follower ----- USB ----+-- DGX Spark
Gripper camera ------ USB ----|   (LeRobot host)
Workspace camera ---- USB ---/
Mount the gripper camera on the follower for a close view of grasping. Keep the workspace camera fixed and frame the follower, pickup area, rack, and full range of arm movement.
On Ubuntu, the robot controller appears as a serial device. Membership in the dialout group lets your user account open that device without running every LeRobot command with sudo. Add your account to the group:
sudo usermod -aG dialout "$USER"
Log out and back in. Return to the cloned LeRobot directory, reactivate the environment, and verify group membership:
source .venv/bin/activate
id -nG | tr ' ' '\n' | grep '^dialout$'
The expected output is:
dialout
Identify the robot arm ports
Run the port finder:
lerobot-find-port
The output lists all serial ports on the host. The relevant lines are similar to:
        Finding all available ports for the MotorsBus.
Ports before disconnecting: [..., '/dev/ttyACM0', '/dev/ttyACM1']
Remove the USB cable from your MotorsBus and press Enter when done.
The port of this MotorsBus is '/dev/ttyACM0'
Reconnect the USB cable.
Device paths can differ on your system. Identify the two roles in this order:
- On the first run, disconnect only the follower USB data cable. The detected path is the value for
ROBOT_PORT. Reconnect the follower and wait for the device to reappear. - Run
lerobot-find-portagain and disconnect only the leader USB data cable. The detected path is the value forLEADER_PORT. Reconnect the leader before continuing.
Save the complete device paths in environment variables for the current terminal. For example, if the two discovery runs reported /dev/ttyACM0 for the follower and /dev/ttyACM1 for the leader, run:
export ROBOT_PORT="/dev/ttyACM0"
export LEADER_PORT="/dev/ttyACM1"
Discover the cameras
Close browsers, video-conferencing software, and desktop camera applications before discovery so OpenCV can open both camera streams.
Discover the OpenCV streams and save a diagnostic image from each camera:
lerobot-find-cameras opencv --output-dir outputs/captured_images
An abbreviated output is similar to:
        --- Detected Cameras ---
Camera #0:
  Name: OpenCV Camera @ /dev/video0
  Type: OpenCV
  Id: /dev/video0
  Backend api: V4L2
  Default stream profile:
    ...
    Fourcc: YUYV
    Width: 640
    Height: 480
    Fps: 30.0
--------------------
Camera #1:
  Name: OpenCV Camera @ /dev/video2
  Type: OpenCV
  Id: /dev/video2
  Backend api: V4L2
  Default stream profile:
    ...
    Fourcc: YUYV
    Width: 640
    Height: 480
    Fps: 30.0
--------------------
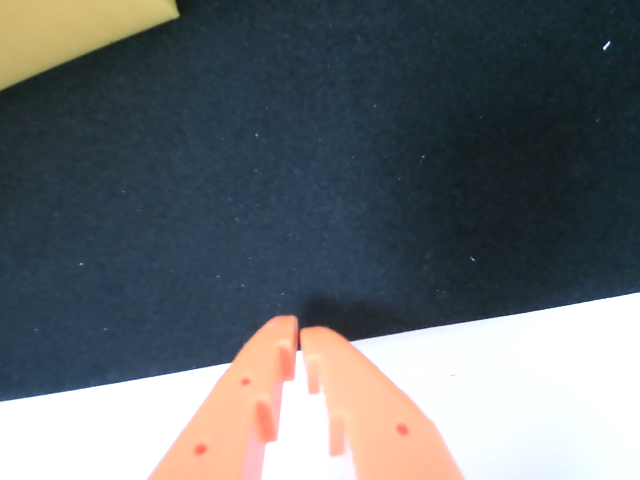
Open the images in outputs/captured_images/ and match each Id to its view.
| Gripper camera view | Workspace camera view |
|---|---|
 Gripper camera view Gripper camera view | 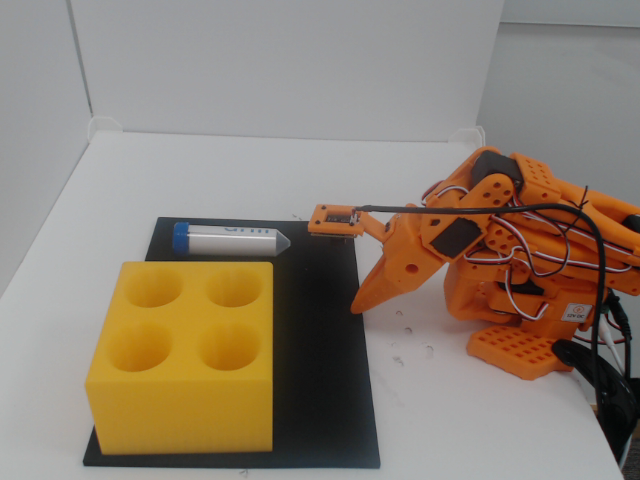 Workspace camera view Workspace camera view |
Camera numbers and device paths can differ on your host. Use each camera’s Id value, not Camera #0 or Camera #1. Assign the camera showing the gripper to GRIPPER_CAMERA_ID. Assign the camera covering the complete task to WORKSPACE_CAMERA_ID.
The tested setup used the following mapping:
export GRIPPER_CAMERA_ID="/dev/video0"
export WORKSPACE_CAMERA_ID="/dev/video2"
Your device paths might differ.
Device paths can change after reconnection, so don’t assume that a previous device path still identifies the same arm or camera.
What you’ve accomplished and what’s next
You’ve now connected and identified both SO-101 arms and assigned the gripper and workspace camera roles. Keep the hardware connected and the camera mounts fixed.
Next, you’ll calibrate both arms and verify teleoperation before recording demonstrations.