Visualize Ethos-U NPU performance with ExecuTorch on Arm FVPs
Introduction
Overview
Understand the ExecuTorch workflow
Set up your ExecuTorch environment
Set up the Corstone-320 Fixed Virtual Platform
Deploy and run Mobilenet V2 on the Corstone-320 FVP
Enable GUI and deploy a model on Corstone-320 FVP
Evaluate Ethos-U Performance
Next Steps
Visualize Ethos-U NPU performance with ExecuTorch on Arm FVPs
Visualize model execution using the FVP GUI
You’ve successfully deployed a model on the Corstone-320 FVP from the command line. In this step, you’ll enable the platform’s built-in graphical output and re-run the model to observe instruction-level execution metrics in a windowed display.
Find your IP address
Note down your computer’s IP address:
ip addr show
You’ll use the IP address of your active network interface (inet) later to pass as an argument to the FVP.
For macOS, note down your en0 IP address (or whichever network adapter is active):
ipconfig getifaddr en0 # Returns your Mac's WiFi IP address
Configure the FVP for GUI output
Edit the following parameters in your locally checked out executorch/backends/arm/scripts/run_fvp.sh file, to enable the Mobilenet V2 output on the FVP’s GUI:
-C mps4_board.subsystem.ethosu.num_macs=${num_macs} \
-C mps4_board.visualisation.disable-visualisation=1 \
-C vis_hdlcd.disable_visualisation=1                \
-C mps4_board.telnetterminal0.start_telnet=0        \
-C mps4_board.uart0.out_file='-'                    \
-C mps4_board.uart0.shutdown_on_eot=1               \
- Change
mps4_board.visualisation.disable-visualisationto equal0 - Change
vis_hdlcd.disable_visualisationto equal0 - Enter a
--display-ipparameter and set it to your computer’s IP address
-C mps4_board.subsystem.ethosu.num_macs=${num_macs} \
-C mps4_board.visualisation.disable-visualisation=0 \
-C vis_hdlcd.disable_visualisation=0                \
-C mps4_board.telnetterminal0.start_telnet=0        \
-C mps4_board.uart0.out_file='-'                    \
-C mps4_board.uart0.shutdown_on_eot=1               \
--display-ip <YOUR_IP_ADDRESS>                   \
Deploy the model
Now run the Mobilenet V2 computer vision model, using executorch/examples/arm/run.sh :
./examples/arm/run.sh \
--aot_arm_compiler_flags="--delegate --quantize --intermediates mv2_u85/ --debug --evaluate" \
--output=mv2_u85 \
--target=ethos-u85-128 \
--model_name=mv2
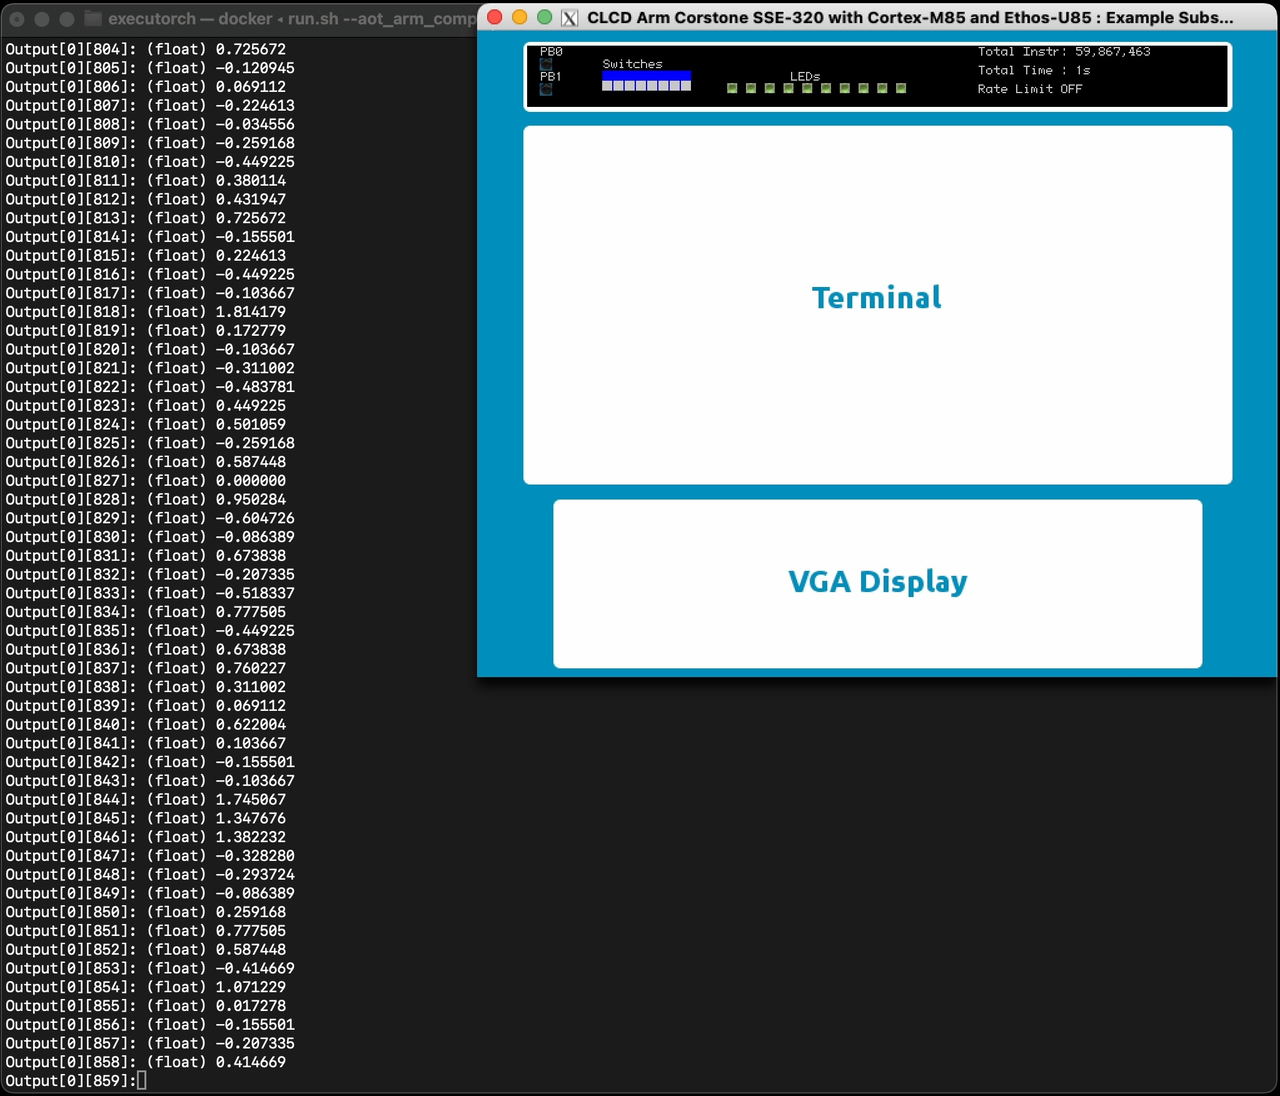
Observe that the FVP loads the model file, compiles the PyTorch model to ExecuTorch .pte format and then shows an instruction count in the top right of the GUI:
 Terminal and FVP output
For macOS users, follow these instructions:
Start Docker. FVPs run inside a Docker container.
Make sure to use an official version of Docker and not a free version like the Colima Docker container runtime
run.shassumes Docker Desktop style networking (host.docker.internal) which breaks with ColimaColima then breaks the FVP GUI
Start XQuartz: on macOS, the FVP GUI runs using XQuartz.
Start the xquartz.app and then configure XQuartz so that the FVP will accept connections from your Mac and localhost:
xhost + <YOUR_IP_ADDRESS>
xhost + 127.0.0.1 # The Docker container seems to proxy through localhost