Optimize ExecuTorch fallback with CMSIS-NN on Cortex-M
Introduction
Understand and prepare the environment
Lower a model to the Cortex-M backend
Add Ethos-U delegation and CPU fallback
Inspect the generated CMSIS Pack selection
Understand the reusable CMSIS project
Build and run the mixed application
Next Steps
Optimize ExecuTorch fallback with CMSIS-NN on Cortex-M
ExecuTorch for Cortex-M and Ethos-U
ExecuTorch is the PyTorch runtime for deploying machine learning models on edge devices, including embedded systems. It converts trained models into programs that can run within the limited memory and compute resources of a microcontroller.
Many microcontrollers use Arm Cortex-M CPUs. Some also integrate an Arm Ethos-U NPU to accelerate neural-network operations.
For combined Cortex-M and Ethos-U systems, ExecuTorch lets one model use both processors. Supported operations are dispatched to the Ethos-U NPU, while remaining operations run on the Cortex-M CPU.
Choose where each operation runs
The example model uses three execution paths:
| Execution path | What operation runs there | Why the operation runs there |
|---|---|---|
| Ethos-U55 NPU | The stride-1 convolution | The NPU supports this convolution configuration. |
| CMSIS-NN kernels on Cortex-M | The stride-4 convolution | Ethos-U55 doesn’t support this configuration, so the CPU runs it with an optimized CMSIS-NN kernel. |
| ExecuTorch portable kernels on Cortex-M | The topk operation | This operation uses a general CPU implementation. |
The following diagram shows the NPU path alongside the two paths that run on the Cortex-M CPU:
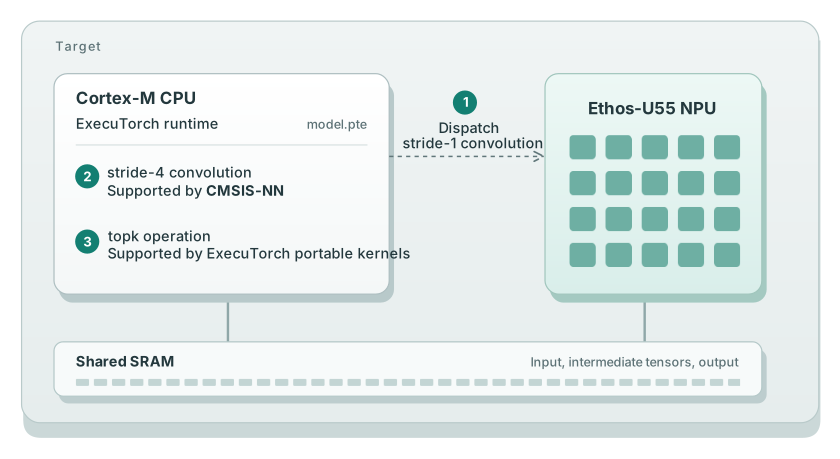 ExecuTorch execution paths
Fallback is expected here during export. It isn’t recovery from an NPU failure at runtime. The exporter determines which regions the target Ethos-U delegate supports. It then assigns known remaining patterns to the Cortex-M backend.
Ethos-U55 is used for this Learning Path because its unsupported stride-4 convolution creates a predictable fallback region. Ethos-U85 supports more operator configurations, so it will typically have less CPU fallback than Ethos-U55. The same workflow still applies when a model contains operations that remain outside the U85 delegate.
You’ll export a model and select CMSIS-NN kernels for its Cortex-M operations. You’ll then run a mixed CPU and NPU application on a Corstone-300 Fixed Virtual Platform (FVP). The checks show which implementations the model uses and confirm that inference completes. Measure latency and power on your target hardware to quantify the benefit for your application.
The CMSIS-Executorch example that you’ll clone already contains the necessary board support, runner, memory configuration, and FVP settings.
Check the host tools
You need Visual Studio Code (VS Code) for the Keil Studio workflow. Before cloning the project, check that Git and Python 3.10–3.13 are available in your host terminal:
git --version
python3 --version
git --version
python --version
If either command is unavailable, install Git or a supported Python version before continuing.
Python 3.14 is excluded because the pinned Tensor Operator Set Architecture (TOSA) export dependency has no wheel for it.
On Linux, ensure that your Python installation includes venv support. Install the python3-venv package for your distribution if needed.
The macOS exporter requires Apple silicon and macOS 15 or later. The pinned ExecuTorch and TOSA packages don’t provide Intel macOS wheels. Docker supplies the FVP on macOS, and the Python exporter runs on the host.
On Windows, enable long-path support before installing the export dependencies.
Clone the example project
Clone the CMSIS-Executorch example and select the tested revision:
git clone https://github.com/Arm-Examples/CMSIS-Executorch.git
cd CMSIS-Executorch
git checkout 4002b63dcc3e27eb7444946a0dbf69b9a74d6fc9
The CMSIS-Executorch directory is the project root. Open this folder in VS Code and use it as the working directory for every command.
Install the VS Code extensions
In the VS Code Extensions view, install the Keil Studio Pack and the Python extension . Keil Studio Pack includes Arm Tools Environment Manager and the CMSIS Solution extension that you’ll use.
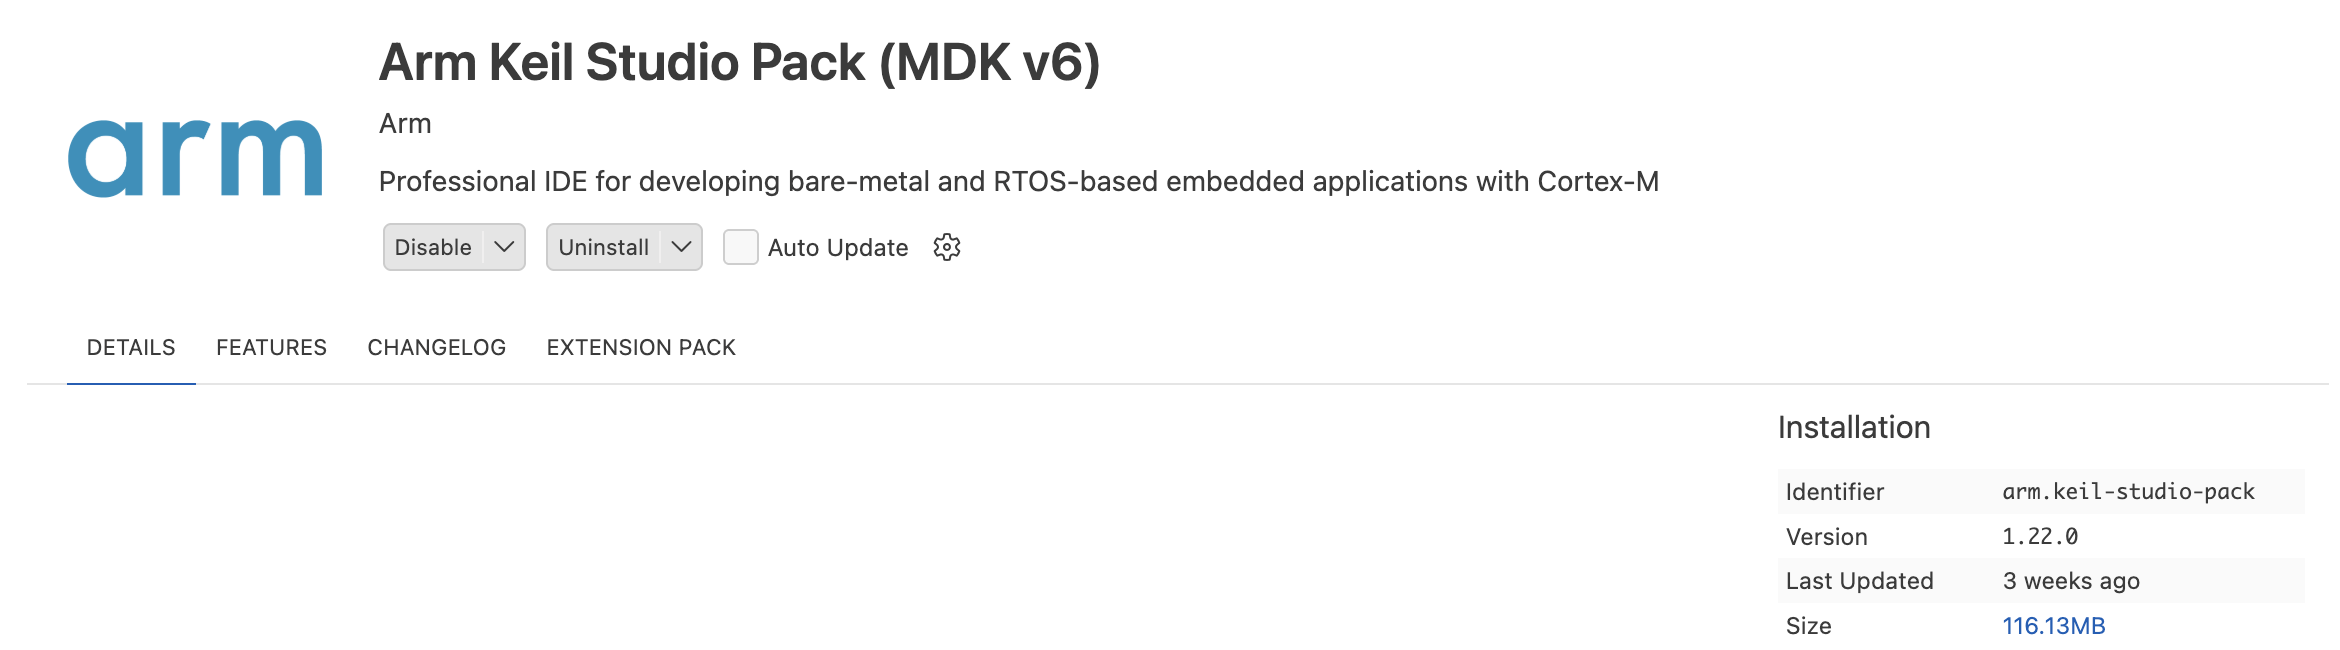 Keil Studio Pack installed in VS Code
Activate the Arm tools and license
When you open the project folder, Arm Tools Environment Manager automatically activates vcpkg-configuration.json by default. If prompted, allow it to download the declared tools. Wait for the Arm Tools status-bar indicator to finish loading. Hover over it to check the installed tools, or open Arm Tools > View Log to inspect activation errors.
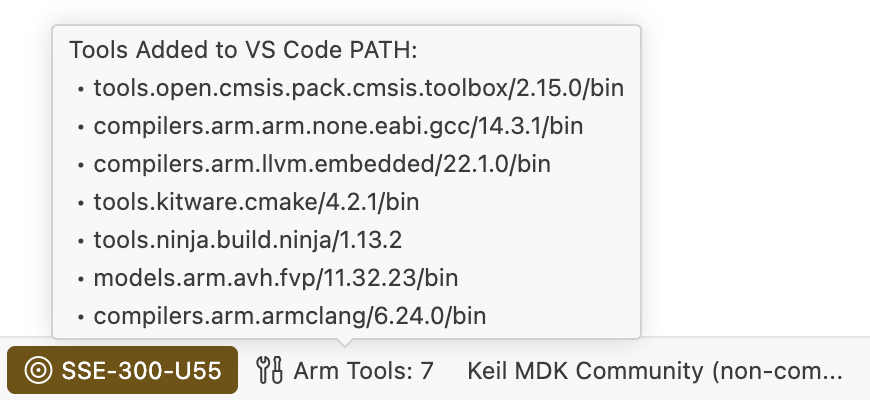 Confirm that the project's Arm tools are active
If activation doesn’t start, right-click vcpkg-configuration.json in the Explorer view and select Activate Environment. You can also select Activate Environment from the Arm Tools status-bar menu when the configuration is detected.
Arm Compiler for Embedded requires an activated license. Select the license indicator next to Arm Tools, then select Activate Arm Keil MDK Community Edition for evaluation or non-commercial use. Alternatively, you can select Activate or manage Arm licenses to use your existing license.
Confirm that the indicator shows an active license before building. For available options, see Keil Studio license activation .
In the CMSIS view, select … > Open Solution in Workspace and choose cmsis-executorch-u55.csolution.yml. Confirm that the active target is SSE-300-U55.
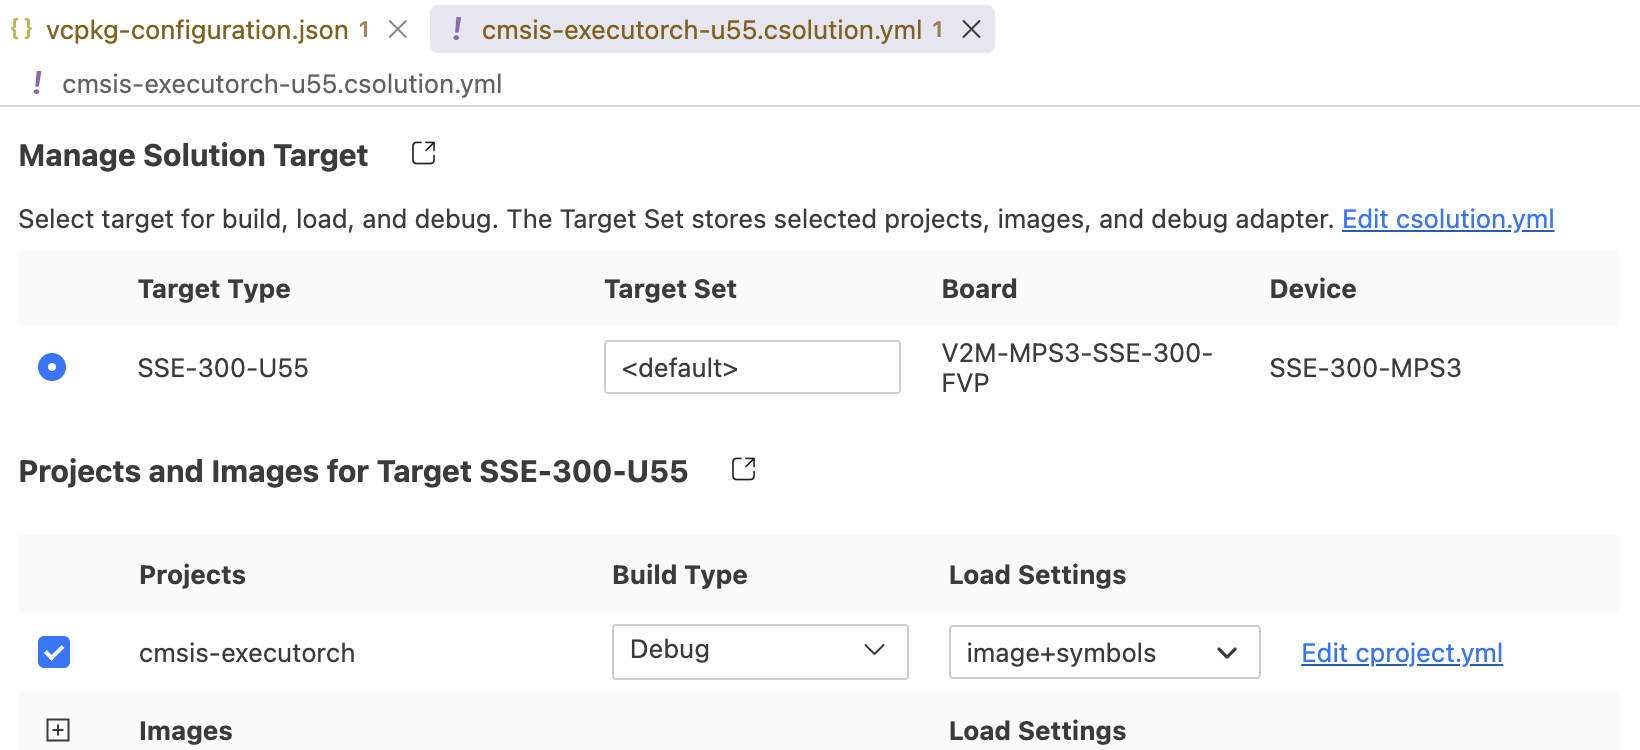 Select the Corstone-300 Ethos-U55 target
Create the Python environment
Select Terminal > Run Task > Create Python environment (pip).
 Run the pip environment setup task
The task runs setup_venv.sh on Linux and macOS, or setup_venv.bat on Windows. Both invoke setup_venv.py. The task completes the following setup steps:
- Creates
.venvusing the host Python interpreter. - Installs
requirements.txt, including ExecuTorch 1.5.1, PyTorch 2.14.0, TorchAO 0.18.0, and Vela 5.1.0. - Installs
requirements-arm-tosa.txtwith--no-depsto preserve the required serialization versions of the exporter. - Checks that the ExecuTorch Arm quantizer imports successfully.
Wait for the task to exit successfully and print a message similar to:
venv ready: .../CMSIS-Executorch/.venv
This task installs the Python dependencies for you. Use the setup script when repairing the environment so that both requirements files are installed with the correct options.
If the task selects a different Python version from the supported one that you installed, run the setup from the project root. For example, with Python 3.12 installed:
PYTHON=python3.12 ./setup_venv.sh
py -3.12 setup_venv.py
Open and verify the working terminal
After Arm tool activation and Python setup, select Terminal > New Terminal.
Use a Bash-compatible shell on Linux and macOS, or PowerShell on Windows. This new integrated terminal receives the activated Arm tool environment.
Activate .venv in this terminal:
source .venv/bin/activate
.\.venv\Scripts\Activate.ps1
Check the working directory and Python interpreter:
python -c "from pathlib import Path; import sys; print('Project:', Path.cwd()); print('Python:', sys.executable)"
The output is similar to:
        Project: .../CMSIS-Executorch
Python: .../CMSIS-Executorch/.venv/bin/python
On Windows, the interpreter path ends in .venv\Scripts\python.exe. Both paths need to belong to the same project. Keep using this terminal for subsequent commands. Repeat environment activation and this check if you need to open a new terminal.
Verify the environment
Check the activated Arm tools and Python package versions:
python --version
cbuild --version
armclang --version
python -c "from importlib.metadata import version; print('ExecuTorch', version('executorch')); print('PyTorch', version('torch'))"
Confirm that Python is between 3.10 and 3.13, cbuild reports 2.15.0 or later, and Arm Compiler for Embedded reports 6.24.
The expected final two lines of the output are:
        ExecuTorch 1.5.1
PyTorch 2.14.0
If a tool is unavailable or its version differs, reactivate the Arm tools and open a new integrated terminal. Activate .venv again before repeating these checks. The ExecuTorch Python package and CMSIS Pack versions need to match because the embedded runtime loads the program produced by the exporter.
Set up Docker on macOS
On macOS, install and start Docker Desktop . The FVP runs inside a Linux container because it isn’t available as a macOS application.
Check that Docker is running:
docker info
The project .vscode/fvp.sh wrapper mounts the project directory into the container, including when it’s outside your home directory. Its first run builds the FVP container image.
Download the Learning Path assets
Download the example folder for the Learning Path from the code examples repository.
The archive is pinned to a commit and includes the fallback model, integration
patch, inspection helpers, and their license. Run the commands from the project root. They create lp-assets for the downloaded originals, then copy the four working files into the project root:
curl -fL "https://gitlab.arm.com/learning-code-examples/code-examples/-/archive/5eb4e50676d4085c90e926abec1c978f257d1bde/code-examples-5eb4e50676d4085c90e926abec1c978f257d1bde.tar.gz?path=learning-paths/embedded-and-microcontrollers/optimize-executorch-fallback-cortex-m" -o lp-assets.tar.gz
mkdir -p lp-assets
tar -xzf lp-assets.tar.gz -C lp-assets --strip-components=4
cp lp-assets/*.py lp-assets/*.patch .
curl.exe -fL "https://gitlab.arm.com/learning-code-examples/code-examples/-/archive/5eb4e50676d4085c90e926abec1c978f257d1bde/code-examples-5eb4e50676d4085c90e926abec1c978f257d1bde.tar.gz?path=learning-paths/embedded-and-microcontrollers/optimize-executorch-fallback-cortex-m" -o lp-assets.tar.gz
New-Item -ItemType Directory -Force lp-assets | Out-Null
tar -xzf lp-assets.tar.gz -C lp-assets --strip-components=4
Copy-Item lp-assets\*.py, lp-assets\*.patch .
Keep track of the project files
The working files now have the following roles:
CMSIS-Executorch/
├── lp-assets/                       Downloaded originals and license
├── mixed_backend_cnn.py             Model to copy into model/model.py
├── export_cortex_m_fallback.py       Export and inspect both graph variants
├── enable_cortex_m_fallback.patch   Add CMSIS-NN fallback to the project exporter
├── verify_pack_sources.py           Check the build's Pack source paths
├── model/model.py                   Working model used by both exporters
├── .venv/                           Python export environment
├── create_ai_layer.py               Project exporter, patched in chapter 3
├── cmsis-executorch-u55.csolution.yml
├── artifacts/                       Inspection exports from chapters 2 and 3
├── ai_layer/                        Generated model and firmware component list
└── out/                             Compiled firmware and compilation database
You’ll create the artifacts/ and out/ directories later. ai_layer/ already exists in the cloned example and will be regenerated for your model.
The inspection script writes its .pte and graph-summary .json files into artifacts/. The firmware embeds ai_layer/model.pte, which create_ai_layer.py generates. Keep all commands rooted in CMSIS-Executorch so that these paths continue to refer to the same files.
Use a convolution example
The CMSIS-Executorch repository starts with a TinyCNN model that can be delegated completely to Ethos-U.
You’ll change this model to one that will demonstrate fallback. You’ll retain the model input and output interface, but adjust the operations happening inside it.
Replace the original model with the one that you downloaded:
cp mixed_backend_cnn.py model/model.py
Copy-Item .\mixed_backend_cnn.py .\model\model.py
The model still accepts one 16 x 16 RGB image in NHWC order and returns ten
values. Keeping that interface means that the supplied bare-metal runner needs no
changes.
The important part of model/model.py is now as follows:
self.conv1 = nn.Conv2d(
    channels, 4, kernel_size=3, stride=1, padding=1, bias=False
)
self.conv2 = nn.Conv2d(
    4, num_classes, kernel_size=3, stride=4, padding=1, bias=False
)

values = torch.relu(self.conv1(values))
values = self.conv2(values)
values = torch.flatten(values, start_dim=2)
values, _ = torch.topk(values, k=1, dim=-1)
The stride controls how far a convolution filter moves between positions. stride=1 visits adjacent positions. stride=4 moves four positions
at a time and produces a smaller output. For this Ethos-U55 target and tensor shape,
the first convolution can be delegated to the NPU. The stride-4 convolution
remains outside the delegate. topk selects the largest spatial response for
each of the ten output channels.
What you’ve accomplished and what’s next
You now have a pinned Corstone-300 Ethos-U55 project, and its matching Python packages and versioned Arm tools. You’ve also downloaded a model that will run only partially on an Ethos-U55.
Next, you’ll understand how to optimize supported operators with CMSIS-NN on Cortex-M CPUs in a CPU-only example.