Build an OpenCV YOLOX pipeline to benchmark KleidiCV preprocessing
Introduction
Understand YOLOX and KleidiCV in the detection pipeline
Build OpenCV with and without KleidiCV
Prepare the YOLOX model and test image
Compile and run YOLOX static-image detection
Evaluate KleidiCV preprocessing and pipeline performance
Next Steps
Build an OpenCV YOLOX pipeline to benchmark KleidiCV preprocessing
Create the application directory
After creating baseline and default KleidiCV 26.06 OpenCV installations, you can prepare the YOLOX model and test image.
Create a directory for the source code, model, labels, and test image:
cd ~/opencv-kleidicv-lab
mkdir -p static-detection
cd static-detection
Download the YOLOX model
Download the FP32 YOLOX-S model from OpenCV Zoo:
wget -O object_detection_yolox_2022nov.onnx \
    https://github.com/opencv/opencv_zoo/raw/main/models/object_detection_yolox/object_detection_yolox_2022nov.onnx
Verify that Git Large File Storage returned the model rather than its small pointer file:
ls -lh object_detection_yolox_2022nov.onnx
sha256sum object_detection_yolox_2022nov.onnx
The model is approximately 35 MB. The expected SHA-256 value is:
c5c2d13e59ae883e6af3b45daea64af4833a4951c92d116ec270d9ddbe998063 object_detection_yolox_2022nov.onnx
The model and the YOLOX files in OpenCV Zoo are licensed under the Apache License 2.0. For more information, see the OpenCV Zoo YOLOX model directory .
Download the COCO class names
The model recognizes 80 classes from the COCO dataset.
Download the label file that’s published with the Learning Path:
wget -O coco.names \
    https://learn.arm.com/learning-paths/embedded-and-microcontrollers/opencv-onnx-kleidicv-static-detection/coco.names
If you’re following a preview of the Learning Path, replace https://learn.arm.com in the attachment download commands with the origin of the preview site. Include its port if needed. Use the same site when downloading the application source later.
Count the labels:
wc -l coco.names
The expected output is:
80 coco.names
Download a static test image
Download the original photograph from the OpenCV 4.13.0 sample data:
wget -O input.jpg \
    https://raw.githubusercontent.com/opencv/opencv/4.13.0/samples/data/messi5.jpg
This image has no segmentation overlay. Verify that you downloaded the same image that was used for the reference measurements:
sha256sum input.jpg
The expected output is:
1d570e49654e84c7a943918537bd9e5e1ef82920152e147c834006e235be97c9 input.jpg
Confirm that all three inputs are present:
file object_detection_yolox_2022nov.onnx coco.names input.jpg
The output identifies the ONNX model as data, the labels as text, and input.jpg as a JPEG image. You can replace input.jpg with your own photograph later.
The image shows a football player kicking a ball:
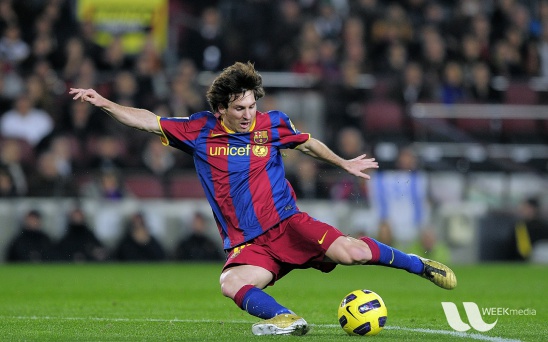 YOLOX static-image detection input
The image is distributed in the OpenCV sample data directory . For licensing information, see the OpenCV license .
What you’ve accomplished and what’s next
You’ve prepared a verified YOLOX ONNX model, its 80 COCO labels, and a repeatable input image.
Next, you’ll compile the static-image application and verify its detection output.