Debug Trusted Firmware-A and the Linux kernel on Arm FVP with Arm Development Studio
Introduction
Introduction to Arm Fixed Virtual Platforms (FVPs)
Configure Trusted Firmware-A build flags to include cpu_ops support
Modify the device tree for CPU FVPs
Run the Linux software stack on an FVP
Debug the software stack
Next steps
Debug Trusted Firmware-A and the Linux kernel on Arm FVP with Arm Development Studio
Launch the Linux software stack on an FVP
Once you’ve built the Linux stack with the correct configuration, you’re ready to run it on an Arm CPU Fixed Virtual Platform (FVP).
Replace <SRC_PATH> with the root path to your workspace, and <PATH_TO_LOG> with the location where you want to save the UART output logs.
Verify the build output
After building, check the output directory to make sure the expected files were generated:
tree output/aemfvp-a/aemfvp-a/
The expected output is:
        output/aemfvp-a/aemfvp-a/
├── Image -> ../components/linux/Image
├── Image.defconfig -> ../components/linux/Image.defconfig
├── fip-uboot.bin
├── fip-uefi.bin
├── fvp-base-revc.dtb -> ../components/linux/fvp-base-revc.dtb
├── tf-bl1.bin -> ../components/fvp/tf-bl1.bin
├── tf-bl2.bin -> ../components/fvp/tf-bl2.bin
├── tf-bl2u.bin -> ../components/fvp/tf-bl2u.bin
├── tf-bl31.bin -> ../components/fvp/tf-bl31.bin
├── uboot.bin -> ../components/aemfvp-a/uboot.bin
└── uefi.bin -> ../components/aemfvp-a/uefi.bin
Run the software stack
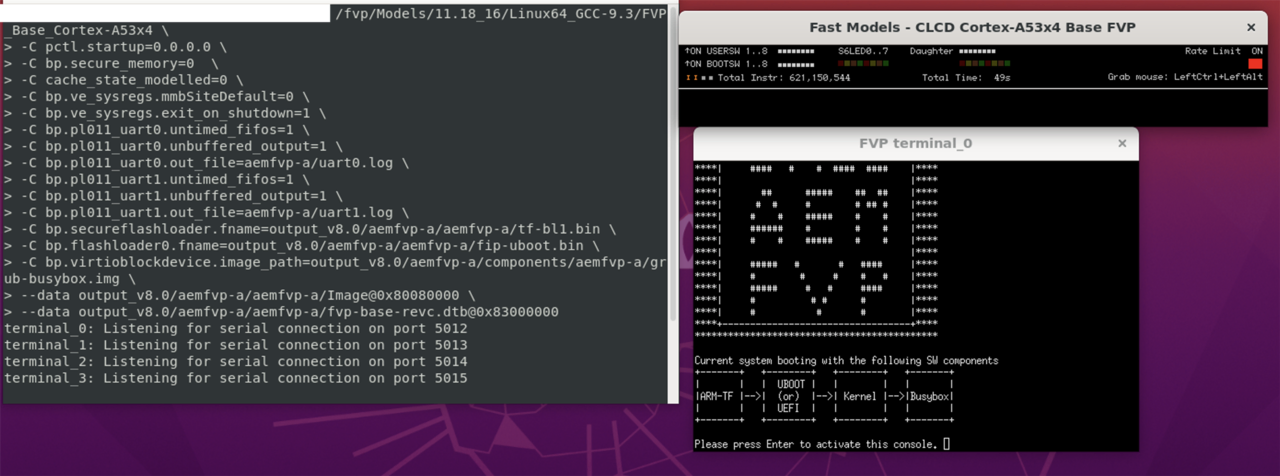
To launch the software stack on the FVP, use a command like the following:
FVP_Base_Cortex-A55x4 \
-C pctl.startup=0.0.0.0 \
-C bp.secure_memory=0  \
-C cache_state_modelled=0 \
-C bp.ve_sysregs.mmbSiteDefault=0 \
-C bp.ve_sysregs.exit_on_shutdown=1 \
-C bp.pl011_uart0.untimed_fifos=1 \
-C bp.pl011_uart0.unbuffered_output=1 \
-C bp.pl011_uart0.out_file=<PATH_TO_LOG>/uart0.log \
-C bp.pl011_uart1.untimed_fifos=1 \
-C bp.pl011_uart1.unbuffered_output=1 \
-C bp.pl011_uart1.out_file=<PATH_TO_LOG>/uart1.log \
-C bp.secureflashloader.fname=<SRC_PATH>/output/aemfvp-a/aemfvp-a/tf-bl1.bin \
-C bp.flashloader0.fname=<SRC_PATH>/output/aemfvp-a/aemfvp-a/fip-uboot.bin \
-C bp.virtioblockdevice.image_path=<SRC_PATH>/output/aemfvp-a/components/aemfvp-a/grub-busybox.img \
--data cluster0.cpu0=<SRC_PATH>/output/aemfvp-a/aemfvp-a/Image@0x80080000 \
--data cluster0.cpu0=<SRC_PATH>/output/aemfvp-a/aemfvp-a/fvp-base-revc.dtb@0x83000000
This will boot Trusted Firmware-A, UEFI/U-Boot, Linux, and BusyBox in sequence.
Troubleshoot FVP launch issues
Different FVP models use different CPU instance names.
If you see an error like:
Warning: target instance not found: 'FVP_Base_Cortex_A65AEx4_Cortex_A76AEx4.cluster0.cpu0' (data: 'output/aemfvp-a/aemfvp-afvp-base-revc.dtb')
Identify the correct instance name for your platform.
Run:
FVP_Base_Cortex-A65AEx4+Cortex-A76AEx4 -l | grep RVBARADDR | grep cpu0
Example output:
cluster0.subcluster1.cpu0.RVBARADDR=0 # (int , init-time) default = '0x0' : Value of RVBAR_ELx register.
Update your –data parameters accordingly:
        --data cluster0.subcluster0.cpu0.thread0=<SRC_PATH>/output/aemfvp-a/aemfvp-a/Image@0x80080000 \
--data cluster0.subcluster0.cpu0.thread0=<SRC_PATH>/output/aemfvp-a/aemfvp-a/fvp-base-revc.dtb@0x83000000
Always check the name of the CPU instance when switching between different FVP models.
Use the GUI (optional)
You can also run the FVP using its graphical user interface:
 View of the FVP GUI