Learn how to run AI on Edge devices using Arduino Nano RP2040
Introduction
Overview
Train and deploy a TinyML audio classifier with Edge Impulse
Board connection and IDE setup
Program your first TinyML device
Next Steps
Learn how to run AI on Edge devices using Arduino Nano RP2040
Arduino Nano RP2040
To get started with your first TinyML project, the Arduino Nano RP2040 Connect is a good option. Built by Arduino, it uses the RP2040 microcontroller and is fully supported by the Arduino core package.
The board comes with built-in Wi-Fi, Bluetooth, and an onboard IMU. These are features that are useful for deploying machine learning models at the edge.
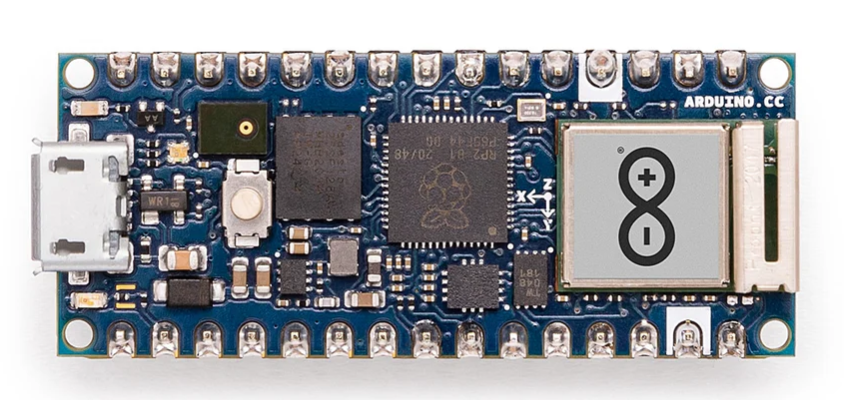 Arduino Nano RP2040
Its compatibility with popular tools like Edge Impulse and the Arduino IDE makes it a suitable choice for TinyML applications. You can learn more about the Arduino Nano RP2040 Connect on the Arduino website .
Connect and set up the Arduino Nano RP2040 Connect
This guide will help you connect the Arduino Nano RP2040 Connect to your computer and set up the Arduino IDE for programming.
Gather the components
To visualize the output of the voice command model, you’ll use a simple LED circuit.
You will need the following components:
- Arduino Nano RP2040 Connect
- 1× LED
- 1× 220 Ω resistor
- Breadboard and jumper wires
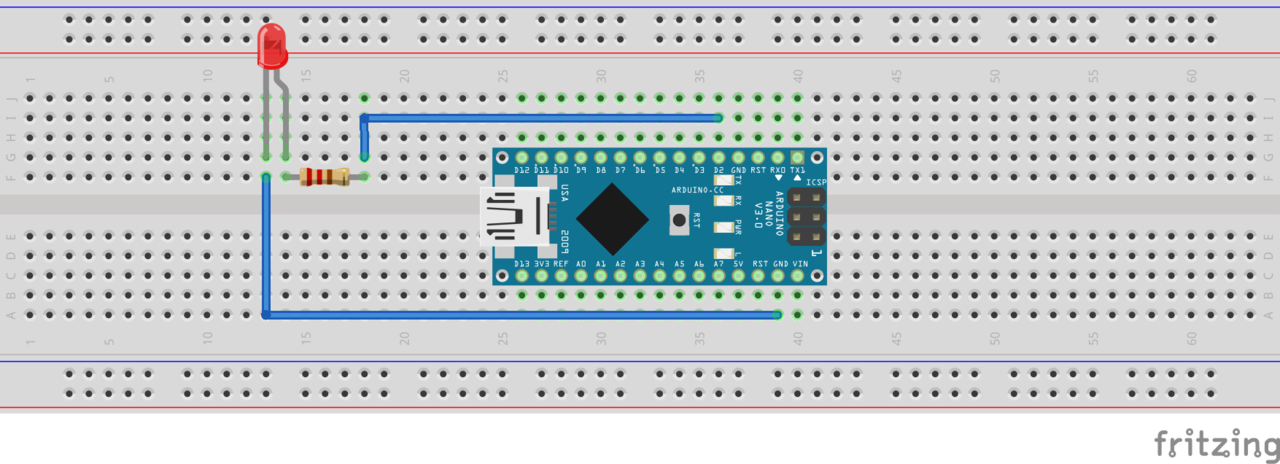
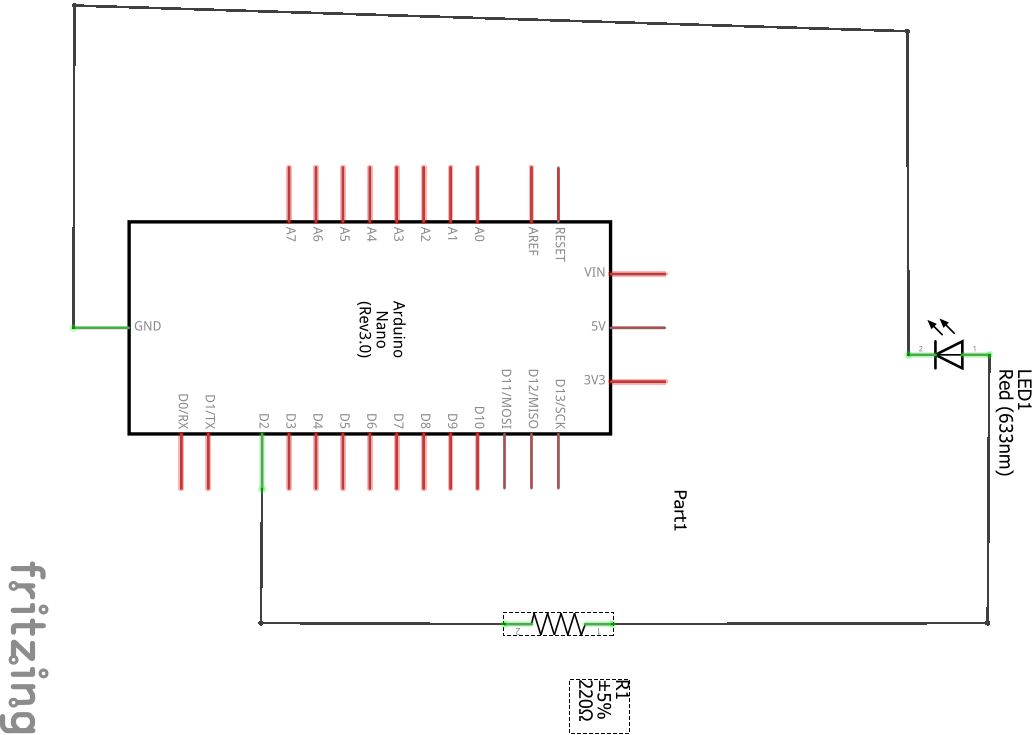
Connect the LED to the Arduino Nano RP2040
- Anode (long leg) of the LED → connect to GPIO pin D2 through a 220 Ω resistor
- Cathode (short leg) → connect to GND
Set up the Arduino IDE
To program and deploy your trained model to the Arduino Nano RP2040, you first need to configure your development environment.
Follow the steps in the Arduino Nano RP2040 install guide .
This guide walks you through:
- Installing the Arduino IDE
- Adding the board support package for the Nano RP2040
Select your board and port in the Arduino IDE
Open the Arduino IDE. To select your board:
Go to Tools > Board then select Arduino Nano RP2040 Connect
To select your port:
Connect your board to your computer using a USB cable, then follow these steps:
- Go to Tools > Port
- Select the port labeled with your board’s name, such as
COM4 (Arduino Nano RP2040 Connect)or/dev/cu.usbmodem...on macOS.
Your Arduino IDE is now ready to upload code to the Arduino Nano RP2040.