Deploy a Windows on Arm virtual machine on Microsoft Azure
Introduction
Create Windows on Arm virtual machine in Azure cloud
Next Steps
Deploy a Windows on Arm virtual machine on Microsoft Azure
If you don’t have access to a Windows on Arm device, you can create a Windows on Arm virtual machine in the Azure cloud.
These same instructions can be used to deploy a Linux image on the Arm Virtual Machine. Simply select a Linux distribution instead of Windows.
Create a Windows on Arm Virtual Machine
Microsoft Azure is Microsoft’s cloud computing platform. You can log into Azure using either your personal subscription or your organization’s subscription.
To begin:
- Login to your Azure account.
- From the Azure search bar, begin typing the word “virtual machines” until the Virtual Machines service appears as a selection.
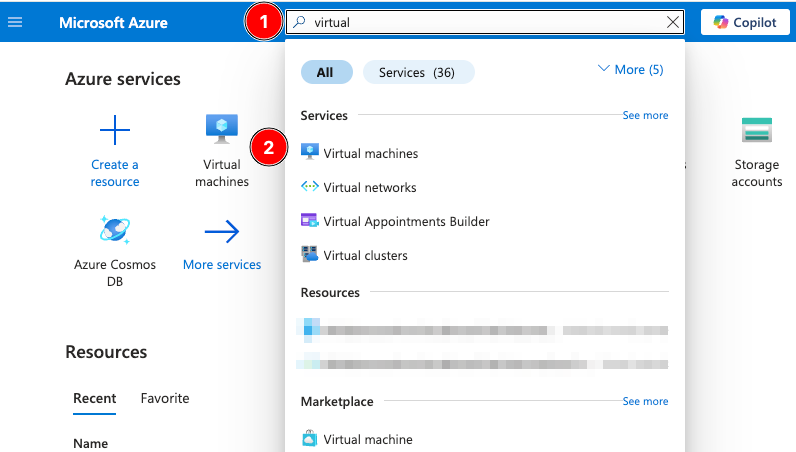
- Select
Virtual Machines.
The Virtual Machines page appears.
- Click
Create>Azure virtual machine.

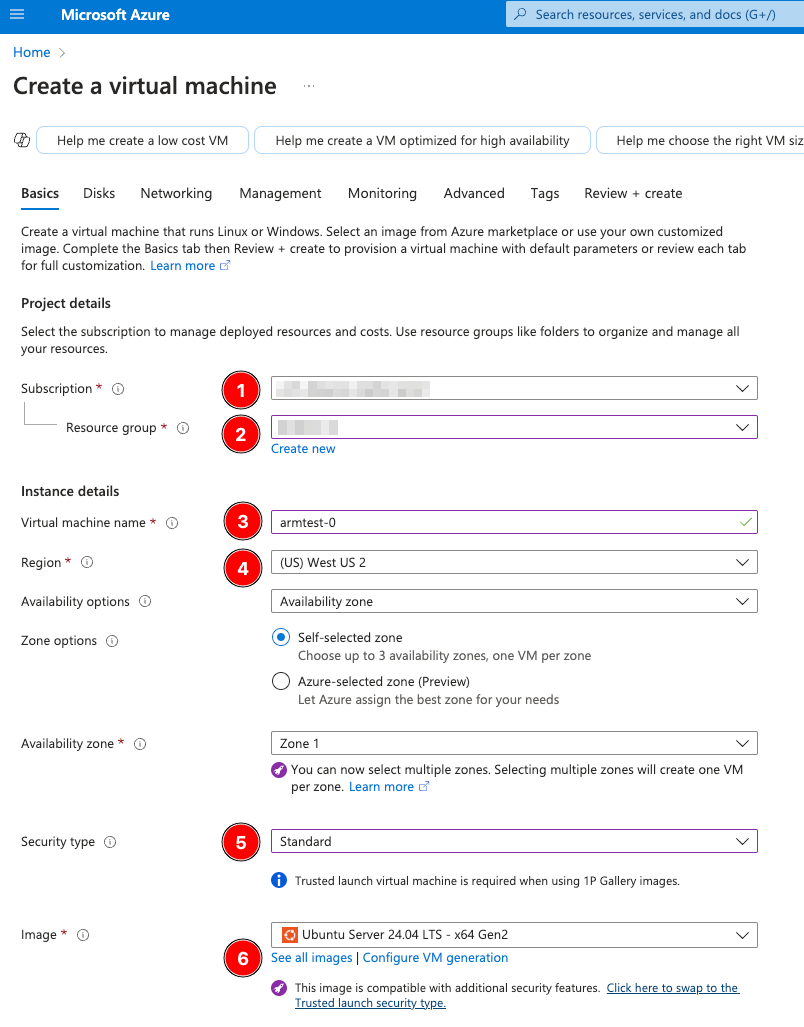
The Create a virtual machine page appears.
- Select a valid
Subscription. - Select a
Resource group- Optional; you may leave blank. - Enter a
Virtual Machine name- We’ll call it armtest-0 for this example. - Select a
Region- For best performance, select the region closest to you. - Select
StandardforSecurity Type. - Select
See all images- You can find this under theImagedropdown.
The Marketplace page appears.
- Enter
windows 11into the search bar and press enter. - Click the
Image Typefilter and selectArm64.

You are presented with all available Arm VM images.
Note all the different Arm images (Windows and others) Azure provides; feel free to experiment with different Arm images from the Azure Marketplace upon completion of this learning path.
- From the drop-down at the bottom of the
Microsoft Windows 11 Preview arm64tile, selectWindows 11 Professional 24H2 - Arm64.
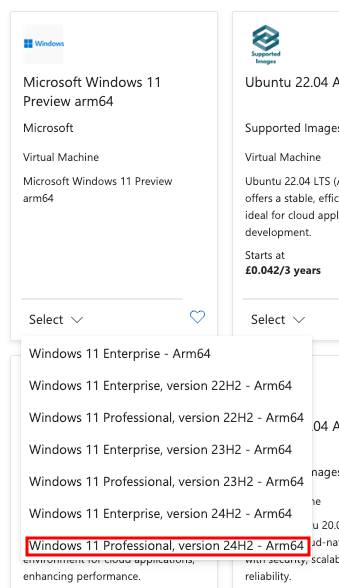
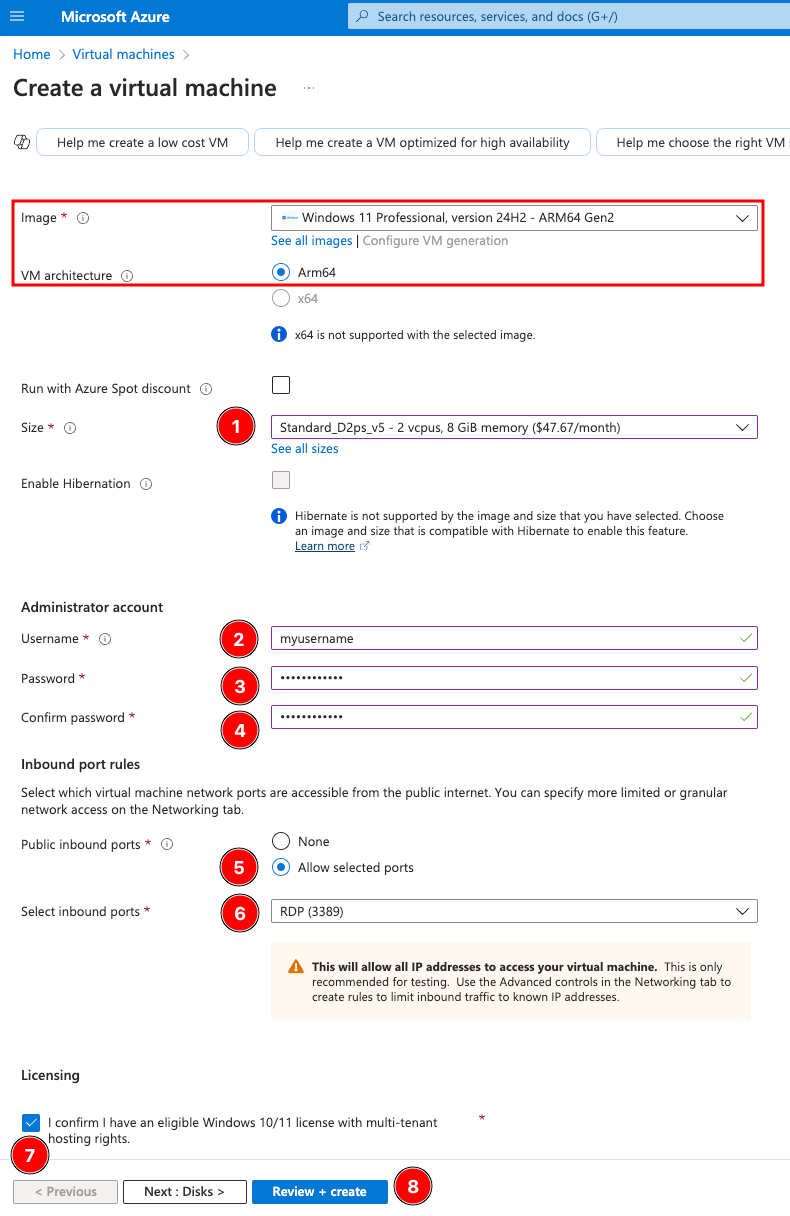
Upon selection, you are returned to the Create a virtual machine screen with your architecture set to Arm64 and your image set to Windows 11 Professional, version 24H2 - ARM64 Gen2.
- For
Size, selectStandard_D2ps_v5 - 2 vcpus, 8 GiB memory.
The VM size suggested for this learning path is enough to demonstrate Windows on Arm in the Azure cloud, but may need to be adjusted to support other workloads. For more information rightsizing your VM instances, please see Rightsize to maximize your cloud investment with Microsoft Azure .
For
UsernameandPassword, provide values which will be used to login to the Windows virtual machine.For
Inbound port rules>Public inbound ports, selectAllow selected portsand chooseRDP (3389)from the drop-down menu.For
Licensingconfirm that you have an eligible Windows 10/11 license with multi-tenant hosting rights. To learn more about this checkbox, please visit documentation .Leave all other settings as default.
Click
Review + create.
The validation and confirmation page appears.
- Upon review and validation of your settings, select
Createto launch your Windows on Arm virtual machine.

At this point, Azure will deploy your new Windows on Arm instance to the Azure cloud. This may take a few moments to complete.

Upon completion, your screen will look similar to:
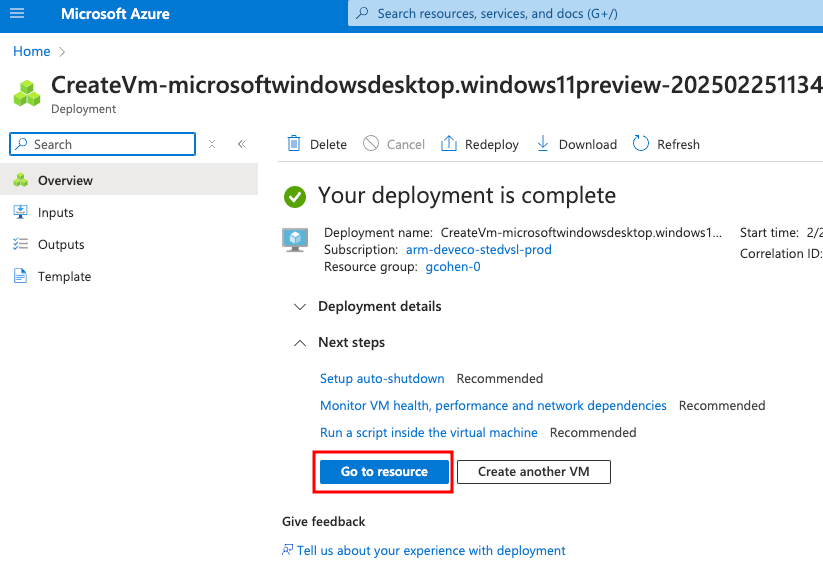
- Click
Go to Resource.
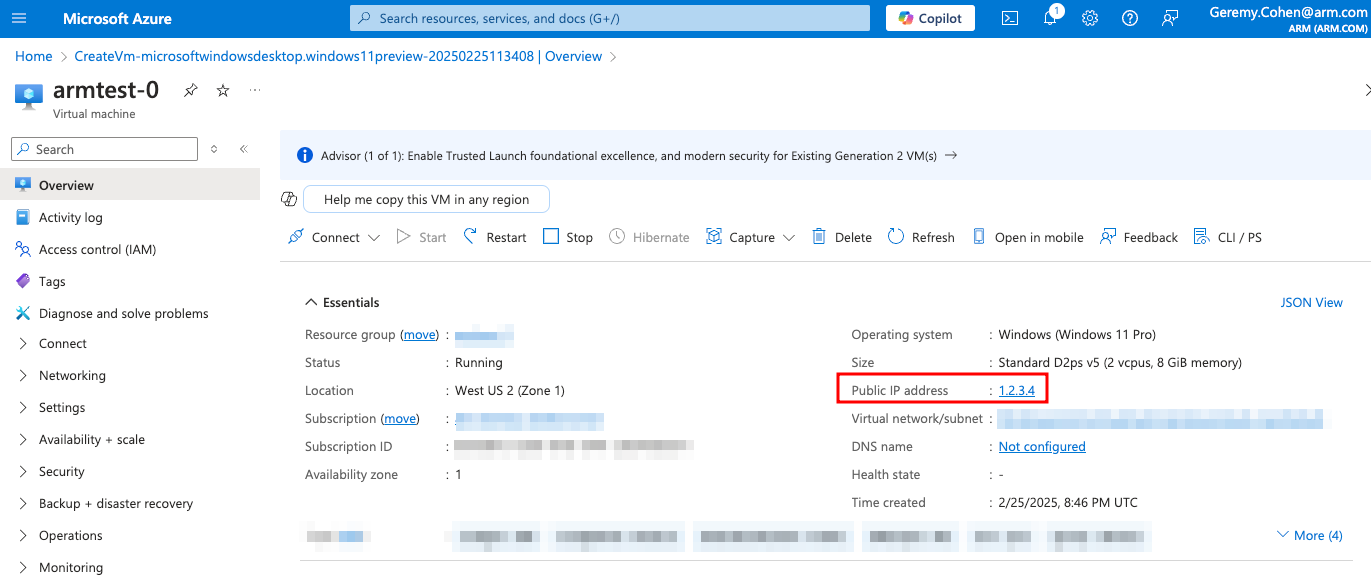
From this resource page, note the Public IP address of your virtual machine, as you will use in the next step to connect to your VM instance.
Connect to your Windows on Arm VM
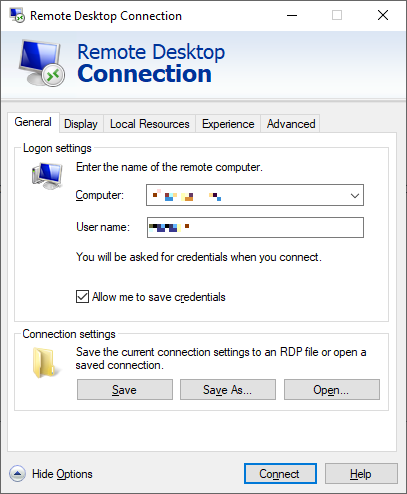
- On your local host PC, launch your RDP client application.
In our example, we use the Remote Desktop Connection app as our RDP client, but you may choose any RDP client to use.
Enter the
Public IP Addressyou wrote down earlier as theComputeror remote host/IP to connect to.Enter the username and password you set earlier while creating the VM instance.
Click connect.
You can now interact with the VM in the same way as you would a local desktop.
If you have issues connecting to your instance, see this Microsoft article:
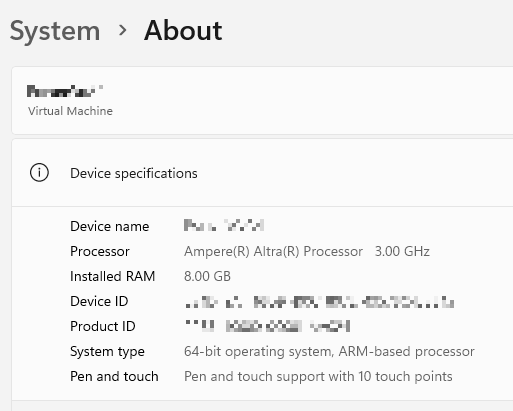
Explore your VM
Open Control Panel > System, and verify that Device > System Type identifies as an Arm-based processor.