Deploy Tinkerblox UltraEdge HPC-I for AI and mixed workloads on Arm
Introduction
Understand UltraEdge HPC-I architecture for edge AI and mixed workloads
Provision a Google Axion C4A VM for Yocto image builds on Arm
Build and install Yocto images for NXP S32G-VNP-GLDBOX3 with UltraEdge
Install UltraEdge on Debian and Ubuntu for Edge AI workloads
Run and manage UltraEdge HPC-I for AI and mixed workloads on Arm
Next Steps
Deploy Tinkerblox UltraEdge HPC-I for AI and mixed workloads on Arm
Introduction
Understand UltraEdge HPC-I architecture for edge AI and mixed workloads
Provision a Google Axion C4A VM for Yocto image builds on Arm
Build and install Yocto images for NXP S32G-VNP-GLDBOX3 with UltraEdge
Install UltraEdge on Debian and Ubuntu for Edge AI workloads
Run and manage UltraEdge HPC-I for AI and mixed workloads on Arm
Next Steps
Install UltraEdge on Ubuntu/Debian
Follow these steps to initialize and register your device within the Uncloud ecosystem:
Access the Platform:
Navigate to the Uncloud Dashboard and log in with your credentials.
Provision a New Device:
- Go to Device Management > New Device.
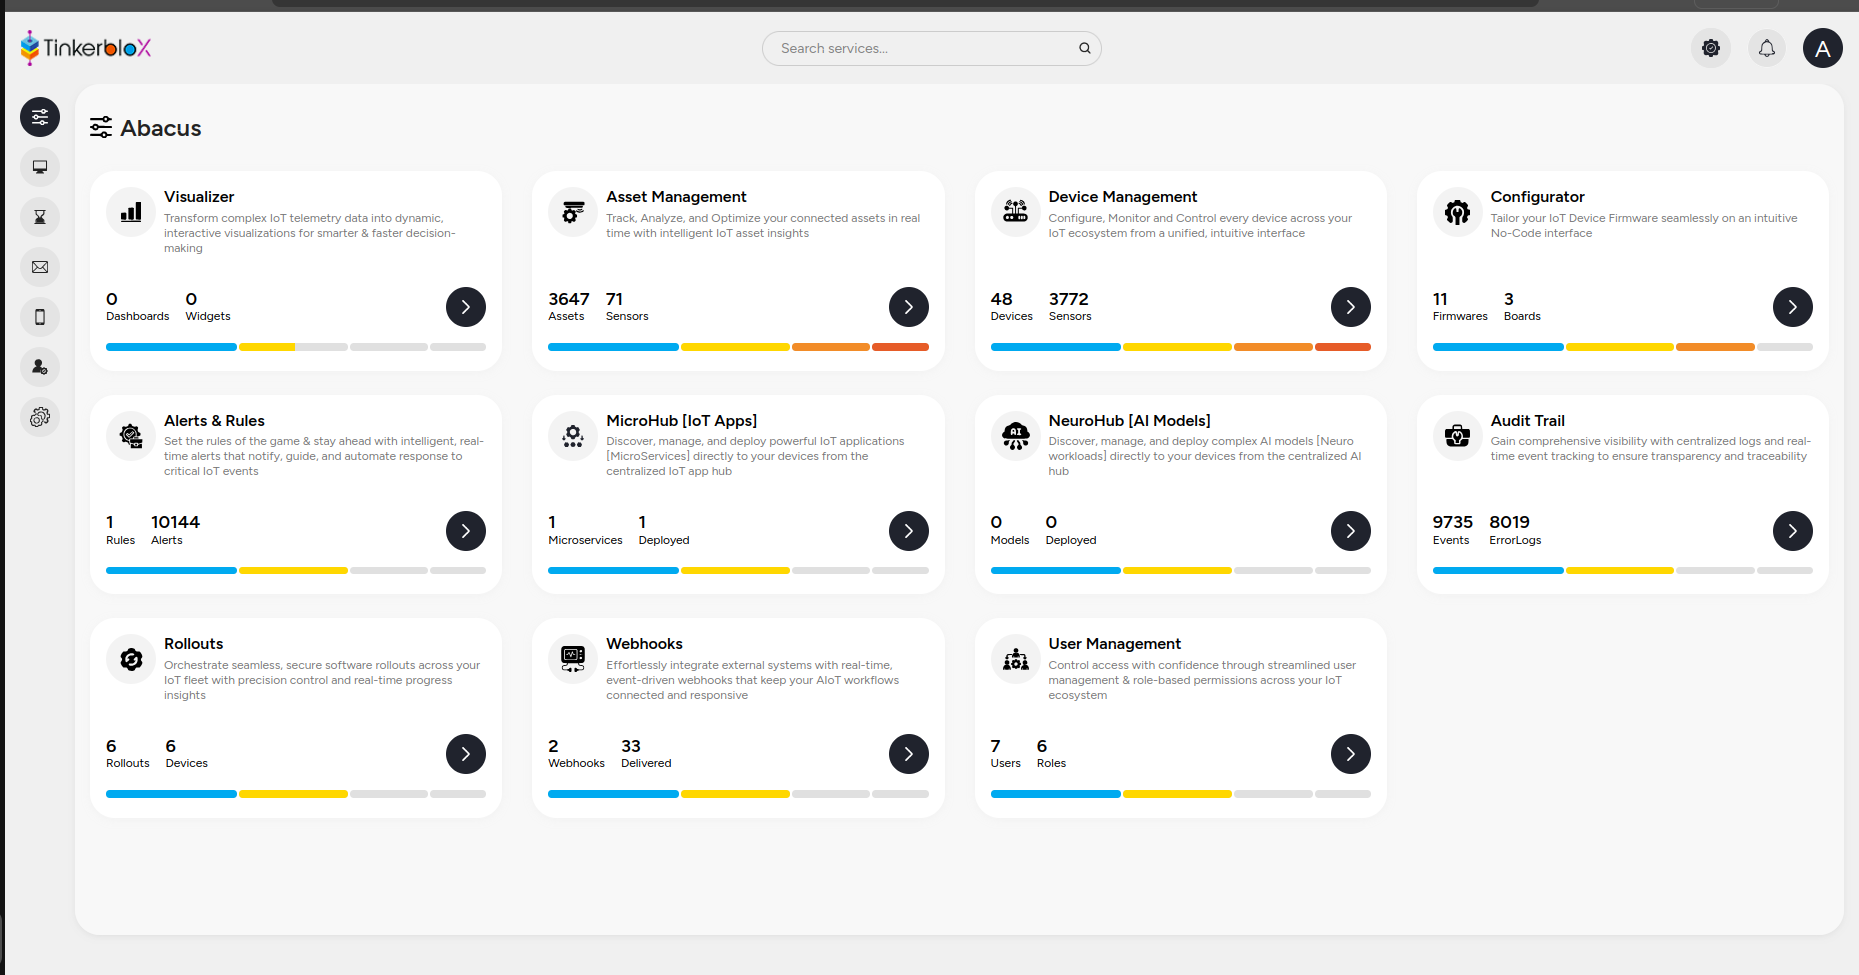 Device Management interface
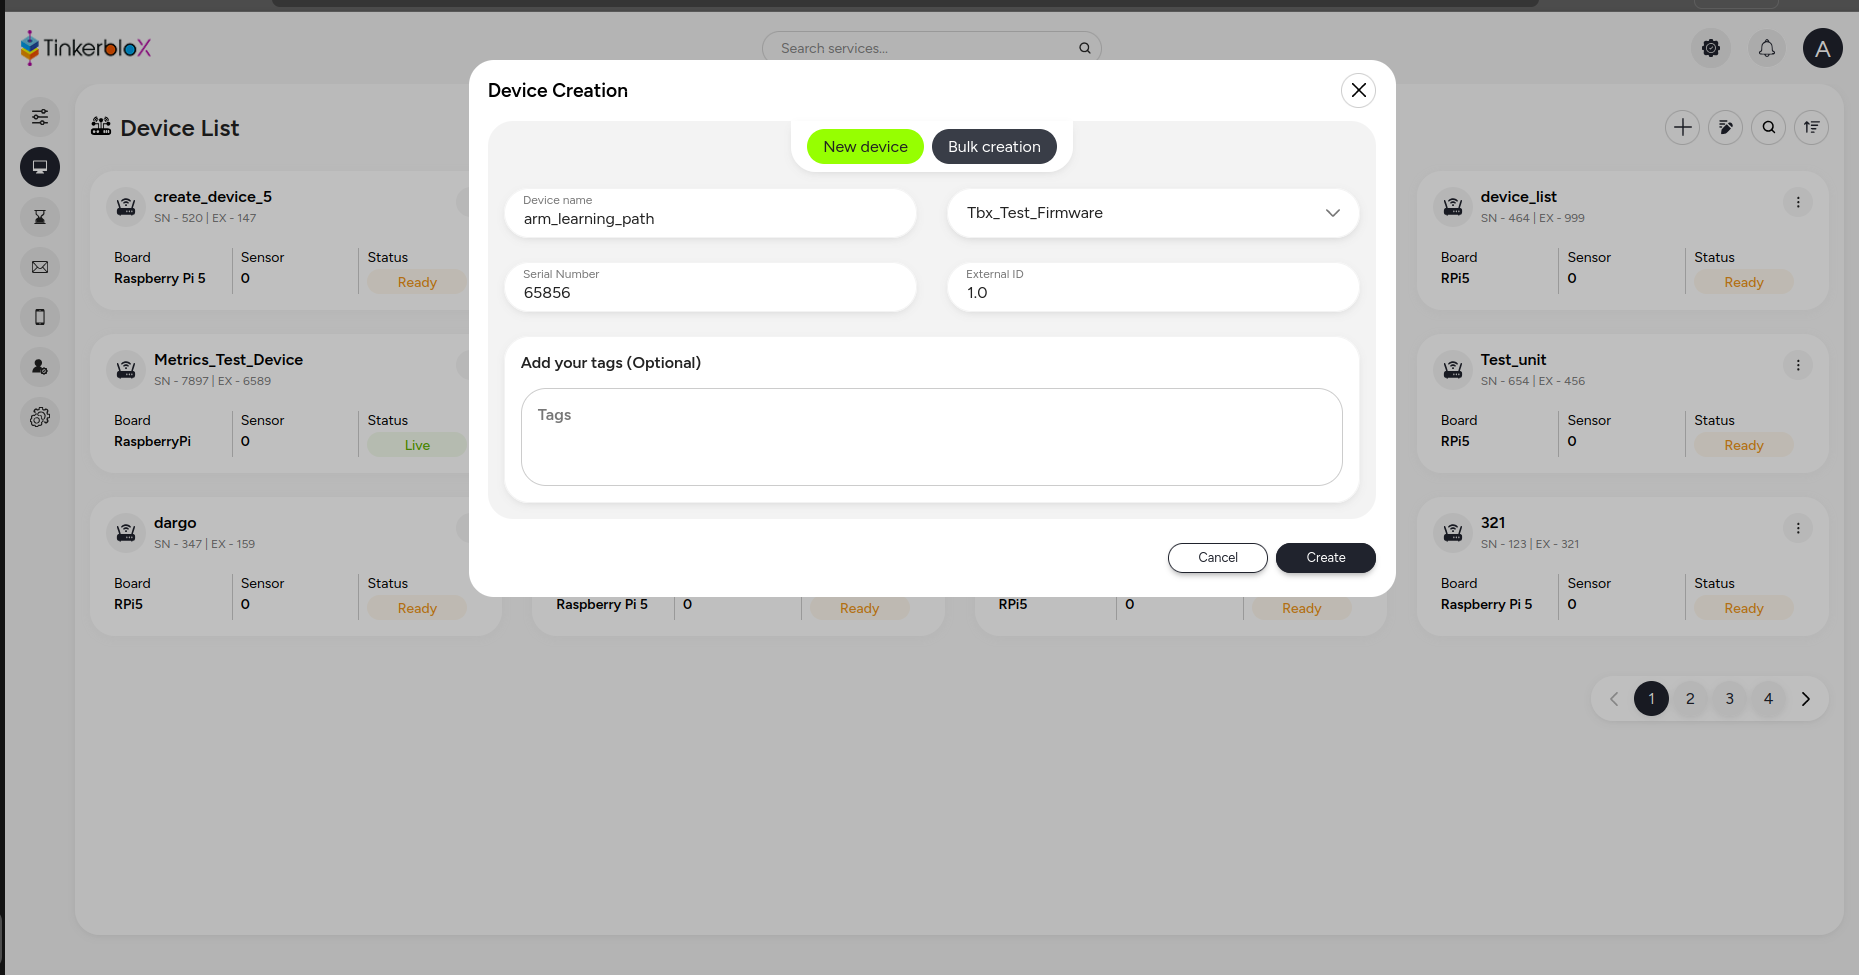 Creating a new device
- Click the three dots (options menu) next to your device entry and select Initialize.
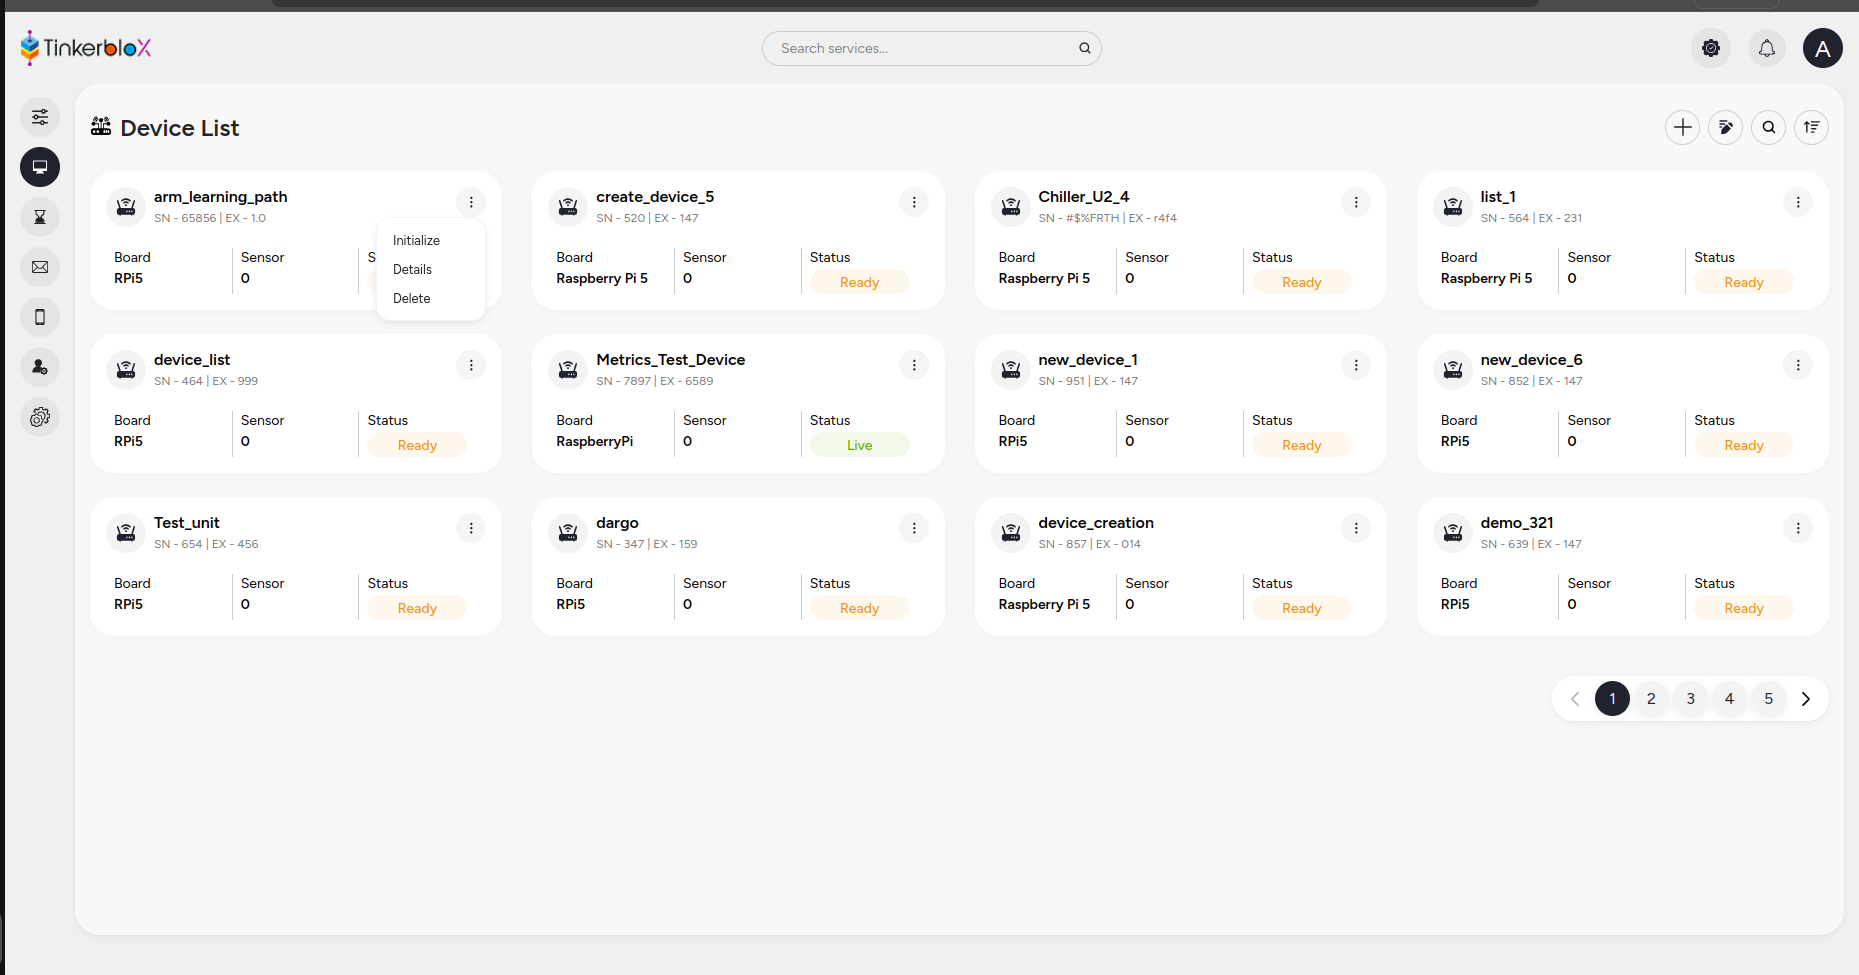 Initialize device option
Install prerequisites:
Install the required prerequisites:
sudo apt update
sudo apt install -y curl jq
Retrieve installation command details:
Copy the generated device installation command or details from the Uncloud portal to your clipboard.
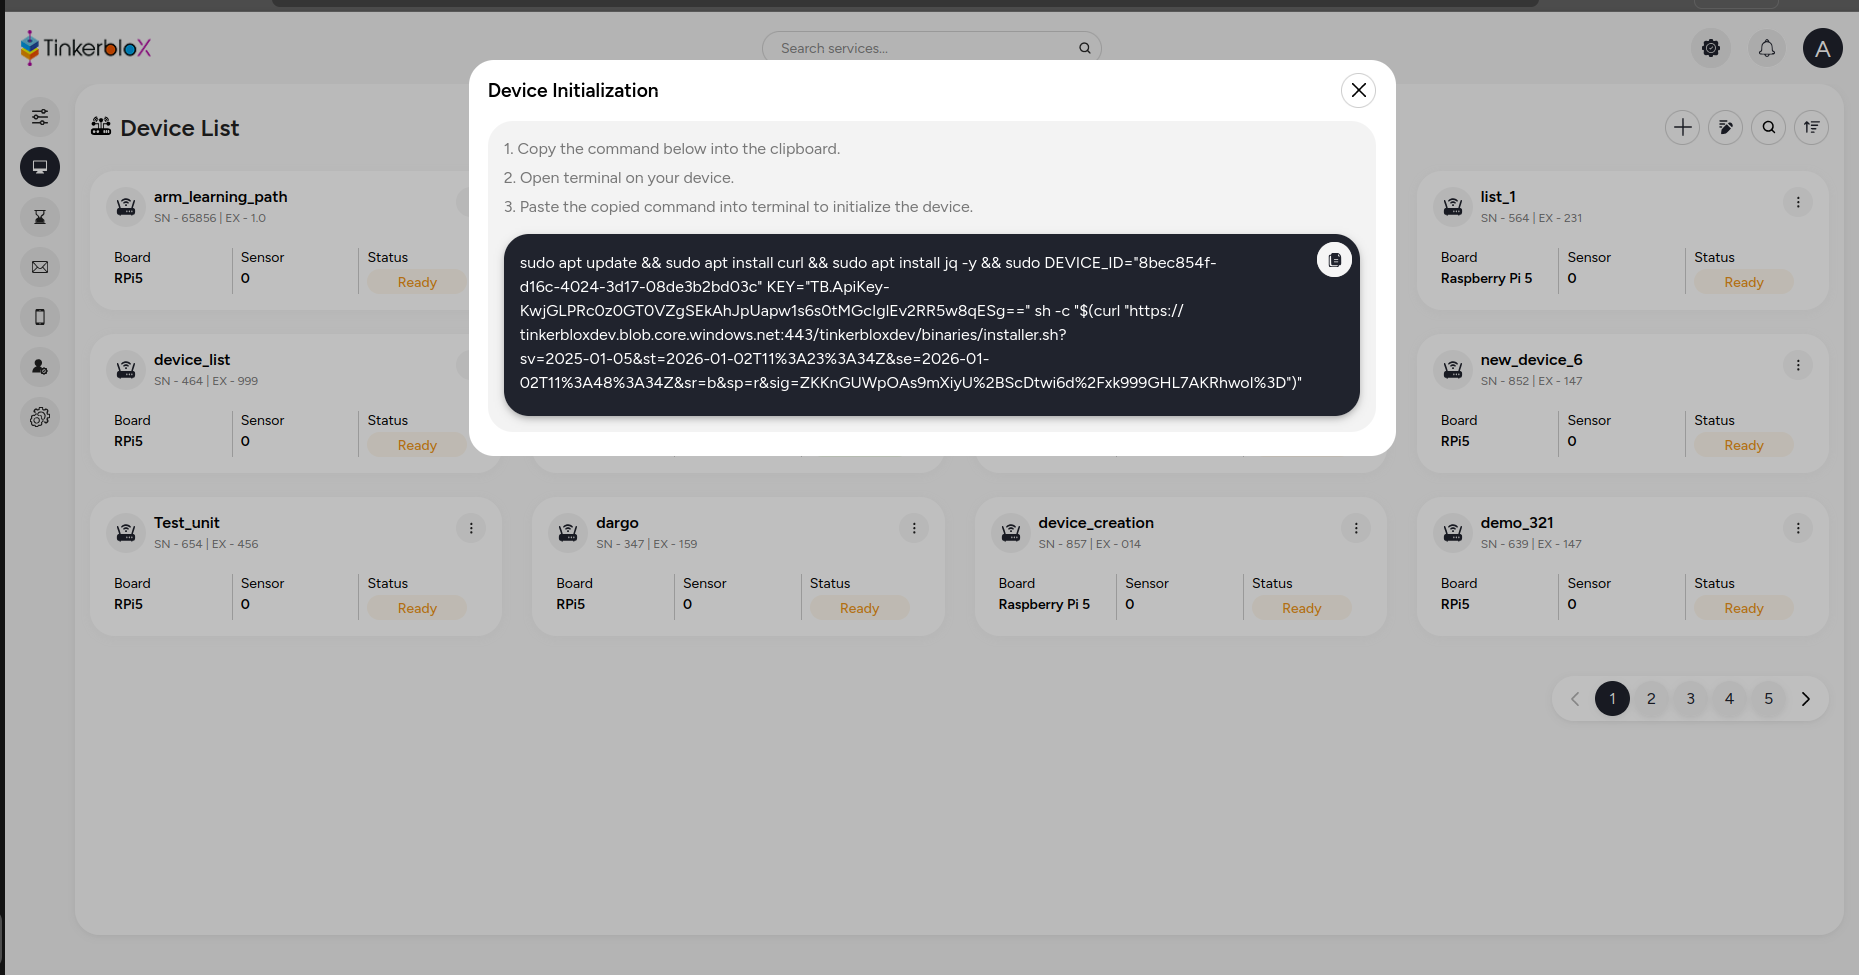 Installation command
You should be able to locate and copy the specific installation command appropriate for your account. Here is an example:
sudo DEVICE_ID="5b3ff290-0c88-4cd9-8ef7-08de0bded9df" KEY="TB.ApiKey-mlBZgDFc7qyM6ztPjILBCbFEqnVlbvjUpM1Q1IqNP6tA7wNdi97AQ==" sh -c "$(curl "https://tinkerbloxdev.blob.core.windows.net:443/tinkerbloxdev/binaries/installer.sh?sv=2025-01-05&st=2025-11-03T06%3A31%3A55Z&se=2025-11-03T06%3A56%3A55Z&sr=b&sp=r&sig=HNS70HgJyHlhCVQrqvpGdCcaf8%2FtVjdW4RNiiiIPCSUA%3D")"
Run your specific installer command in your Ubuntu/Debian SSH shell and initialize the agent to install UltraEdge.
Activate the UltraEdge agent
On the first boot, the agent will automatically generate a file named
activation_key.json at the path:
/opt/tinkerblox/activation_key.json
Share this activation_key.json file with the TinkerBlox team to
receive license key (which includes license metadata).
- Stop the agent using the following command:
sudo systemctl stop tbx-agent.service
Replace the existing
activation_key.jsonfile in/opt/tinkerblox/with the licensed one provided by TinkerBlox.Start the agent:
sudo systemctl start tbx-agent.service
Run the UltraEdge agent manually
Binary path:
/bin/tbx-agentTo start:
tbx-agent
- To stop, press Ctrl + C once.
Install MicroPac
MicroPac is the core tooling used to build and manage MicroStack (general microservices) and NeuroStack (AI-native services).
Platform agnostic: MicroPac is not restricted to a specific operating system; it is fully compatible with both Debian and Yocto environments, providing a consistent execution layer across different Linux distributions.
Build system: To create a service, the system utilizes a MicroPacFile (the declarative configuration) and the MicroPac Builder (the high-performance packaging engine).
Validation: The ecosystem includes a MicroPac Validator, which verifies the integrity and security of the package created by the builder to ensure it is ready for edge deployment.
System requirements
- Linux host (aarch64)
- Sudo permissions
- Overlay filesystem support
- Internet connection
Required packages
    sudo apt-get update
    sudo apt-get install -y tar curl qemu-user-static binfmt-support
Cross-architecture support
The MicroPacFile is the central declarative configuration used by the builder to define the environment and behavior of your service. This configuration is essential for orchestrating both MicroStack (general microservices) and NeuroStack (AI/ML) services.
Multi-language support: You can configure MicroPacFiles for applications written in Python, C, and C++, making it highly versatile for both high-level AI workloads and low-level embedded system tasks.
Unified workloads: It bridges the gap between complex ML models and resource-constrained embedded software, ensuring consistent execution across diverse hardware.
To build MicroPac for different architectures: # Enable binfmt for armv7
sudo update-binfmts --enable qemu-armv7
Install the MicroPac package
The package is provided as a
.debfile.Install it on your host machine:
sudo apt install ./<package_name>.deb
Create and set up the MicroPac file schema
File placement
For the MicroPac Builder to function correctly, the MicroPacFile must be placed in the root directory alongside your source code and dependency files.
Example Directory Structure (video_cv Project):
video_cv/
├── hooks/             # Lifecycle scripts
├── models/            # ML model weights
├── static/            # Static assets (CSS/JS)
├── templates/         # HTML templates
├── app.py             # Main application entry
├── MicroPacFile       # REQUIRED: Configuration file
└── requirements.txt   # Python dependencies
Place a MicroPacFile in your project directory as mentioned in above example.
    name: nginx
    version: 1.0.0.0
    target: aarch64
    applicationType: custom
    image: Alpine:3.21
    createdBy: developer@tinkerblox.io
    description: Nginx web server microservice

    buildSteps:
      # Install nginx and create necessary directories
      - run: apk add --no-cache nginx
      - run: mkdir -p /var/www/html /var/log/nginx /var/lib/nginx /var/tmp/nginx

      # Copy configuration files
      - copy: [nginx.conf, /etc/nginx/nginx.conf]
      - copy: [index.html, /var/www/html/index.html]
      - copy: [404.html, /var/www/html/404.html]

      # Copy startup script
      - workdir: /app
      - copy: [nginx_start.sh, .]
      - run: chmod +x ./nginx_start.sh

      # Set proper permissions
      #- run: chown -R nginx:nginx /var/www/html /var/log/nginx /var/lib/nginx /var/tmp/nginx

    entry: /app/nginx_start.sh
    mode: continuous-run

    env:
      NGINX_PORT: 8080
      APP_ENV: production

    network:
      mode: host
      name: nginx-net
Configuration fields
Required fields
- name: Application name (≤ 10 characters)
- version: Application version
- target: Target architecture
- applicationType: Application type (python, binary, custom)
- image: Base image
- entry: Entry point command
- mode: single-run
Optional fields
- env: Environment variable
- buildSteps: Array of build instructions
- limits: Resource limits (memory, cpu)
- mount: Volume mount points
- network: Network configuration
- createdBy: maintainer of the application
- description: description of the application
Build the MicroPac
Navigate to your project directory and execute:
sudo micropac-builder build
This generates a file named <project_name>.mpac.
Verify the MicroPac setup
To confirm that the Micropac has been generated properly, follow these steps:
- Locate the package: find the generated file with the
.mpacextension. - Extract the contents: extract the
.mpacfile using a standard extraction tool (or rename it to.zip/.tar.gzif necessary to open it. - Verify the contents: the extracted folder must contain exactly three files:
manifest.yaml: contains the metadata and configuration for the package.- RootFS tarball: the base file system layer (in
.tarformat). - Application layer tarball: the specific application logic/binaries (in
.tarformat).
What you’ve accomplished and what’s next
In this section, you:
- Installed UltraEdge on Ubuntu/Debian
- Activated and managed the UltraEdge agent
- Built and installed MicroPac workloads for edge deployment
Next, you can explore advanced MicroPac features, integrate with additional edge devices, or move on to Yocto-based installations for broader hardware support.