Build a ROS 2 and Zenoh simulation environment on an Arm server
Introduction
Start the ROS 2 development containers
Configure Zenoh for ROS 2
Observe Zenoh router discovery behavior
Start the robot simulation and Navigation2
Visualize and navigate the robot with RViz
Control the Neobotix ROX robot with ROS 2
Observe ROS 2 simulation resource usage on an Arm server
Enable Zenoh shared-memory transport
Next Steps
Build a ROS 2 and Zenoh simulation environment on an Arm server
Introduction
Start the ROS 2 development containers
Configure Zenoh for ROS 2
Observe Zenoh router discovery behavior
Start the robot simulation and Navigation2
Visualize and navigate the robot with RViz
Control the Neobotix ROX robot with ROS 2
Observe ROS 2 simulation resource usage on an Arm server
Enable Zenoh shared-memory transport
Next Steps
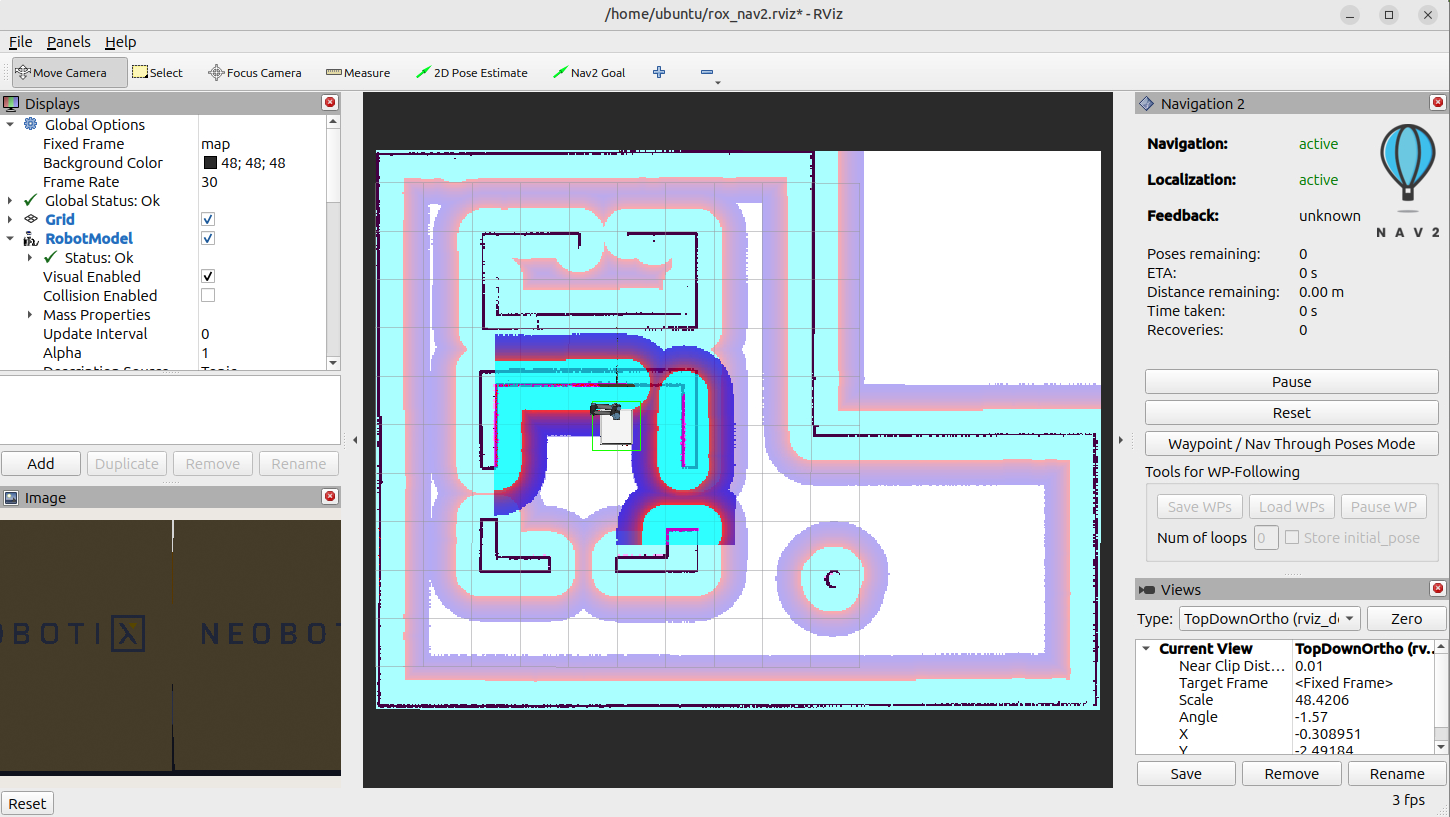
Understand the RViz navigation view
After starting the headless Gazebo simulation, visualize and navigate the robot with RViz.
RViz subscribes to ROS 2 topics and displays the robot model, laser scans, camera data, map, and Navigation2 costmaps. It also provides tools that publish messages, including the goal tool used here.
The navigation view contains several layers:
- The map shows the known environment
- The global costmap combines the static map with navigation costs across the mapped area
- The local costmap moves with the robot and reflects live sensor data nearby
- The inflation layer creates the red-to-blue gradient near walls, increasing the cost of paths that pass close to obstacles
Start RViz
Open a new bash shell in the robot container, source the environment, and start the Navigation2 RViz configuration:
source ~/workshop_env.bash
just rviz_nav2
Wait for the map and costmaps to render. The light blue area represents free space. The small window that follows the robot is the local costmap, while the fixed background is the global costmap.
Send a navigation goal
To send a navigation goal:
- Select Nav2 Goal in the toolbar.
- Move your pointer onto the mapped area in the center.
- Select and hold a position in the free, light-blue area where you want the robot to go.
- While holding the mouse button, drag a short distance in the direction you want the robot to face. An arrow appears.
- Release the mouse button.
Nav2 calculates a path and the robot begins moving.
Goals outside the mapped costmap don’t have a valid planned path, so the robot won’t move toward them.
Verify the navigation result
The robot should plan a path, drive to the goal, and report Feedback: reached. On the supplied reference system, the output is similar to:
        Navigation: active
Feedback: reached
Distance remaining: 0.03 m
Recoveries: 0
The final remaining distance can vary with the selected goal and simulation run. Reaching the goal without recovery behavior is the success criterion.
What you’ve accomplished and what’s next
You’ve interpreted the map, costmaps, and inflation layer, then set a goal position and orientation with RViz.
Next, you’ll bypass Navigation2’s planner and publish velocity commands directly to the robot base.