Build NVIDIA JetPack Yocto images for Jetson Orin NX, Orin Nano, and Thor platforms
Introduction
Understand Yocto image builds for NVIDIA Jetson
Provision a Google Axion C4A virtual machine for Yocto image builds on Arm
Build a Yocto image for NVIDIA Jetson on a Google Axion VM
Flash the Yocto image onto the NVIDIA Jetson device
Run the Yocto image on the NVIDIA Jetson device
Next Steps
Build NVIDIA JetPack Yocto images for Jetson Orin NX, Orin Nano, and Thor platforms
Build and bundle a Yocto image
Use the Google Axion C4A VM you provisioned to build and bundle a Yocto image for a supported NVIDIA Jetson platform. The bundled archive contains the files needed for flashing in the next section.
Clone the build scripts
In the SSH session connected to your C4A instance, clone the build scripts repository:
cd $HOME
git clone https://github.com/DougAnsonAustinTx/jetpack-yocto-builder
Start the Yocto build
Change to the cloned repository and ensure the scripts are executable:
cd $HOME/jetpack-yocto-builder
chmod 755 *.sh
The repository provides wrapper scripts for each supported target:
| Target | Build script |
|---|---|
| NVIDIA Jetson AGX Thor | ./build-thor.sh |
| NVIDIA Jetson Orin NX | ./build-orinnx.sh |
| NVIDIA Jetson Orin Nano Super | ./build-orin-super-nano.sh |
| All three targets | ./build-all.sh |
For demonstration purposes, the steps in the Learning Path are focused on NVIDIA Jetson AGX Thor. To flash the other targets or all three targets, use the appropriate wrapper script.
Each wrapper calls build_oe4t_jetson_multi_platform.sh. Pass --bundle to create the flashing archive used later.
The build takes several hours. Start a tmux session so the build survives SSH disconnections:
sudo apt install -y tmux
tmux new -s yocto-build
If your SSH connection drops during the build, reconnect and reattach:
tmux attach -s yocto-build
Inside the tmux session, start the NVIDIA Jetson AGX Thor build and create a flashing archive:
./build-thor.sh --bundle 2>&1 | tee "$HOME/build.log"
The script installs the required host packages before starting the Yocto build.
If Ubuntu displays a service-restart dialog during package installation, press the Tab key to select OK, then press the Enter key to continue.
After installing the host packages, the script starts BitBake to build the image:
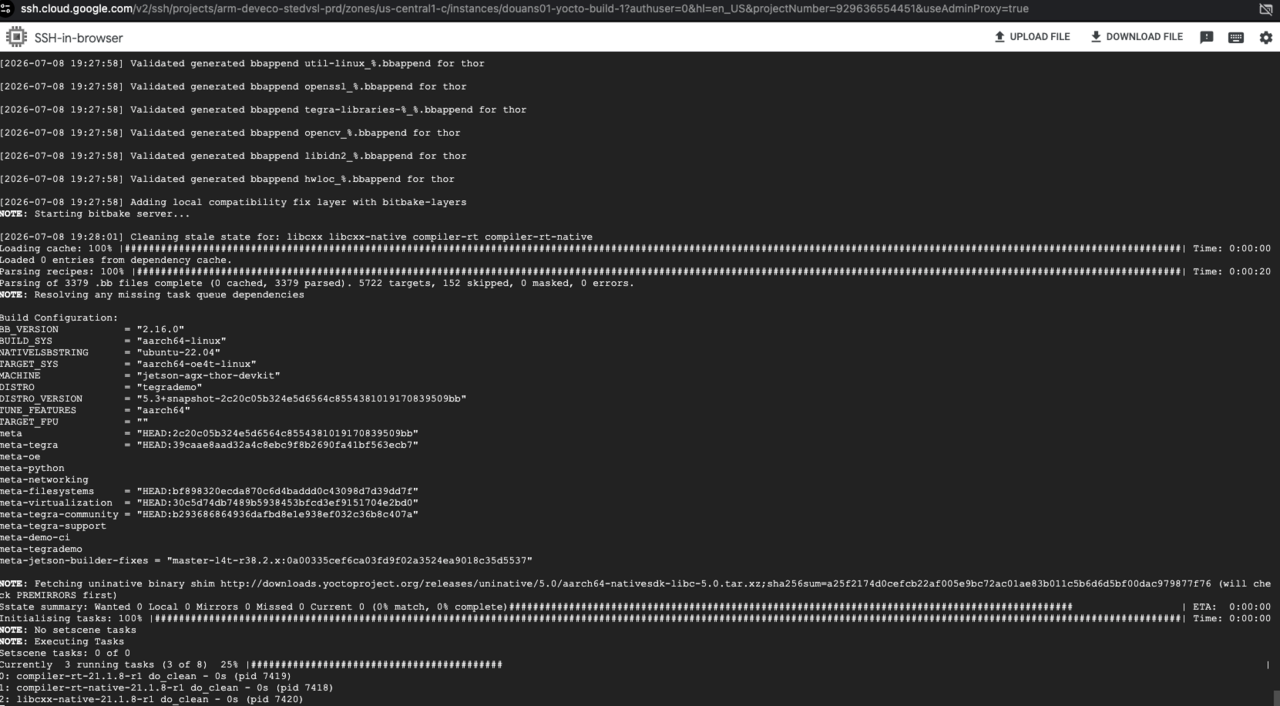 BitBake building the Yocto image
The script runs until the Yocto image and flashing archive are ready.
Restart a failed Yocto build
Source downloads can fail temporarily even when alternate mirrors are available. If a download error stops the build, rerun the same build command.
The wrapper script removes the previous OE4T workspace before rebuilding. A restarted build begins from a clean workspace rather than resuming from the failure point.
Verify the build output
When the build completes, the script prints a summary containing the workspace, deploy directory, primary flashing image, and bundle archive path:
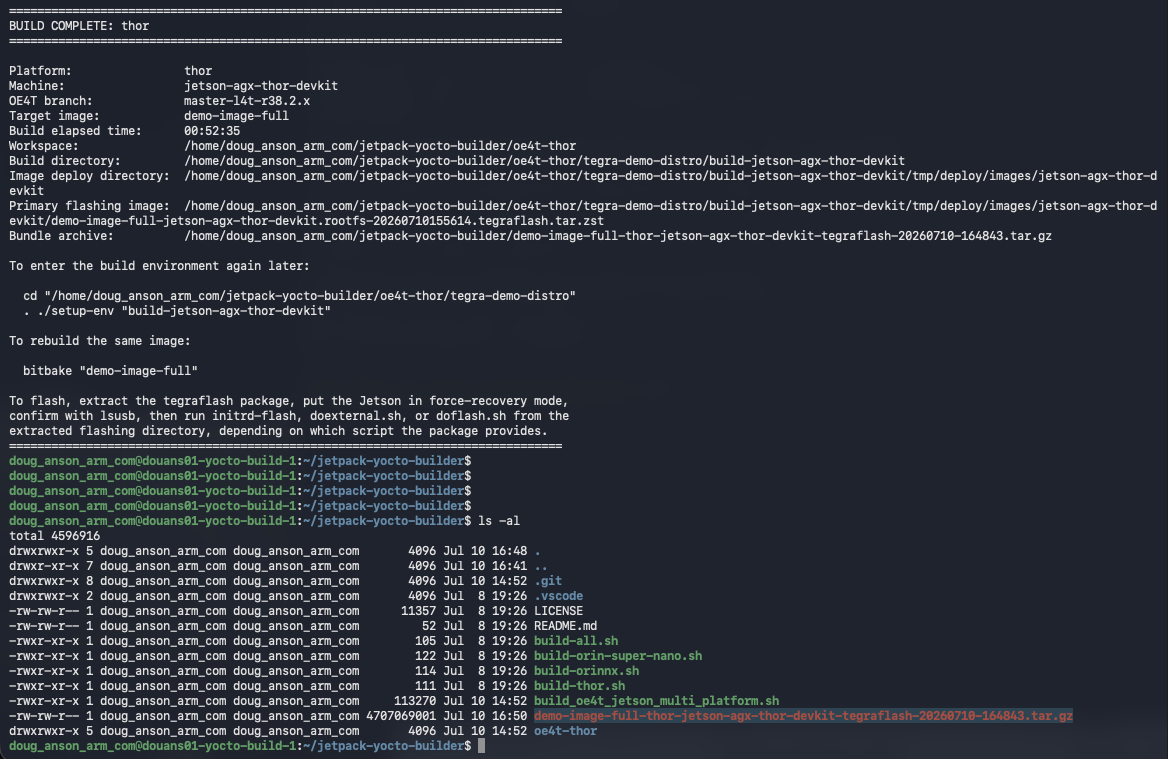 Yocto build completion summary
The --bundle option creates a compressed flashing archive in the cloned repository:
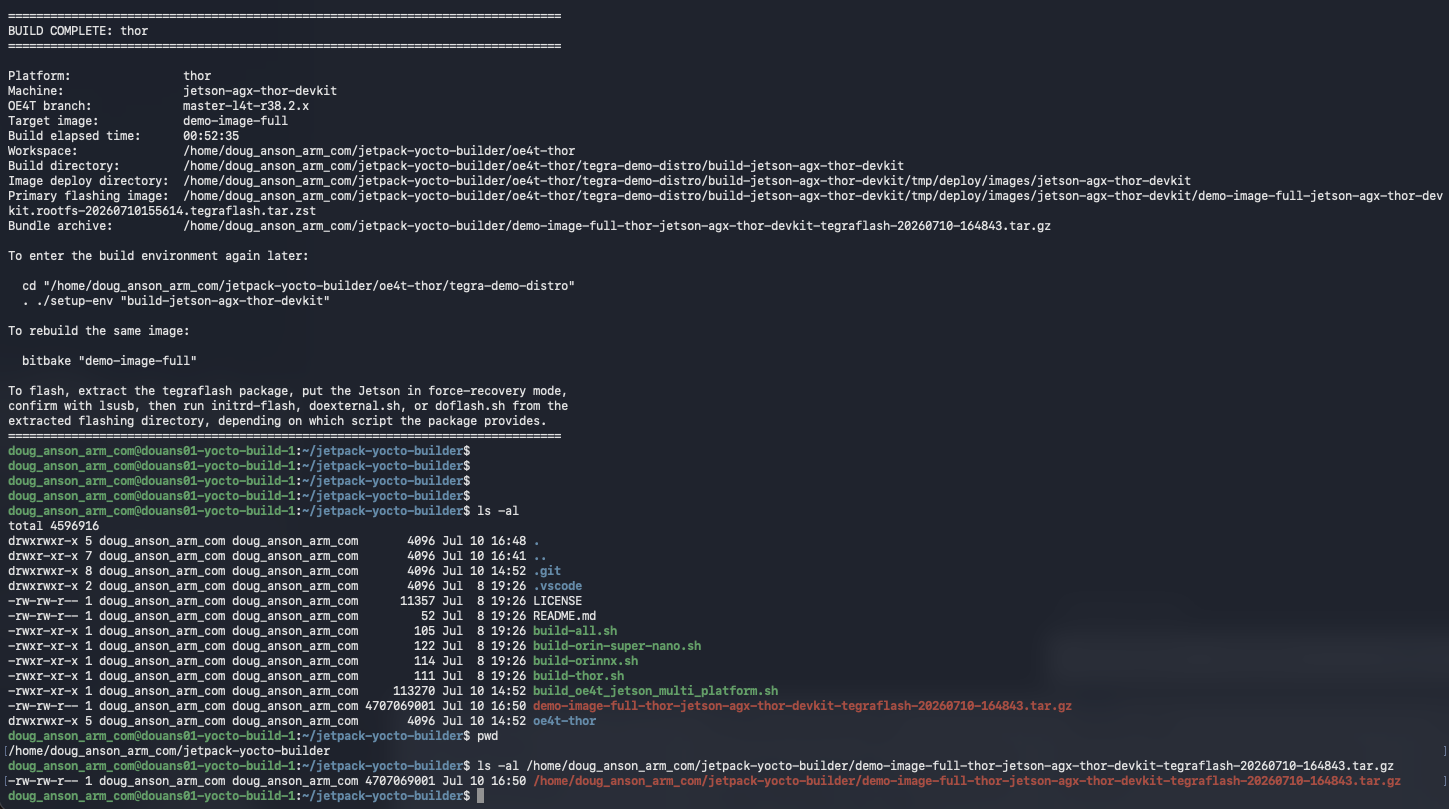 Bundled Yocto flashing archive
Verify that the script created the bundled flashing archive:
ls -lh $HOME/jetpack-yocto-builder/demo-image-full-*-tegraflash-*.tar.gz
Record the displayed path. You’ll transfer this archive to the Ubuntu flashing host in the next section.
What you’ve accomplished and what’s next
You’ve now built and bundled a Yocto image for an NVIDIA Jetson platform on a Google Axion VM.
Next, transfer the archive to your Ubuntu host and flash the image to the Jetson platform.