Build a CI/CD pipeline with GitLab on Google Axion
Introduction
Create a Google Axion-based GitLab self-hosted runner
Automate the build and deployment of a multi-arch application with GitLab CI/CD
Next Steps
Build a CI/CD pipeline with GitLab on Google Axion
What is a GitLab runner?
A GitLab Runner works with GitLab CI/CD to run jobs in a pipeline. It acts as an agent and executes the jobs you define in your GitLab CI/CD configuration. Some key points to note about GitLab Runner:
GitLab offers multiple types of runners - You can use GitLab-hosted runners, self-managed runners, or a combination of both. GitLab manages GitLab-hosted runners, while you install and manage self-managed runners on your own infrastructure.
Each runner is configured as an Executor - When you register a runner, you choose an executor, which determines the environment in which the job runs. Executors can be Docker, Shell, Kubernetes, etc.
Multi-architecture support: GitLab runners support multiple architectures including -
x86/amd64andarm64
What is Google Axion?
Axion is Google’s first Arm-based server processor, built using the Armv9 Neoverse V2 CPU. The VM instances are part of the C4A family of compute instances. To learn more about Google Axion refer to this
page
.
Install GitLab runner on a Google Axion VM
Create a repository in your GitLab account by clicking the “+” sign on top-left corner. Click on New project/repository and select a blank project, provide a name and initiate your project/repository.

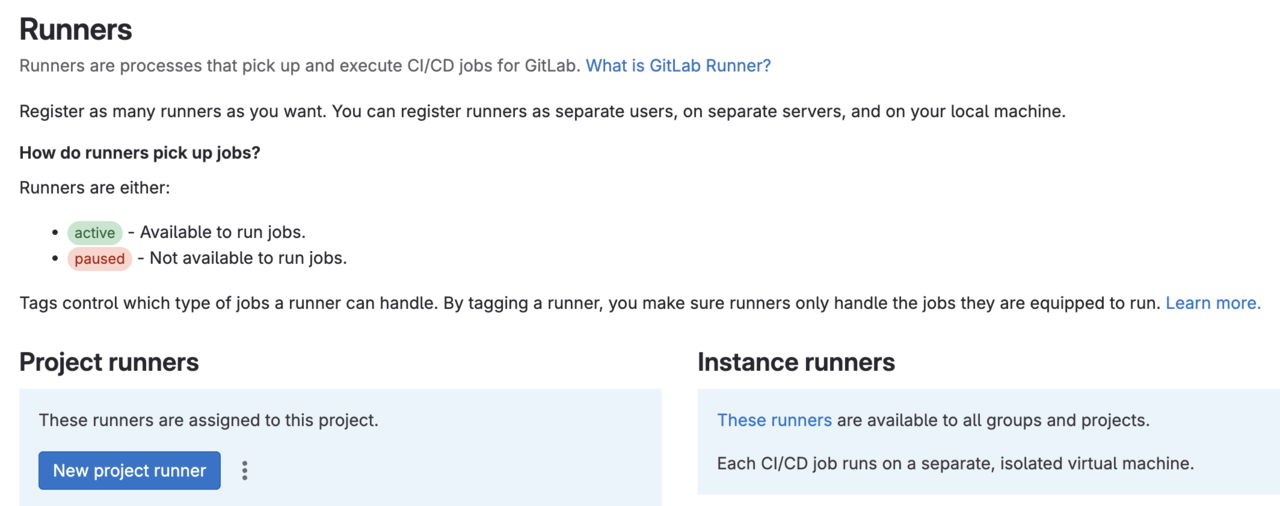
After you create the repository, navigate to Settings->CI/CD in the left-hand pane. Expand the Runners section and under Project Runners, select New Project Runner.

Use Tags to specify the jobs that can be executed on the runner. In the Tags field, enter arm64. In Runner description enter google-axion-arm64-runner and click the Create Runner button
Once the runner is created, you need to register this runner. Select Linux as the Operating System.
In Google Cloud, the C4A VM instance is based on Google Axion. Create a C4A VM by following the
Create Arm-based VM in Google Cloud learning path
SSH to this VM and use the following steps to install GitLab Runner binaries.
Download the binaries using the command below
sudo curl -L --output /usr/local/bin/gitlab-runner https://gitlab-runner-downloads.s3.amazonaws.com/latest/binaries/gitlab-runner-linux-arm64
Provide necessary permissions
sudo chmod +x /usr/local/bin/gitlab-runner
Create a GitLab runner user
sudo useradd --comment 'GitLab Runner' --create-home gitlab-runner --shell /bin/bash
Install the runner and run it as a service
sudo gitlab-runner install --user=gitlab-runner --working-directory=/home/gitlab-runner
sudo gitlab-runner start
In the GitLab console, on the Register Runner page, copy the command from Step 1 and run it on the C4A VM. The command should look like this:
sudo gitlab-runner register --url https://gitlab.com --token <your-runner-token>
Go back to the SSH session for C4A VM. When prompted by the command line, keep the default for GitLab instance URL and enter a name for the runner. For the executor, use shell as the option.
After answering the prompts, the runner should be registered and you should see a message like the one below:
Runner registered successfully. Feel free to start it, but if it's running already the config should be automatically reloaded!
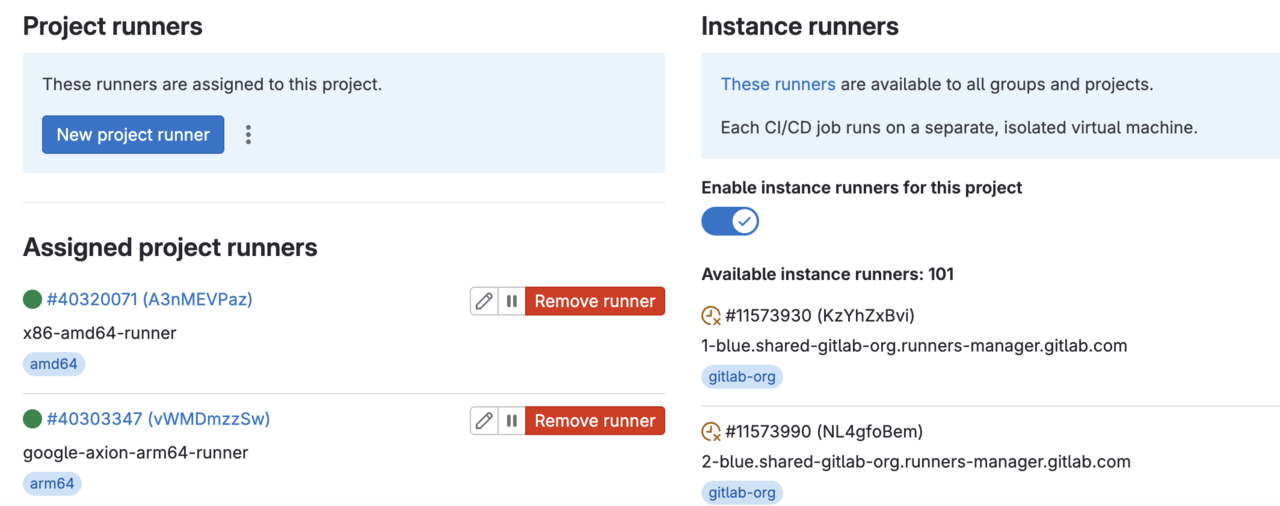
You should see the newly registered runner in the Runners section of the GitLab console as shown below.

To create an amd64 GitLab runner, follow the same steps as above, except for the Download binaries section. Change the download url to https://gitlab-runner-downloads.s3.amazonaws.com/latest/binaries/gitlab-runner-linux-amd64
Launch an amd64 VM instance with the E2 type in Google Cloud and install the runner binaries. Once done, you should be able to see both the runners as shown in the picture above.