Build a CI/CD pipeline using GitLab-hosted Arm runners
Introduction
Build and use GitLab-hosted Arm runners for CI/CD
Create a GitLab project
Build and configure your Arm64 CI/CD pipeline
Run pipeline and verify results
Next Steps
Build a CI/CD pipeline using GitLab-hosted Arm runners
Create your GitLab project for Arm CI/CD
This section covers how to create a new GitLab project to use with Arm64 runners.
Before you begin, log in to your GitLab account or create a new one.
You need a GitLab project to store your application code and CI/CD configuration. You can either create a new project or use an existing one.
If you’re using an existing project, skip to the next section.
Create a new project
Navigate to Projects in the left sidebar and select New Project:
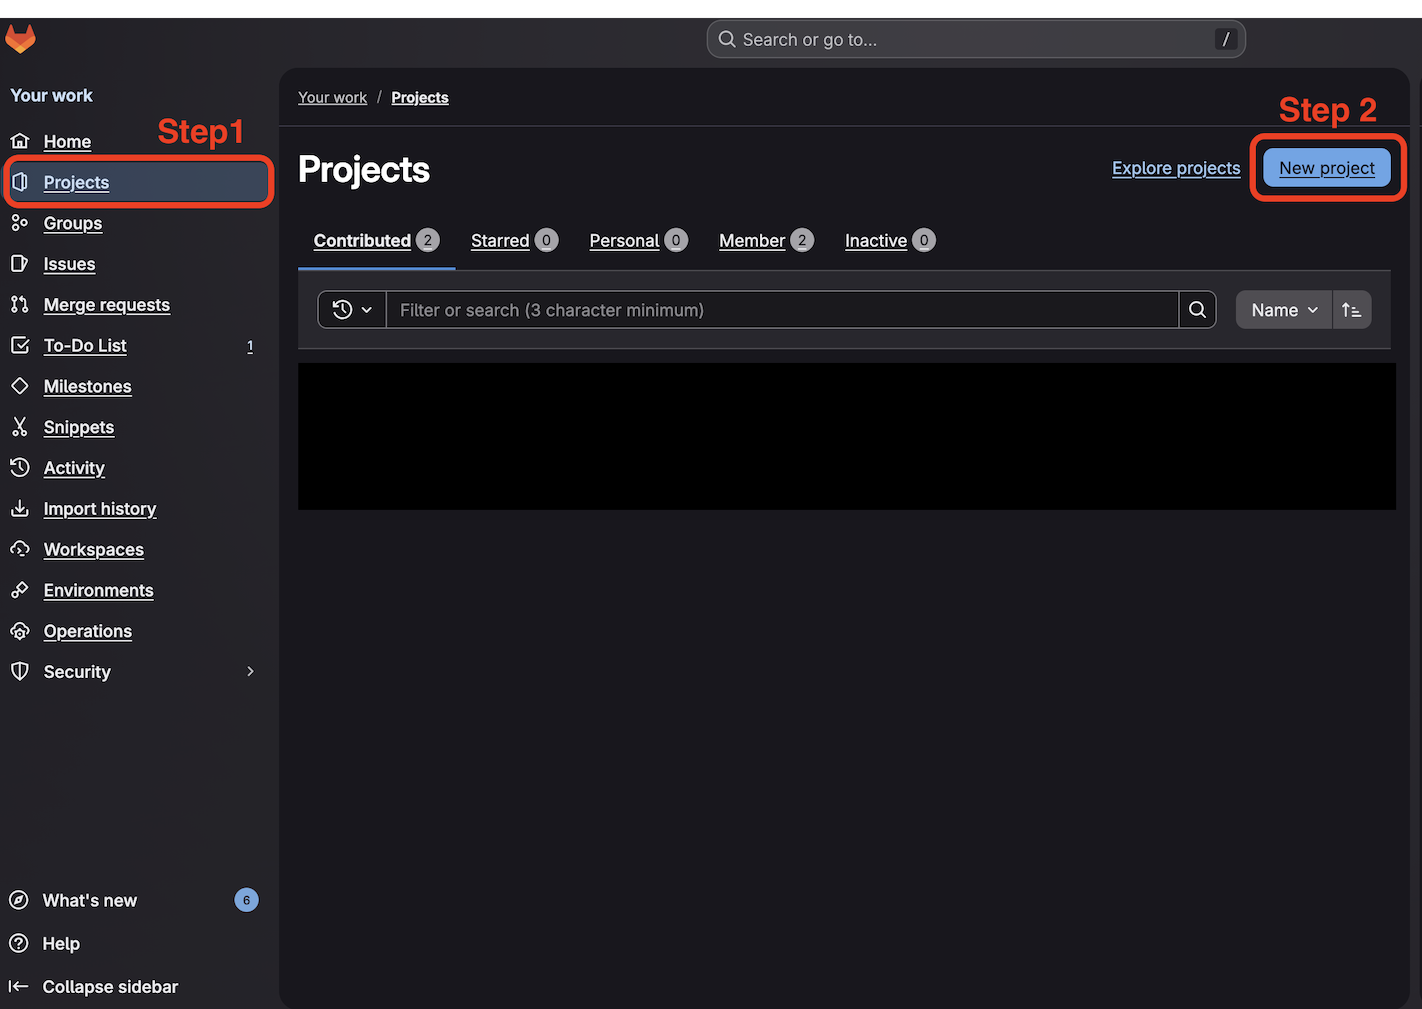 GitLab Projects menu in left sidebar
Choose Create blank project or Create from template (select GitLab CI/CD components if using a template):
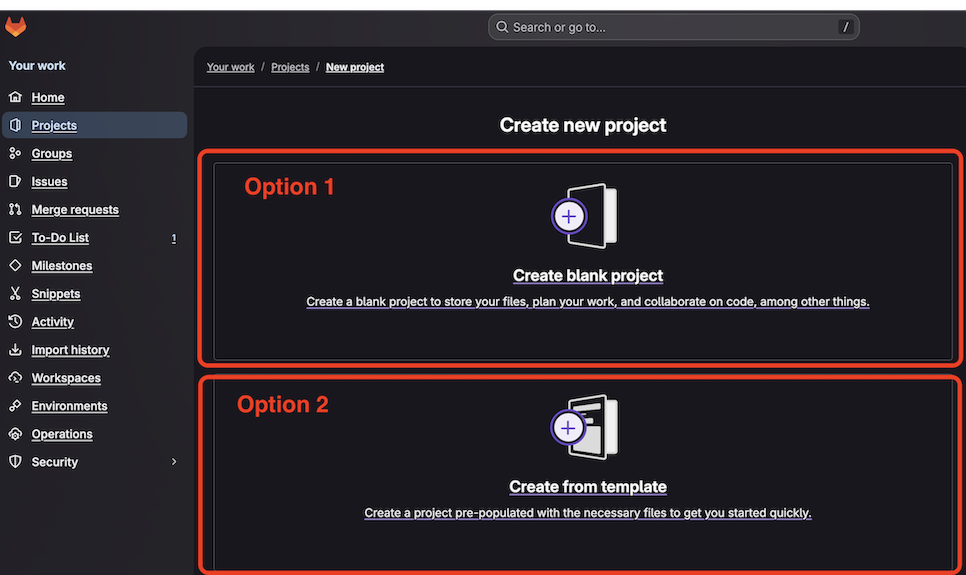 GitLab new project creation screen
Provide a project name (for example, arm-runner-demo) and select your preferred project URL. Select Create Project:
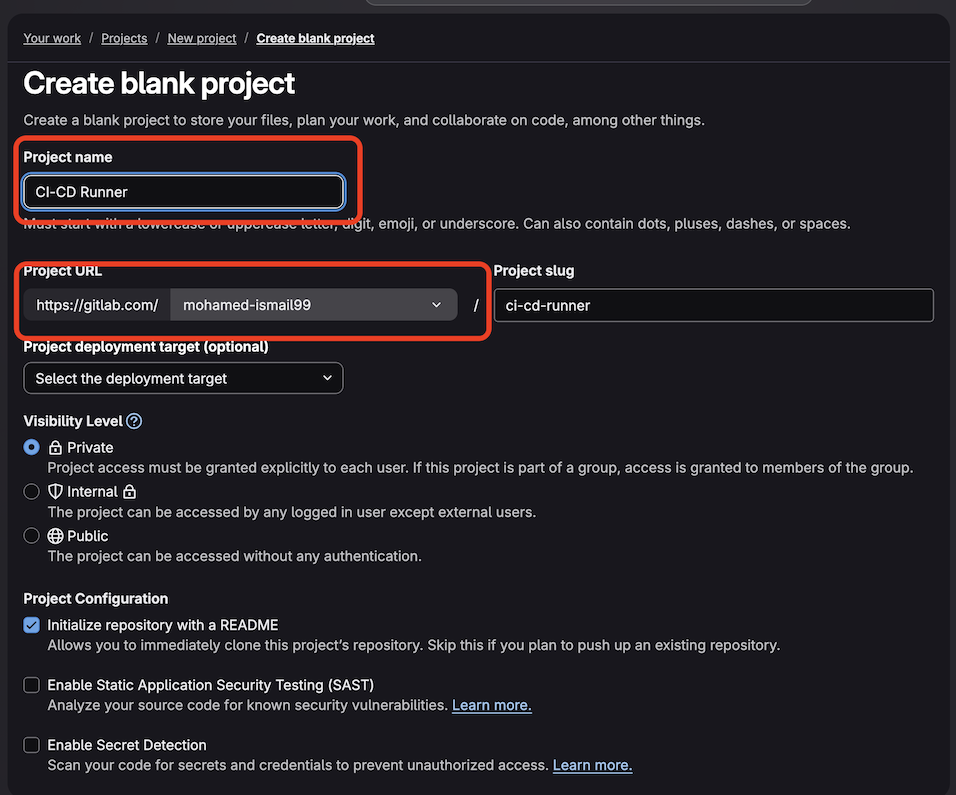 GitLab project information entry screen
Your new project is ready:
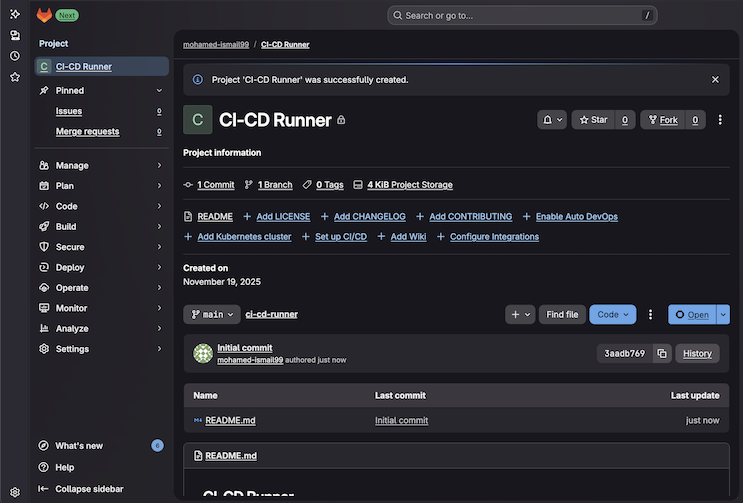 GitLab project creation success screen
With your project created, you can now add application files and configure the CI/CD pipeline to use Arm64 runners.