Run a local AI agent with Ollama to visualize CPU orchestration on Arm
Introduction
Understand the agent and how work is split between CPU and GPU
Set up your environment before running the agent
Serve a model locally with Ollama
Understand the concierge agent code
Run the agent and read the timeline
Understand the CPU's role in the agentic workflow
Next Steps
Run a local AI agent with Ollama to visualize CPU orchestration on Arm
Start the agent
Make sure the following are in place before you start:
- Ollama is running and serving
gemma3:4b. - Your virtual environment is active and
SERPER_API_KEYis set in the current terminal.
From your project directory, start the agent:
python3 concierge_agent.py
The agent greets you and waits for a question:
        Hello! I am your local concierge agent.
Ask me anything - I research topics by browsing multiple websites in real time.
Make sure Ollama is running in the background.
Type "quit" or "exit" to end the session.

What would you like to find?
>
Ask a research question
Type a question that benefits from searching and reading several pages. For example:
Find three highly rated ramen restaurants in San Francisco that are open late
As the agent works, watch the log lines. Cyan [CPU] lines show orchestration and web I/O; yellow [GPU] lines show each model call:
        [GPU] Thinking with local Gemma model...
[CPU] Expanding base query 'late night ramen San Francisco' into multiple variants...
[CPU] Generated 3 search variants: [...]
[CPU] Dispatching 3 parallel search threads...
[CPU] Merging search results and deduplicating URLs...
[GPU] Thinking with local Gemma model...
[CPU] Dispatching 8 parallel browse threads...
[CPU] Running TF-IDF ranking on scraped content...
[CPU] Deduplicating sentences across all scraped sources...
[CPU] Extracting named entities from aggregated content...
[GPU] Thinking with local Gemma model...
The agent then prints a fact-checked summary that answers your question.
Read the timing breakdown
After each answer, the agent prints how the time was spent:
        --- Processing Timeline ---
CPU operations:             4.812s
GPU input token processing: 1.934s
GPU token generation:       3.057s
GPU total:                  4.991s
These numbers separate the three kinds of work:
CPU operations– every orchestration and text-processing stage combined.GPU input token processing– the time the model spends reading each prompt before producing output (prefill).GPU token generation– the time spent writing the answers.
Your exact numbers depend on your hardware, the model size, and how many pages the agent reads. The point isn’t the absolute values, but the fact that CPU work is a substantial share of every query.
Read the timeline
The agent also prints a text-based timeline. Each character is a slice of wall-clock time, color-coded by what was active:
        CCCCCCCPGGGGCCCCCCCCCCCCCCPGGGGGGGGCCCCCCCCCCCCCCCCCCCPGGGGGGGGGGGG
C=CPU (orchestration + web I/O) P=GPU input token processing G=GPU token generation .=idle
Total: 9.803s
Reading left to right, you can see the pattern of an agentic query: long stretches of CPU work (C) for searching, browsing, and processing, punctuated by GPU bursts where the model reads a prompt (P) and generates text (G).
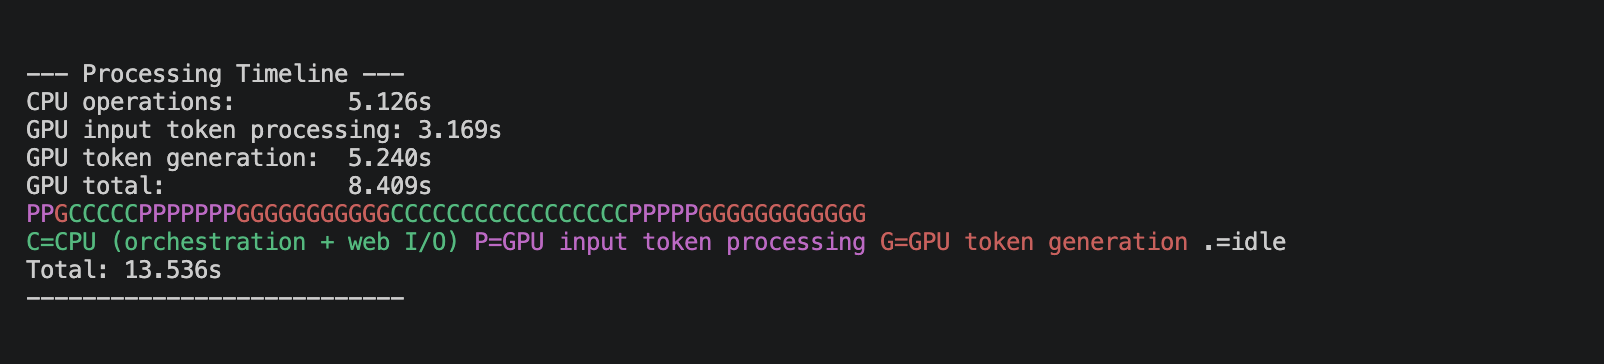 Processing timeline showing CPU and GPU activity for an agent query.
Try more queries
Ask a few different kinds of research questions and compare their timelines:
Compare the battery life of the three most recommended noise-cancelling headphones
Summarize the key differences between the latest Raspberry Pi models
The screenshot shows example queries and the answers the agent returns:
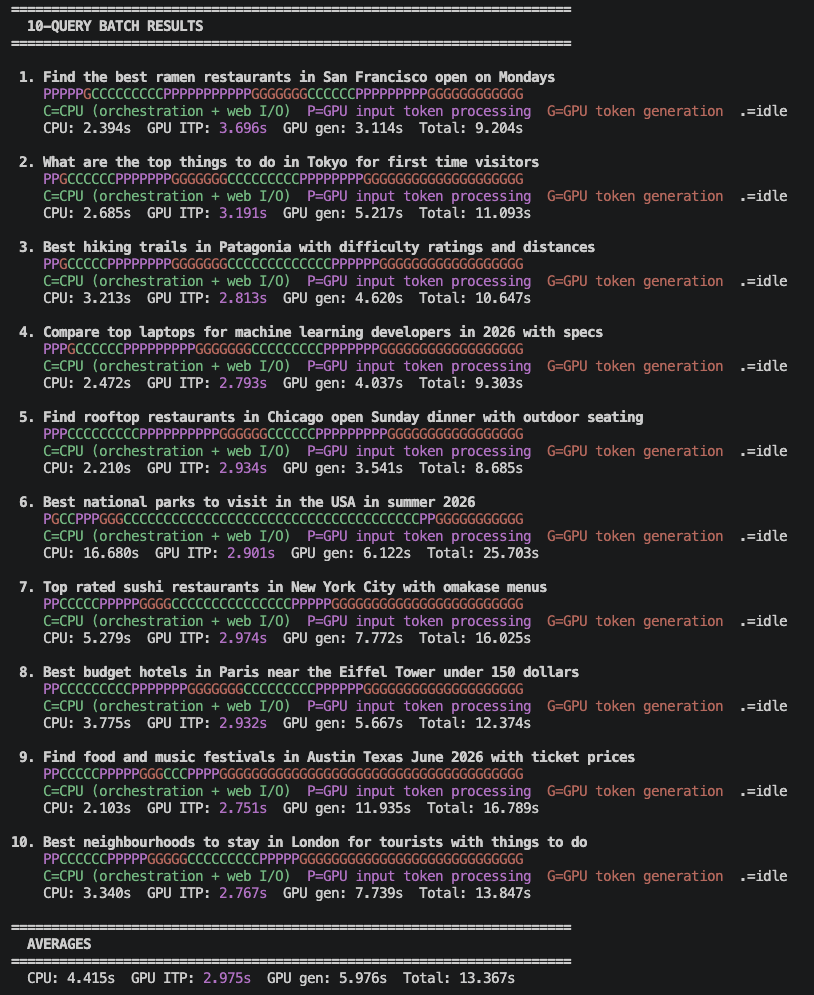 Example queries sent to the local concierge agent and the responses it generates.
Type quit or exit to end the session.
What you’ve accomplished and what’s next
You’ve now started the agent and asked questions to see how query response steps are split between the CPU and the GPU.
Next, you’ll learn why the CPU does so much of the work in an agentic workflow.