NoMachine
How do I install NoMachine?
| Reading time: | 30 min |
| Last updated: | 5 Feb 2025 |
| Reading time: |
| 30 min |
| Last updated: |
| 5 Feb 2025 |
This guide is intended to get you up and running with this tool quickly with the most common settings. For a thorough review of all options, refer to the official documentation.
NoMachine can be used to connect to a remote Linux desktop, including Arm servers and cloud instances.
During development it may be useful to quickly create a remote desktop on an Arm server.
This section provides info about how to setup NoMachine on a remote Arm Linux machine running Ubuntu.
What is NoMachine?
NoMachine is a client server application. The NoMachine server runs on the remote machine. The client runs on the local machine and connects to the remote server.
How do I install the xfce4 desktop?
To connect to a remote desktop, desktop software must be installed. There are many options for this, but using xfce4 makes for a minimal install with good performance.
Install the desktop software.
sudo apt update; sudo apt upgrade -y
sudo apt-get install xfce4 xfce4-goodies xorg dbus-x11 x11-xserver-utils xfce4-terminal -y
How do I install NoMachine on a remote server?
Create two files on the server in the home directory $HOME. The contents of the files is below.
Use a text editor to copy and paste this script into a file on the remote machine at $HOME/nx-key.sh
            #!/bin/bash

if [ -f $HOME/.ssh/authorized_keys ]; then
    [ -d $HOME/.nx/config ] || mkdir -p $HOME/.nx/config
    cp $HOME/.ssh/authorized_keys $HOME/.nx/config/authorized.crt
else
    echo "No .ssh/authorized_keys file found"
fi
Use a text editor to copy and paste this script into a file on the remote machine at $HOME/install-nomachine.sh
            #!/bin/bash

# install NoMachine for remote desktop
wget https://download.nomachine.com/download/8.4/Arm/nomachine_8.4.2_1_arm64.deb
sudo dpkg -i nomachine_8.4.2_1_arm64.deb
if [ $? != 0 ]; then
  exit 1
fi

# user of the AMI must run the nx-key.sh to copy their key for NX
echo "$HOME/nx-key.sh" >> /home/$USER/.bashrc
sudo systemctl set-default multi-user

exit 0
Give both scripts executable permission.
chmod +x nx-key.sh install-nomachine.sh
On the remote machine, run the install script.
./install-nomachine.sh
How do I set a user password for a NoMachine connection?
For NoMachine to work, it’s best to have a user account on the remote machine with a password. Many cloud instances have accounts without passwords and use only ssh keys to connect.
If the user account already has a password, this step can be skipped.
To enable passwords edit the file /etc/sshd_config and set PasswordAuthentication to yes.
To enable it in a script or from the command line use:
sudo sed -i '/PasswordAuthentication no/c\PasswordAuthentication yes' /etc/ssh/sshd_config
Restart the SSH daemon:
sudo systemctl restart ssh
Set a password for the user account. The example shows ubuntu, but change the username as needed.
sudo passwd ubuntu
Enter a new password.
Remember the password for later when the client is connected.
How do I open the NoMachine port?
The default port for NoMachine is 4000. If needed, open this port in the security group. Make sure to open ports only from your IP address, not from anywhere.
How do I install the NoMachine client?
Download and install NoMachine on the client you want to connect from. There are options for most operating systems including Android and iOS.
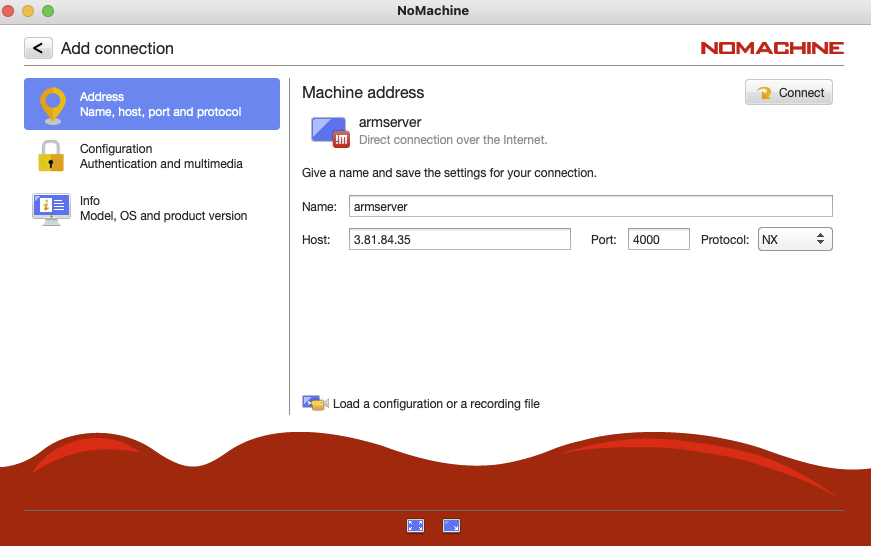
Start NoMachine on the client computer. The first step is to connect. Enter a name for the connection and the (public) IP of the remote machine. The default port is 4000.
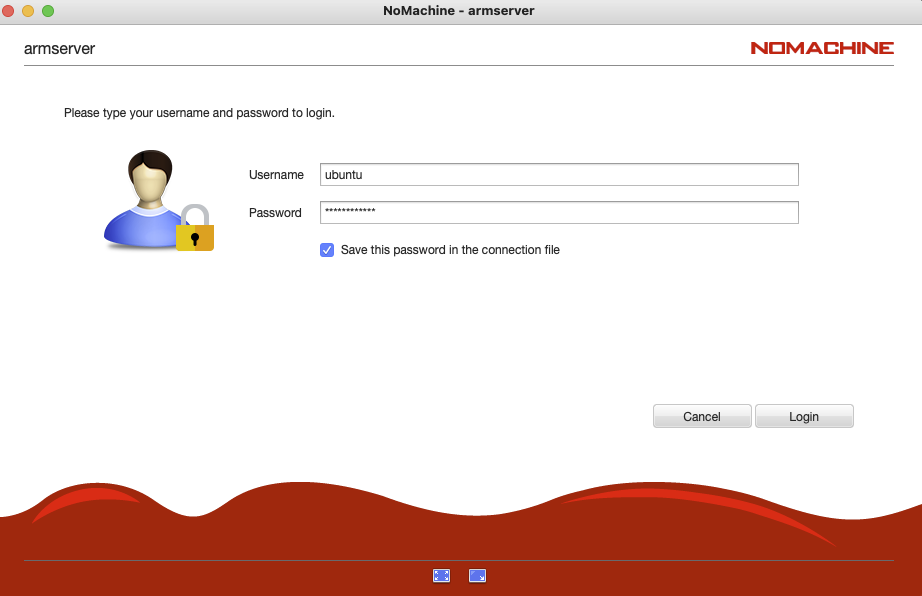
The next screen is the login screen. Enter the username and password for the account on the remote machine.
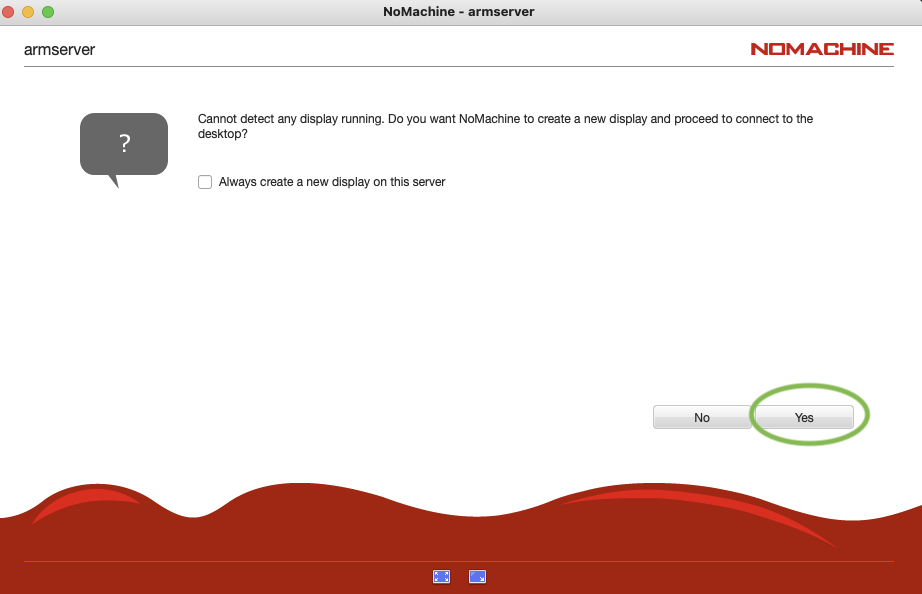
A question about creating a new display may be presented, answer Yes.
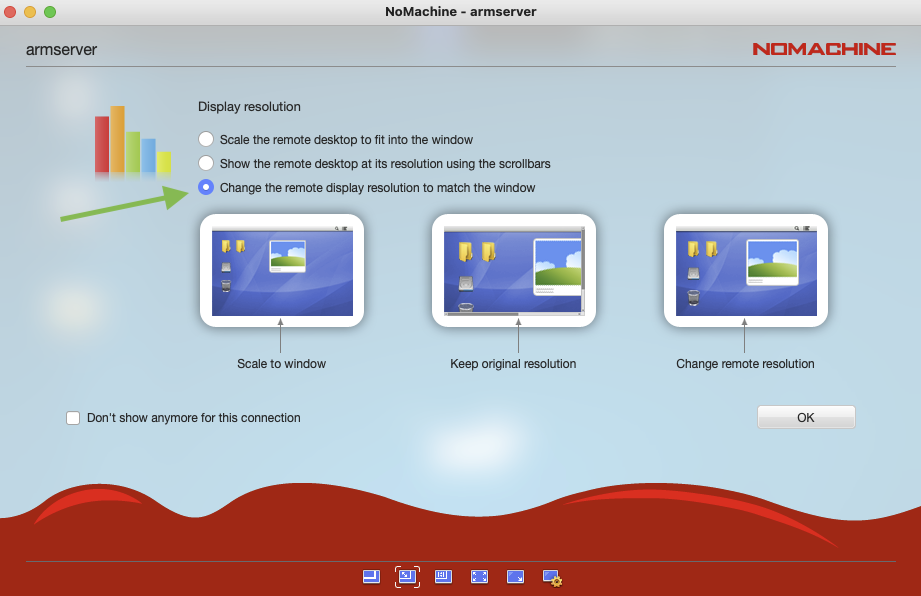
NoMachine will resize the remote desktop to fit in the client window. The best option is to change the remote display resolution to match the client window size.
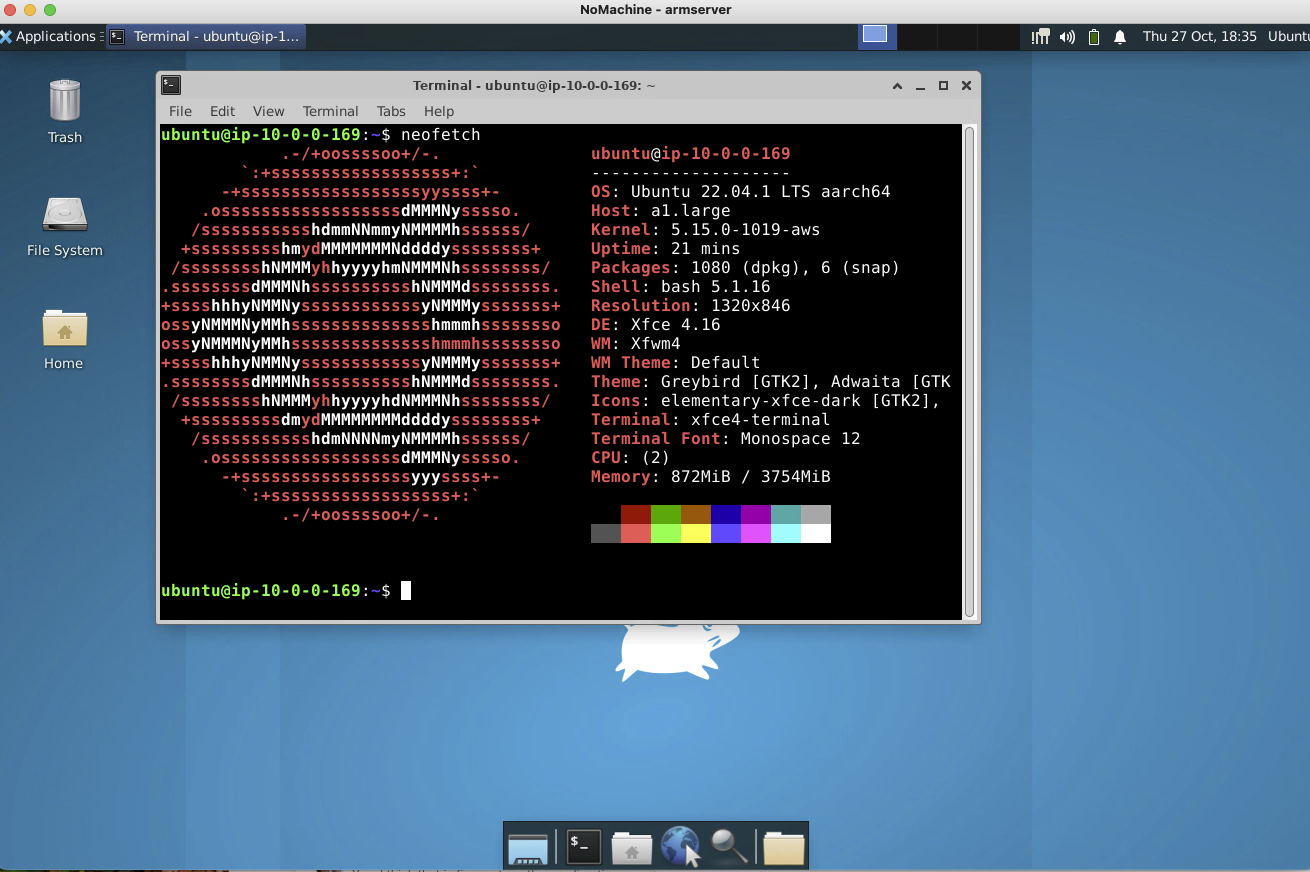
Finally, the desktop will appear and is ready to use.
Feedback
How would you rate the overall quality of this tool quick-install guide?
What is the primary reason for your feedback ?
Thank you. We're grateful for your feedback on how to improve this tool quick-install guide.
- Have more detailed feedback about what to improve or add next? Log an issue on GitHub.
- Want to discuss this topic with fellow developers and Arm Experts? Collaborate in the Arm Developer Discord server.