Hyper-V on Arm
How do I install Hyper-V on Arm?
| Reading time: | 15 min |
| Last updated: | 26 Apr 2025 |
| Reading time: |
| 15 min |
| Last updated: |
| 26 Apr 2025 |
This guide shows you how to install and use the tool with the most common configuration. For advanced options and complete reference information, see the official documentation. Some install guides also include optional next steps to help you explore related workflows or integrations.
You can use Hyper-V to create and run virtual machines using Windows 11 on Arm.
There is nothing to download to enable Hyper-V.
What should I consider before enabling Hyper-V?
Arm virtual machines on Windows with Hyper-V require Windows 11 version 22H2 or newer.
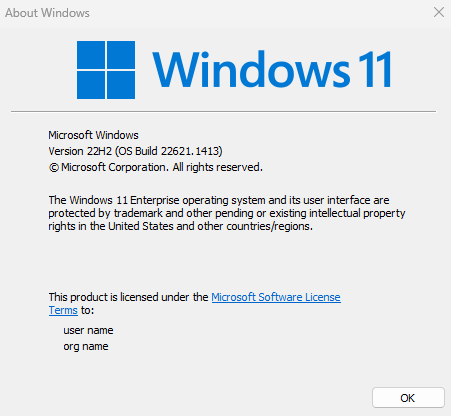
To check your Windows version hold down the Windows Key and press R. In the Run dialog box type winver.
A dialog will appear with your version information.
Look for Version 22H2 or newer.
Here is a screenshot of winver:
You must enable Hyper-V on a physical computer. It cannot be enabled on a virtual machine such as an Azure Arm instance running Windows 11.
Follow the instructions below to enable Hyper-V on Windows on Arm.
There are multiple ways to enable Hyper-V:
- Use the Control Panel
- Use the Command Prompt or PowerShell command line
Pick one alternative, you don’t need to do both.
How do I enable Hyper-V using the Control Panel?
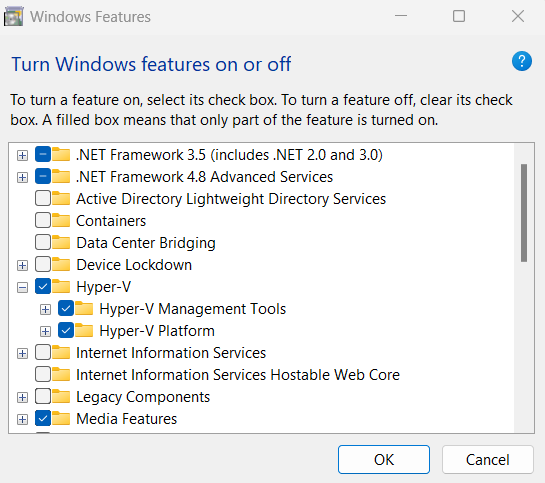
Click the Windows button, find and open the Control Panel
In Control Panel click
Programsand then click Turn Windows features on or off
A dialog should appear:
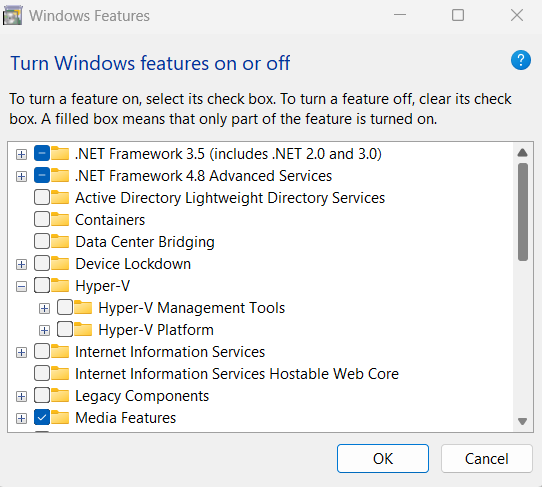
- Select Hyper-V and click OK
How do I enable Hyper-V from the command line?
Open a Command Prompt or Windows PowerShell (as Administrator)
Run the
DISMcommand below to enable Hyper-V:
DISM /Online /Enable-Feature /All /FeatureName:Microsoft-Hyper-V
The output should include the message:
The operation completed successfully.
Restart your computer to finish enabling Hyper-V.
How do I start Hyper-V?
Hyper-V Manager should now be available in the applications menu.

You are now ready to use Hyper-V to create virtual machines on your Windows on Arm device.
Give Feedback
How would you rate this tool quick-install guide?
What is the primary reason for your feedback ?
Thank you! We're grateful for your feedback.
- Have more feedback? Log an issue on GitHub.
- Want to collaborate? Join our Discord server.