Arduino core for the Raspberry Pi Pico
About this Install Guide
| Reading time: | 15 min |
| Last updated: | 11 Nov 2025 |
| Reading time: |
| 15 min |
| Last updated: |
| 11 Nov 2025 |
This guide shows you how to install and use the tool with the most common configuration. For advanced options and complete reference information, see the official documentation. Some install guides also include optional next steps to help you explore related workflows or integrations.
You can install the Arduino IDE and Arduino core software for the Raspberry Pi Pico and the Raspberry Pi Pico W.
Arduino core is the software stack that powers Arduino devices and development boards. While the Raspberry Pi Pico isn’t an Arduino board, it uses the same RP2040 SoC as the Arduino RP2040 Connect, and therefore can run the same Arduino core software.
How do I install Arduino IDE?
First, you need to install the Arduino IDE on your laptop or desktop. You can download it for your operating system from the Arduino Software website . Follow the provided instructions for installing the IDE.
Start the IDE by clicking the Arduino IDE icon.
How do I install the board support package?
The Arduino software is comprised of the core libraries and a Board Support Package that is specific to your device. You need to install the Arduino Mbed OS RP2040 Boards package to support the Raspberry Pi Pico.
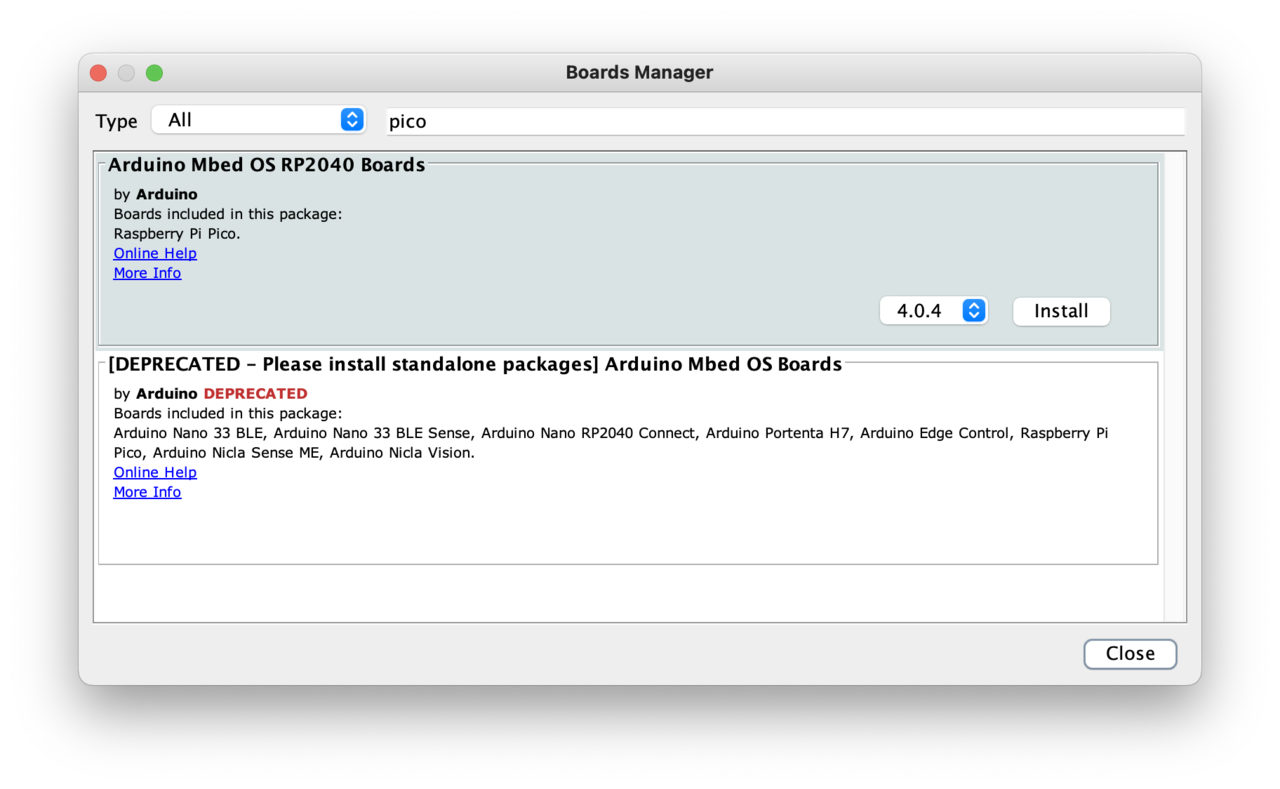
You can install this package by opening the Boards Manager.
From the menu select Tools -> Board -> Boards Manager.
When the Boards Manager opens search for pico and the Arduino Mbed OS RP2040 Boards will be displayed. Click the Install button to add it to the Arduino IDE.
How do I set up the Raspberry Pi Pico W?
The Boards Manager package for for Arduino Mbed OS RP2040 Boards does not include the Raspberry Pi Pico W.
If you want to use the Pico W go to File -> Preferences (or Arduino IDE -> Settings on macOS) and enter the URL below into the Additional Boards Manager URLs field:
https://github.com/earlephilhower/arduino-pico/releases/download/global/package_rp2040_index.json
Return to Tools -> Board -> Boards Manager and search for pico and you will see a new entry Raspberry Pi Pico/RP2040. Click the Install button to add it to the Arduino IDE.
How do I select my board?
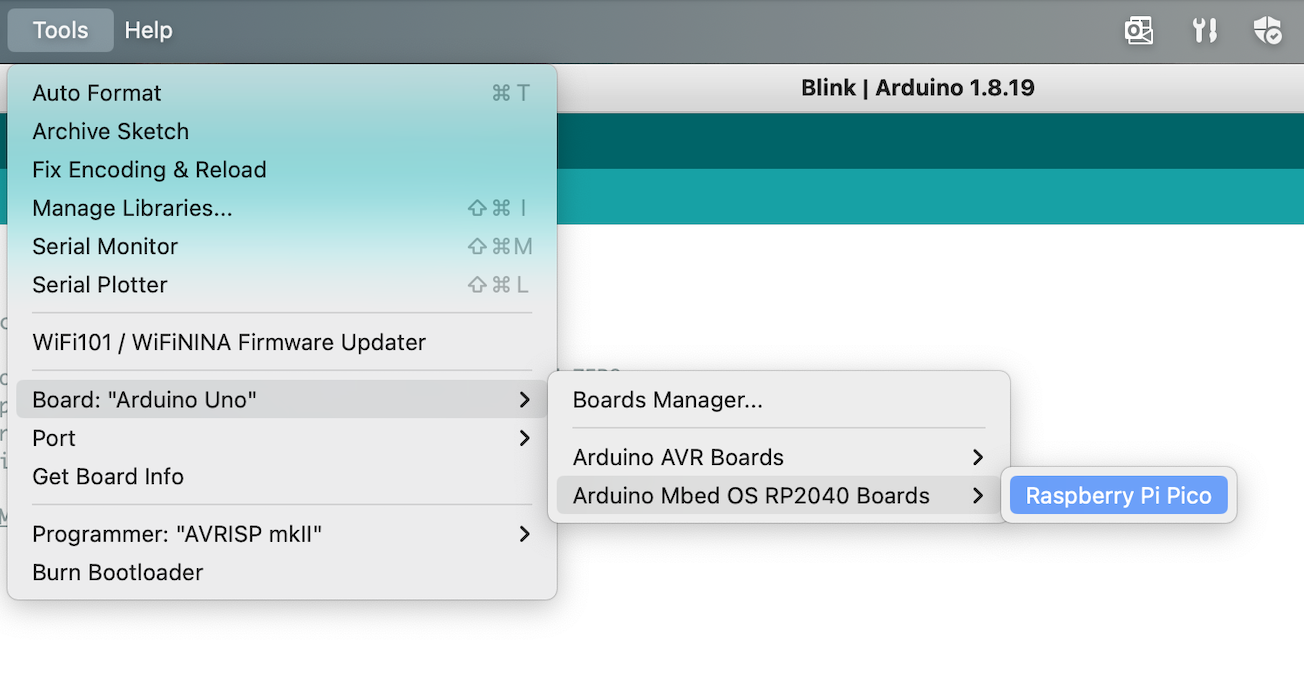
Once the support package is installed, you need to tell the Arduino IDE which supported board you will be using. From the Tools -> Board menu, find and select Raspberry Pi Pico or Raspberry Pi Pico W depending on your board type.
How do I upload code to my board?
Because the Raspberry Pi Pico doesn’t come with the Arduino core software installed, the Arduino IDE won’t recognize it.
To fix that, you must upload a sketch. A sketch is another name for an Arduino software application.
Go to File -> Examples -> 01.Basics -> Blink and load the sketch.
Click the upload button (right arrow icon) and wait for the sketch to be uploaded.
You should see the LED on your Raspberry Pi Pico blink on and off every second.
If you have trouble uploading a sketch, unplug the board, press and hold the BOOTSEL button on the board, plug it in, and then release the button.
You are ready to start writing your own Arduino sketches for Raspberry Pi Pico.
Give Feedback
How would you rate this tool quick-install guide?
What is the primary reason for your feedback ?
Thank you! We're grateful for your feedback.
- Have more feedback? Log an issue on GitHub.
- Want to collaborate? Join our Discord server.