Run the INT8 model in an Android app
Run the asset-sync script in the macOS, Ubuntu, or WSL environment used to prepare the model:
module-3-executorch-on-android-semantic-segmentation/scripts/android/sync_android_assets.py --pte-name lraspp_mobilenetv3_int8_xnnpack.pte
The sync script maps the selected .pte to the filename expected by the app:
(
    args.artifact_dir / args.pte_name,
    args.android_assets / args.asset_pte_name,
)
It also copies the labels and preprocessing settings. Files under
app/src/main/assets are embedded in the APK as read-only assets. At runtime,
the model is copied to app-private storage because Module.load() requires a
filesystem path.
If you use WSL, copy the prepared Module 3 directory to your Windows user directory before running the Android build. Run these commands from the course repository root in WSL:
windows_profile="$(cmd.exe /c 'echo %USERPROFILE%' | tr -d '\r')"
windows_course_dir="$(wslpath "$windows_profile")/executorch_on_arm"
mkdir -p "$windows_course_dir"
cp -R module-3-executorch-on-android-semantic-segmentation "$windows_course_dir/"
Then open Windows PowerShell and change to the copied course directory:
cd "$HOME\executorch_on_arm"
Run on a physical device from the terminal
If you do not have a physical device, skip to the emulator instructions. Physical-device results vary with the system-on-chip (SoC), Android version, available memory, battery mode, background applications, and device temperature.
On an Android 9 or newer phone, enable developer options and USB debugging, then connect the unlocked phone to the development machine. Follow the Android hardware-device instructions if you have not configured USB debugging before.
Check the connection and accept the authorization prompt on the phone:
adb devices -l
The device entry must show device. If it shows unauthorized, unlock the
phone, accept the USB debugging prompt, and run the command again.
Build and install the debug APK from the Android project directory:
cd module-3-executorch-on-android-semantic-segmentation/android/ObjectCutout
./gradlew --version
./gradlew :app:assembleDebug :app:lintDebug
adb -d install -r app/build/outputs/apk/debug/app-debug.apk
cd module-3-executorch-on-android-semantic-segmentation\android\ObjectCutout
.\gradlew.bat --version
.\gradlew.bat :app:assembleDebug :app:lintDebug
adb -d install -r app\build\outputs\apk\debug\app-debug.apk
The Launcher JVM and Daemon JVM reported by the Gradle version command should
both use Java 17. Stop and correct JAVA_HOME if either uses another version.
The INT8 debug APK should be about 30 MiB. This includes the model, application code, ExecuTorch runtime, and native libraries for both packaged ABIs.
Copy the course sample image into the phone’s Download directory, then launch
the app:
adb -d push ../../artifacts/lraspp_mobilenetv3/sample.jpg /sdcard/Download/sample.jpg
adb -d shell am start -n org.arm.education.executorch.objectcutout/.MainActivity
adb -d push ..\..\artifacts\lraspp_mobilenetv3\sample.jpg /sdcard/Download/sample.jpg
adb -d shell am start -n org.arm.education.executorch.objectcutout/.MainActivity
The first command uses the sample.jpg created during model preparation. The second
starts the installed Cutout Studio activity.
Optional: run with Android Studio and an emulator
Use Android Studio when you do not have a physical Android device. Follow the Android virtual-device instructions to create and start an Android 9 or newer emulator.
An emulator is useful for checking Gradle integration, assets, navigation, image selection, tensor creation, and error handling. It reports timings, but they are not necessarily representative of production performance, and not a substitute for performance testing on an Arm-based phone.
Open this project directory in Android Studio:
module-3-executorch-on-android-semantic-segmentation/android/ObjectCutout
Use Android Studio to create and start the emulator. Then build, install, copy the sample image, and launch the app from the Android project directory:
cd module-3-executorch-on-android-semantic-segmentation/android/ObjectCutout
./gradlew :app:assembleDebug :app:lintDebug
adb -e install -r app/build/outputs/apk/debug/app-debug.apk
adb -e push ../../artifacts/lraspp_mobilenetv3/sample.jpg /sdcard/Download/sample.jpg
adb -e shell am start -n org.arm.education.executorch.objectcutout/.MainActivity
cd module-3-executorch-on-android-semantic-segmentation\android\ObjectCutout
.\gradlew.bat :app:assembleDebug :app:lintDebug
adb -e install -r app\build\outputs\apk\debug\app-debug.apk
adb -e push ..\..\artifacts\lraspp_mobilenetv3\sample.jpg /sdcard/Download/sample.jpg
adb -e shell am start -n org.arm.education.executorch.objectcutout/.MainActivity
If you prefer to build and launch from Android Studio, set Gradle JDK to
JDK 17 before selecting the app configuration and clicking the green
Run button. Open Device Manager, select the emulator’s menu, and use
Device Explorer to copy sample.jpg to sdcard/Download.
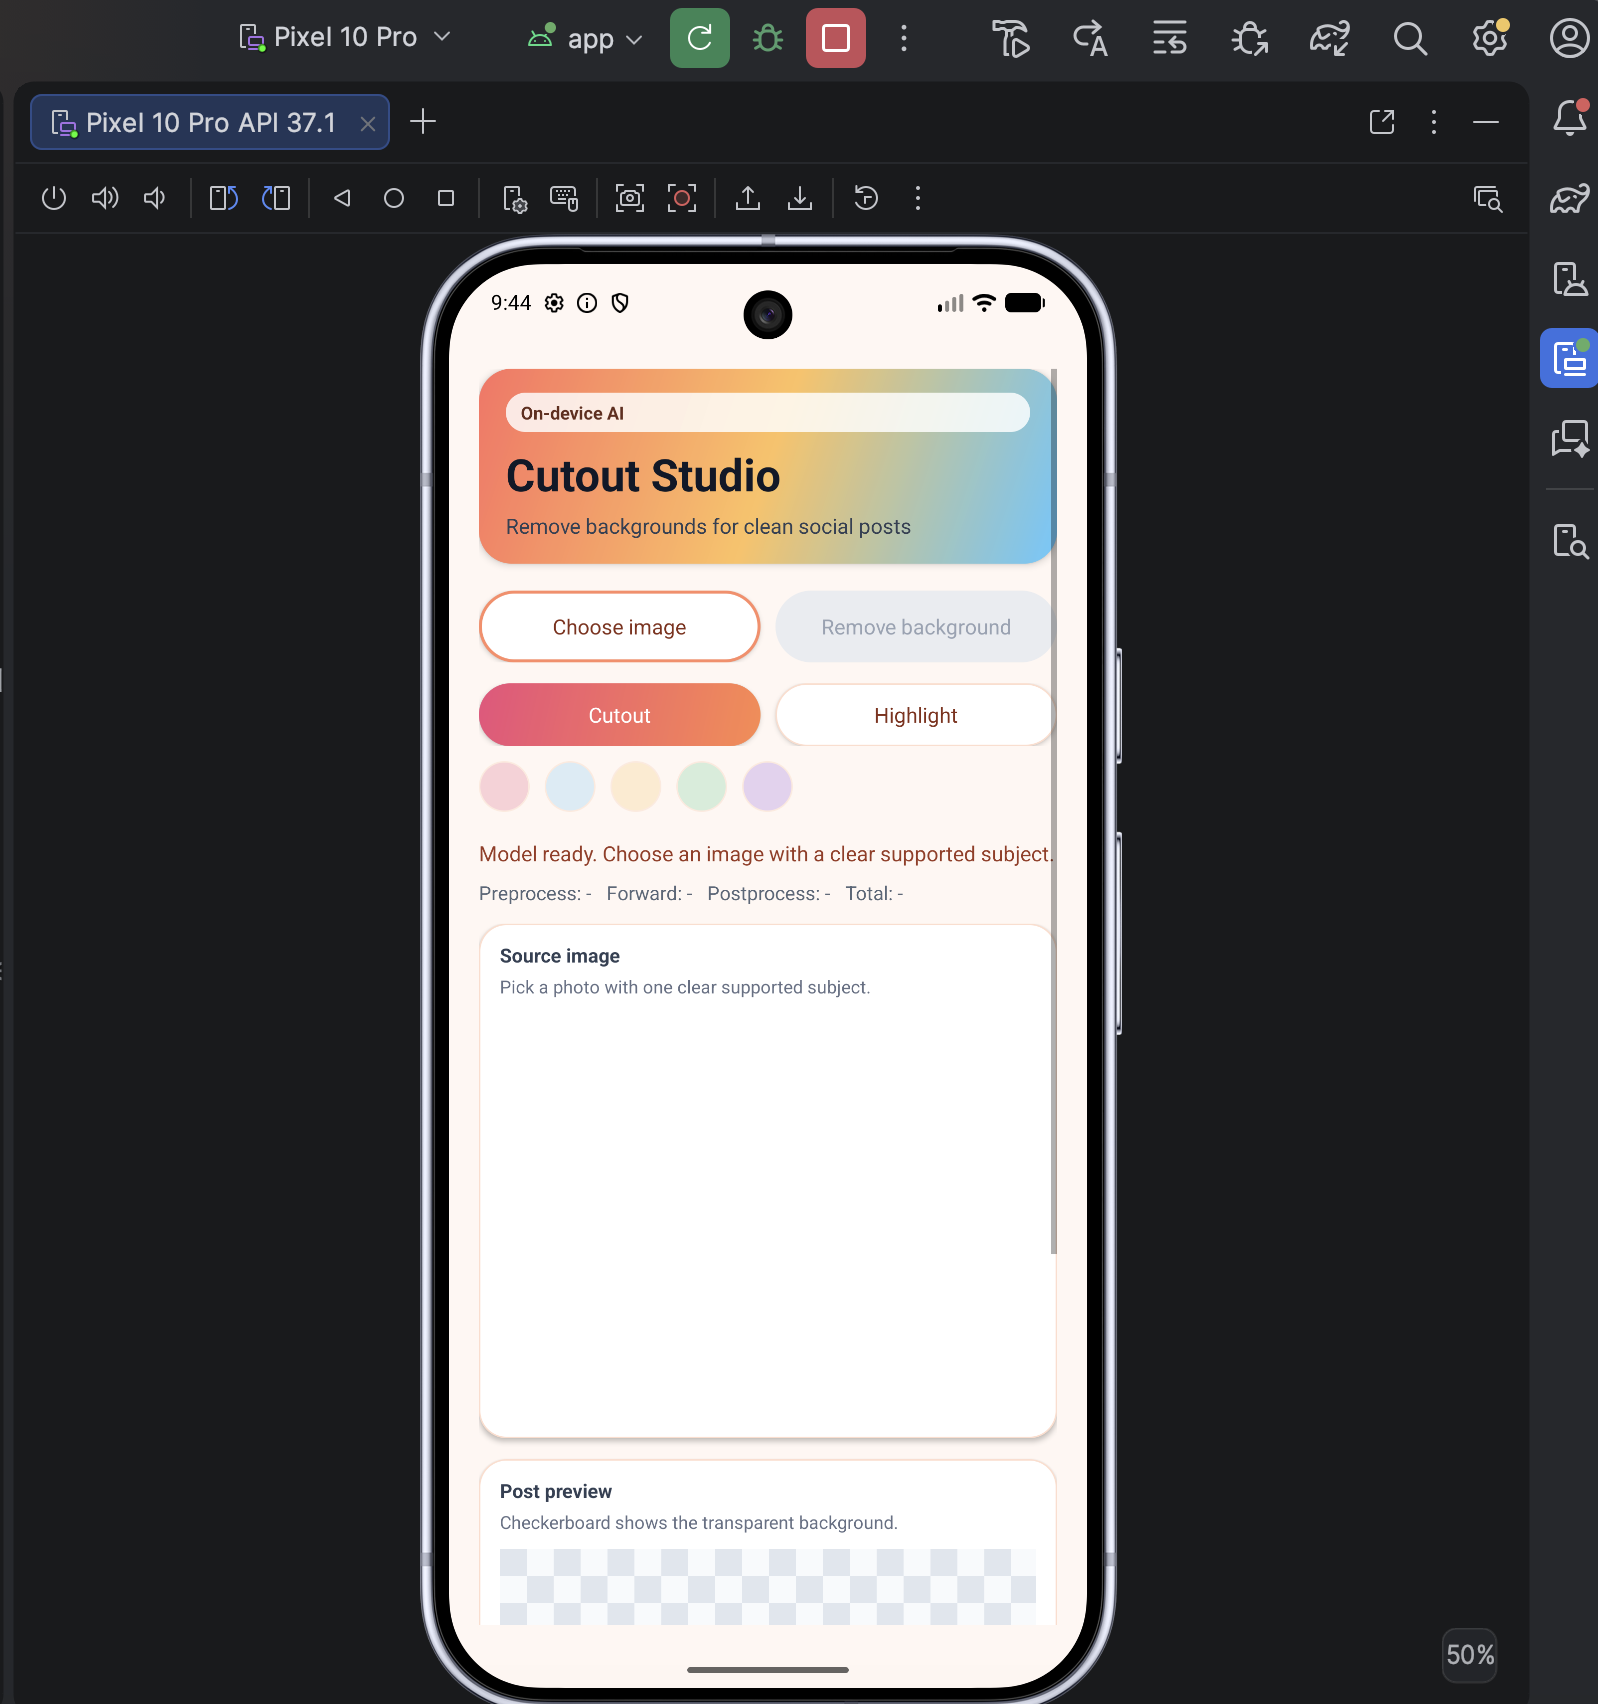
Use the app
Whether on a physical device, or emulation, once you have launched the app, you can try it out.
- wait for
Model ready. - tap Choose image.
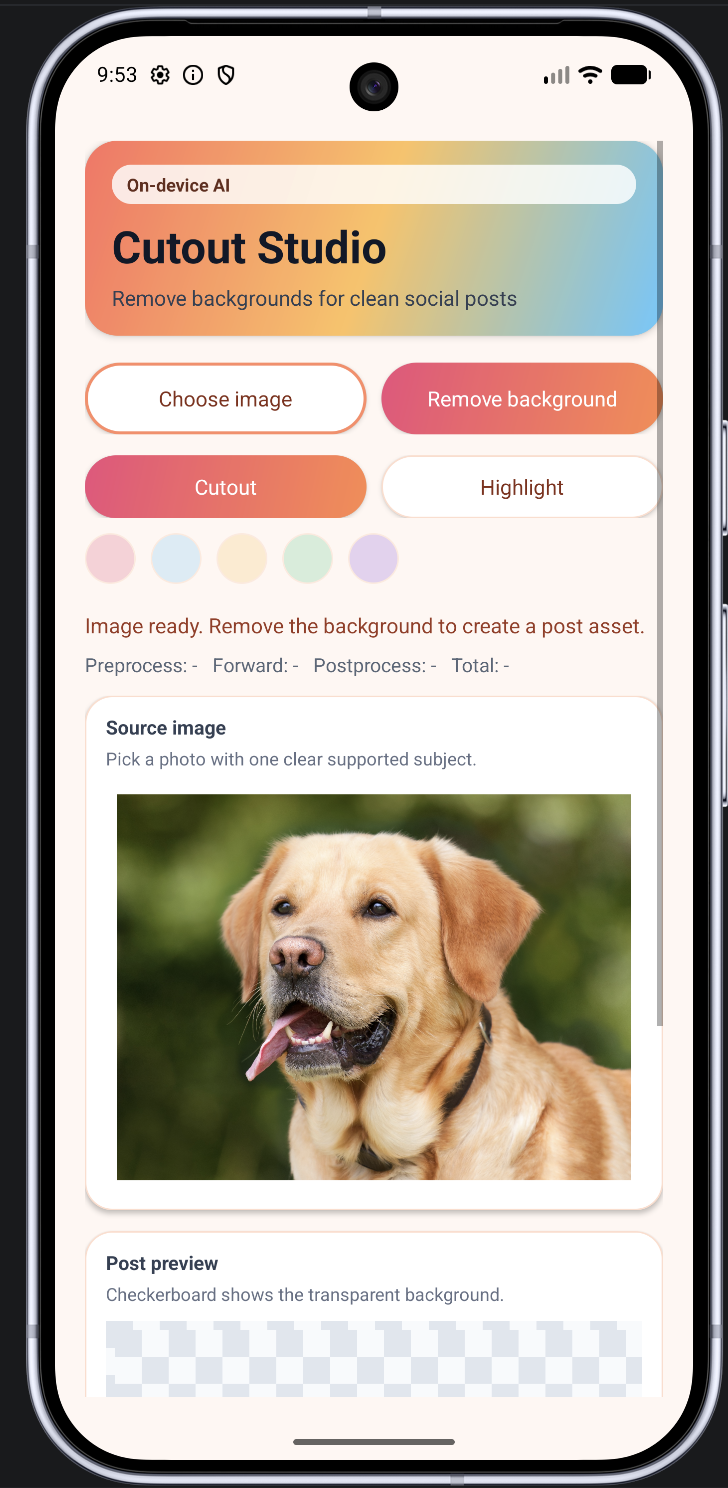
- select an image containing one clear Pascal VOC object, such as the sample image provided.
- tap Remove background.
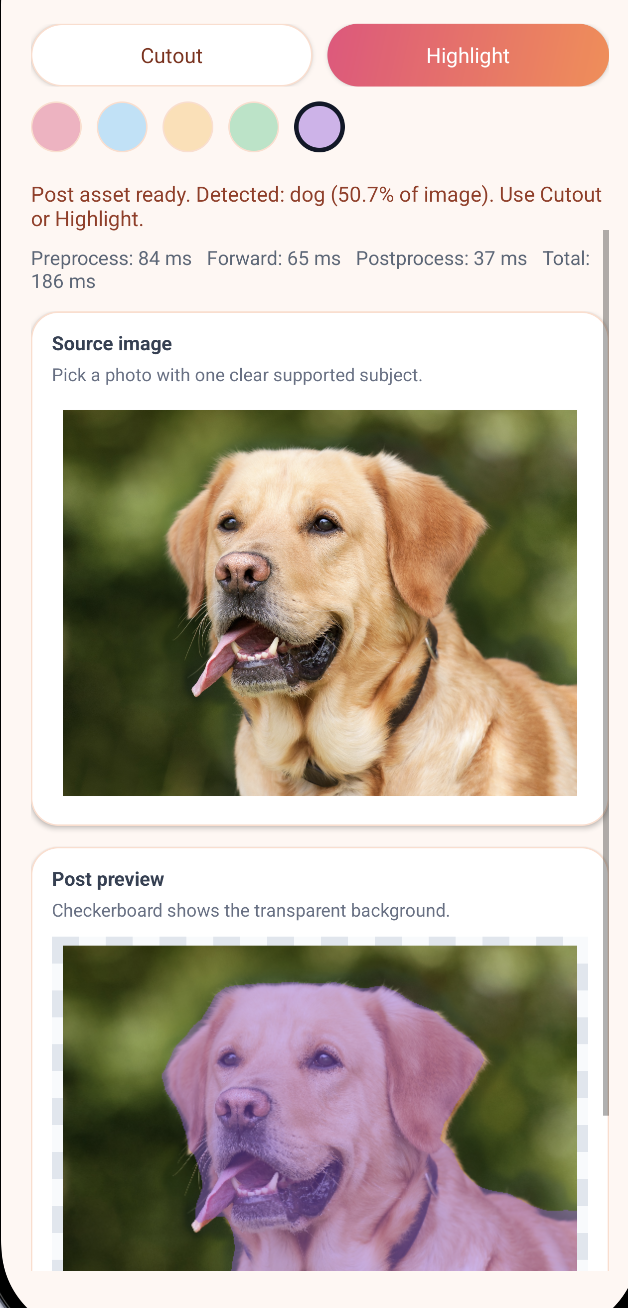
- compare the Cutout and Highlight views.
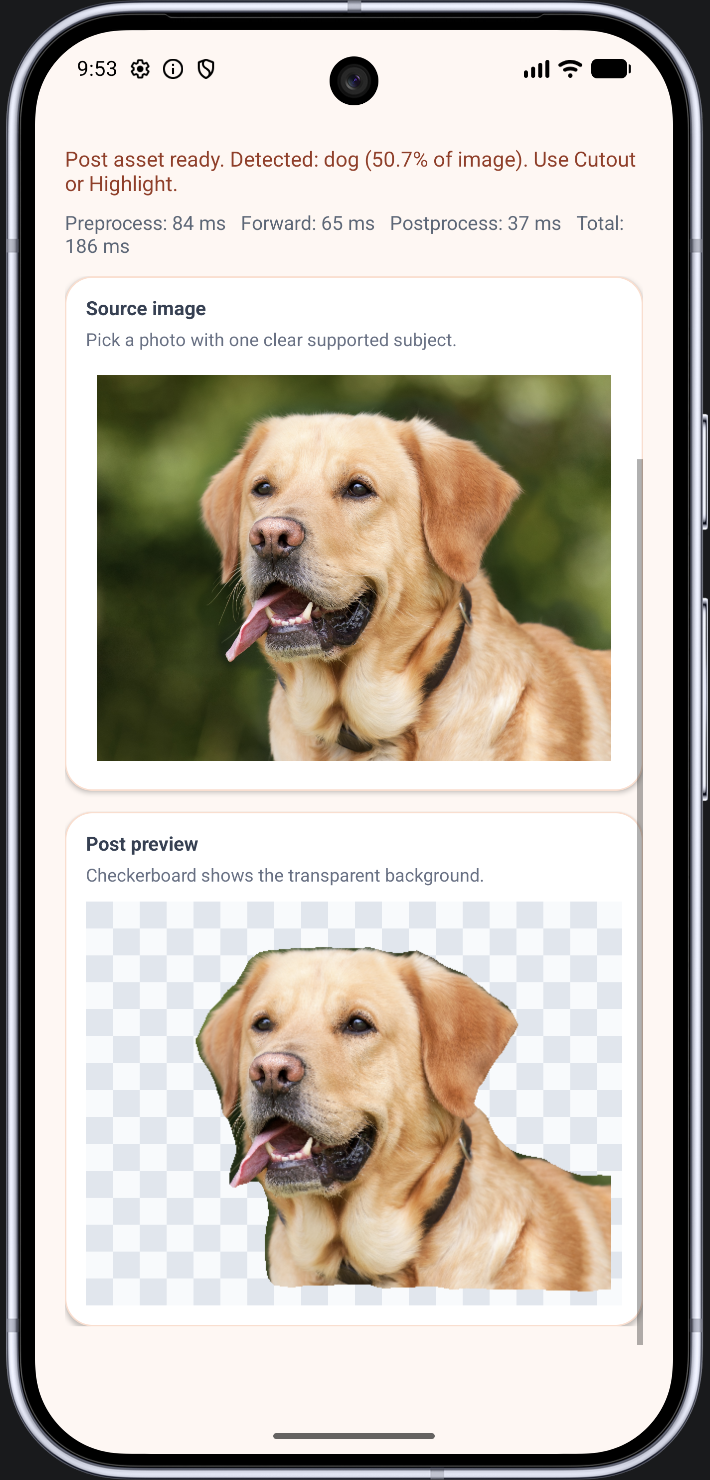
After Remove background completes, read the timing row directly below the
app’s status message. It reports Preprocess, Forward, Postprocess, and
Total in milliseconds.
The timings are explained below:
| Timing | Includes |
|---|---|
| Preprocessing | Letterbox resize and NCHW normalization |
| Forward | Tensor creation, ExecuTorch execution, and output extraction |
| Postprocessing | Class selection, mask creation, and cutout generation |
| Total | The three stages above. This excludes model loading, image selection and decoding, and UI rendering |
The emulator screenshots below show the sample Labrador image, the transparent cutout, and the class-highlight view:
| Image selected | Cutout result | Highlight result |
|---|---|---|
 . . |  . . |  . . |
Another example can be seen on a physical device:
| App launched on physical device | Result shown on physical device |
|---|---|
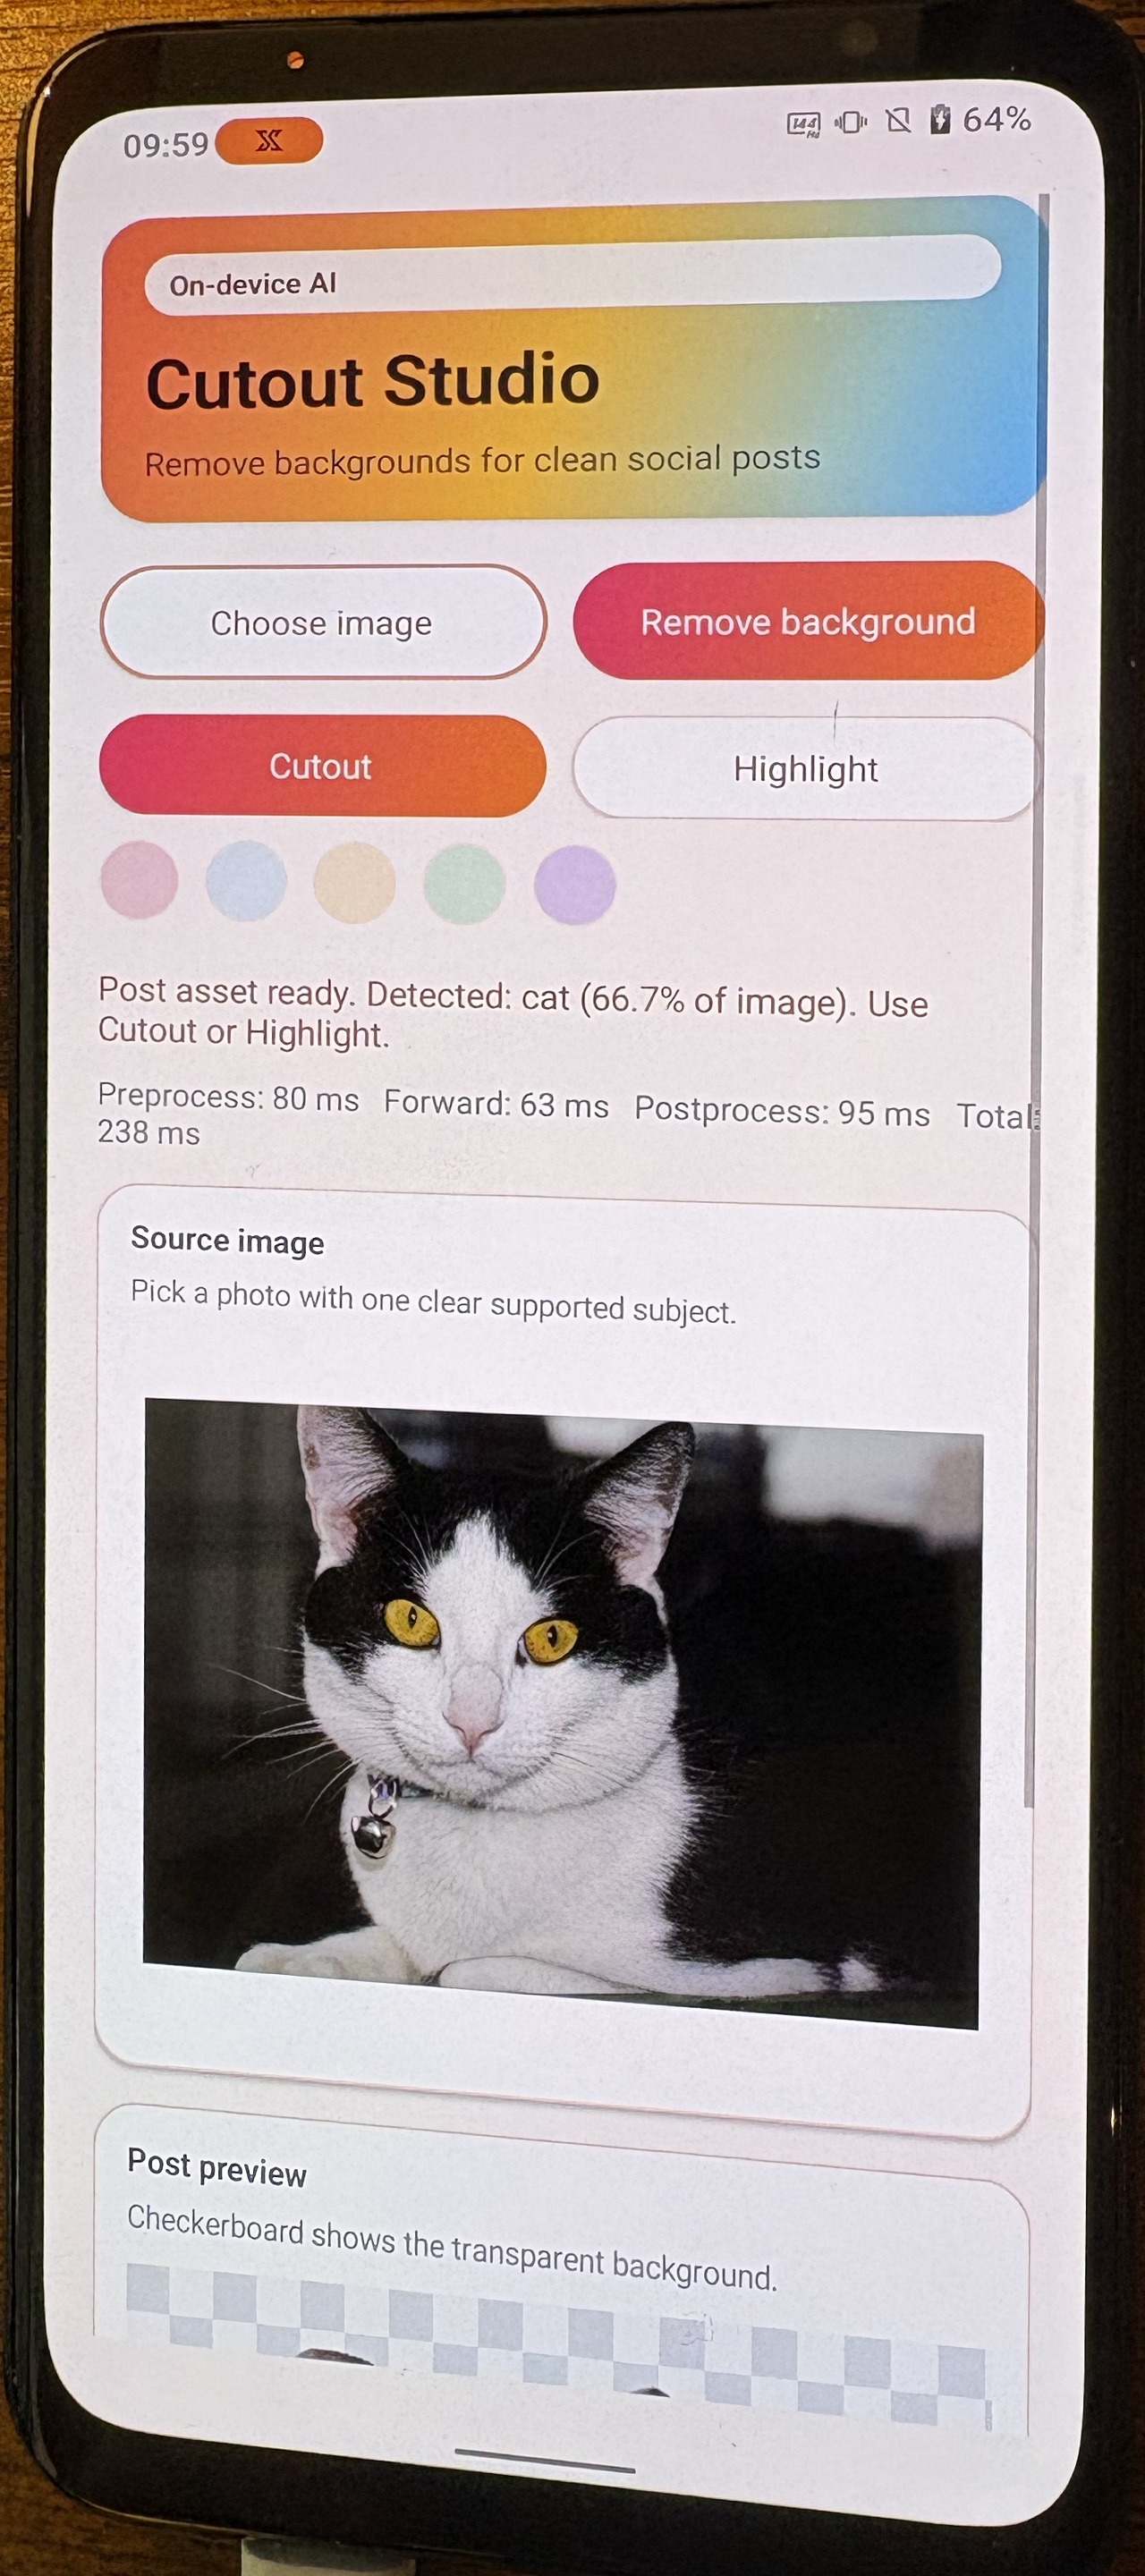 . . | 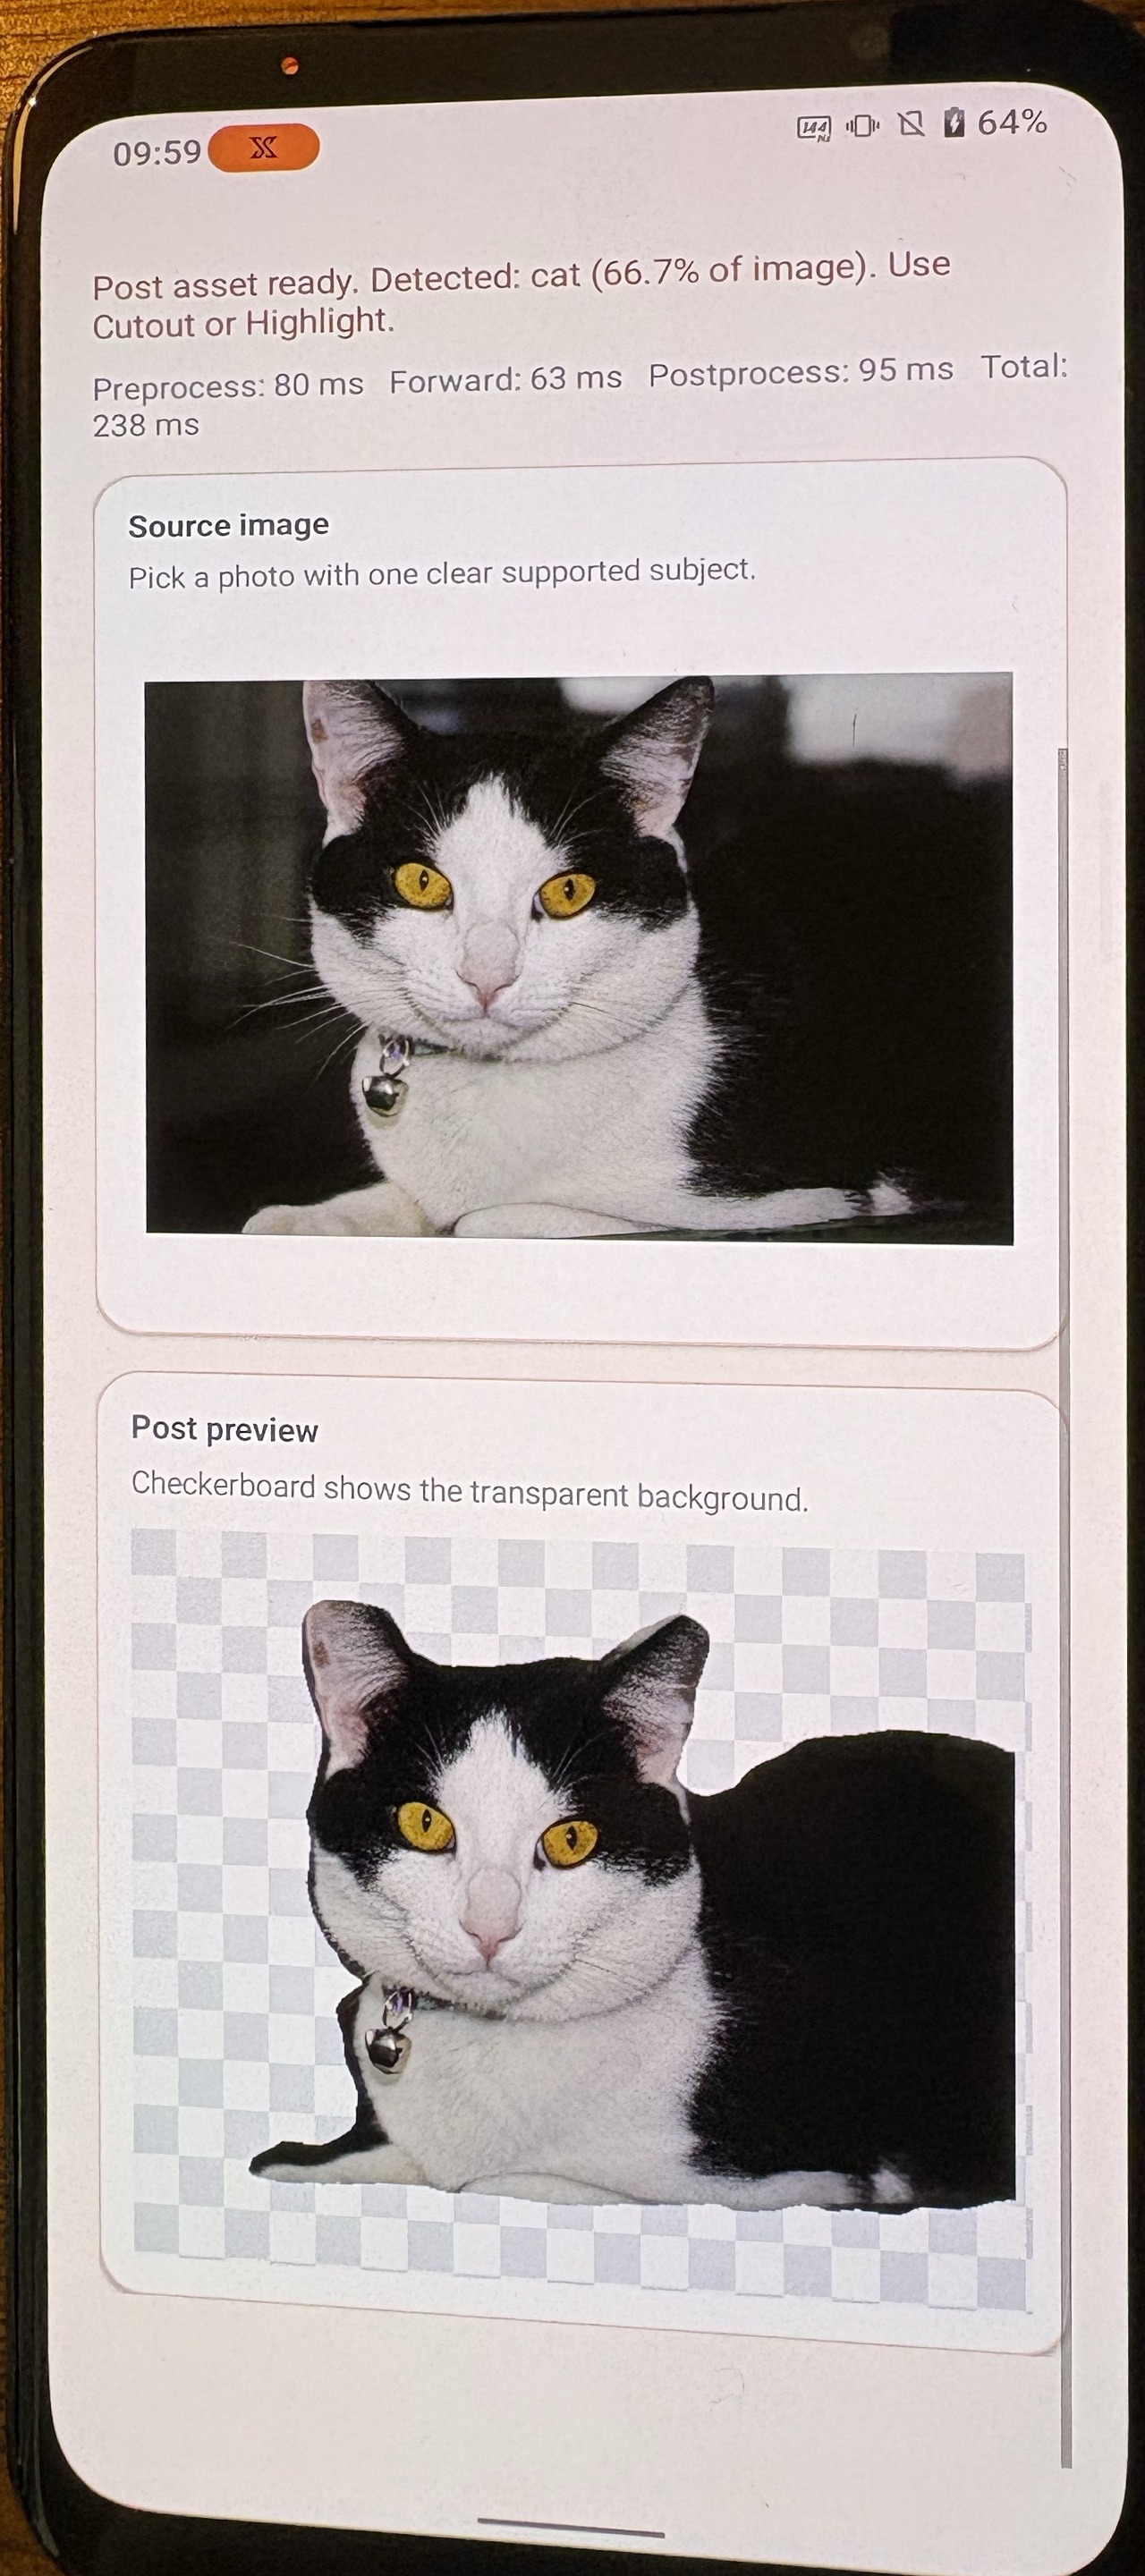 . . |
The cat photograph is Closeup photo of a cat by RobotBlanket, released under CC0 1.0
If the XNNPACK .pte cannot run on your device, adapt the FP32 portable
workflow from Module 1 to create a portable .pte.
Record your results
Confirm that the model loads, the cutout and highlight views are useful, and the UI remains responsive during inference.
Record the timing results:
| Metrics | Your result |
|---|---|
| Preprocessing time | |
| Forward time | |
| Postprocessing time | |
| Total time |
Try other images, including examples with multiple objects of the same class, or multiple classes of a similar size in the image, and observe which classes are selected, and the end result.
Consider what you would need to check or test, before considering the application to be production-ready.
Some potential ideas include:
- first-run latency, including runtime or backend work deferred until the first inference
- peak application memory
- APK or App Bundle size
- behavior after repeated inference as the device warms up
You can now move on to inspect and understand the application code.
Course complete
Nice work
You completed Optimize and deploy AI inference with ExecuTorch on Arm.